Sale Ends Today! 75% off our annual membership. Get skills that fulfill.

 Rhea
Rhea
Want to know how to remove an image background in Procreate?
Although, unlike other programs like Adobe Photoshop, Procreate is not designed with comprehensive photo editing in mind, there are still a few different methods you can use to remove background colors from your photos.
The difficulty of this process is going to depend entirely on how simple or complicated your background is, which is something to consider when you are choosing which images you would like to remove the backgrounds from.
To help make the process easier for you, here is all the information you need to start removing backgrounds in Procreate.
Want to learn how to create an entire illustration in Procreate? Why not check out one of our awesome Procreate courses and get started on your creative journey today.
We have engaging video tutorial lessons for students of all different ability levels and fields of interest, so be sure to take a look at all of the options available on our website.
If you are trying to remove an object from an image with a simple solid background the process should be relatively simple for you.
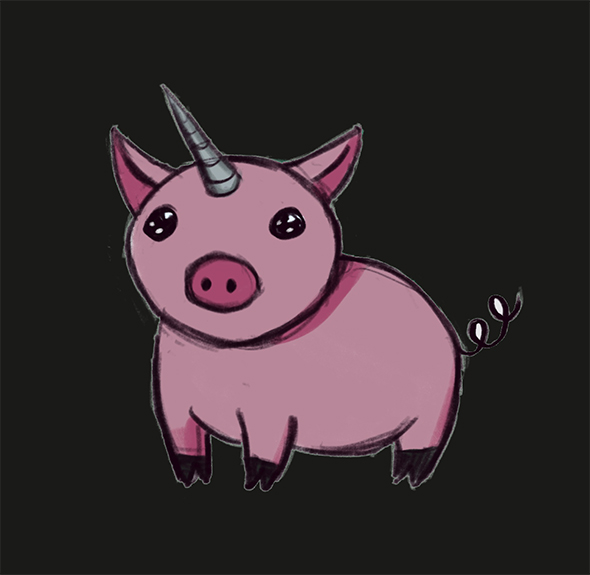
This is because of Procreate’s awesome ‘Auto Selection’ tool which can be used to select entire objects or backgrounds in one simple click. In this example I will be removing a simple white background.
So, let’s learn how to make a background transparent together.
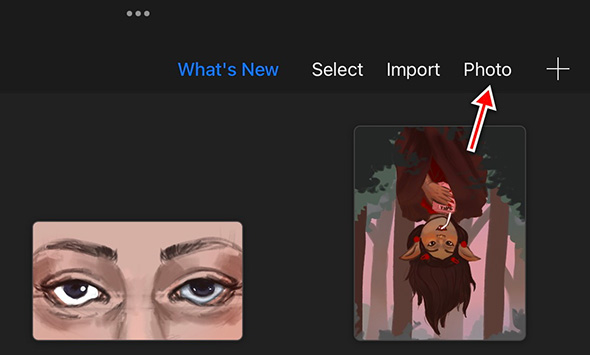
Select the ‘Actions’ menu found under the wrench icon and navigate to the ‘Add’ tab on the drop-down menu. Tap on ‘Insert a Photo’ and locate your desired image in your device’s camera roll. Resize the image to whatever you’d prefer then un-select it.
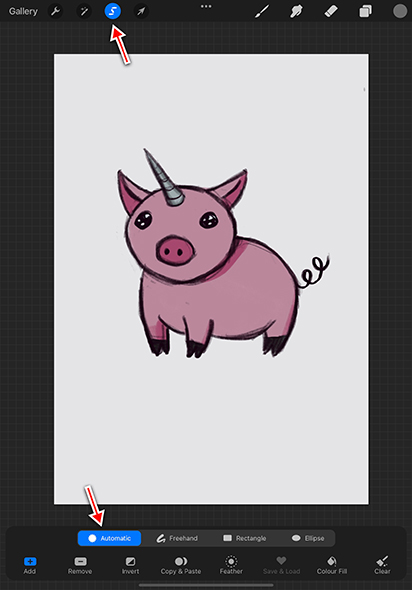
Tap on the ‘Selection Tool,’ the S tape icon at the top of your screen. This should open up the selection tool interface and you should see a menu of different selection options at the bottom of your canvas.
Select ‘Automatic’ from the left-hand side of the menu. It should now appear in a bright blue to show it is activated.
Your tool may automatically select your background, but in most cases you will need to slide one finger across your screen (left-to-right) to adjust the selection threshold.
You want to adjust it until you see all parts of the background become inverted in color, these inverted areas are the parts that the tool has selected.
Once your background has been fully selected, you will be ready to move onto the next step.

Now that you have selected your background, tap on ‘Invert’ from the selection tool menu. You should now be able to see that the colors of your subject have been inverted.
Tap on ‘Copy & Paste,’ this will create a new layer that contains your subject without its background.
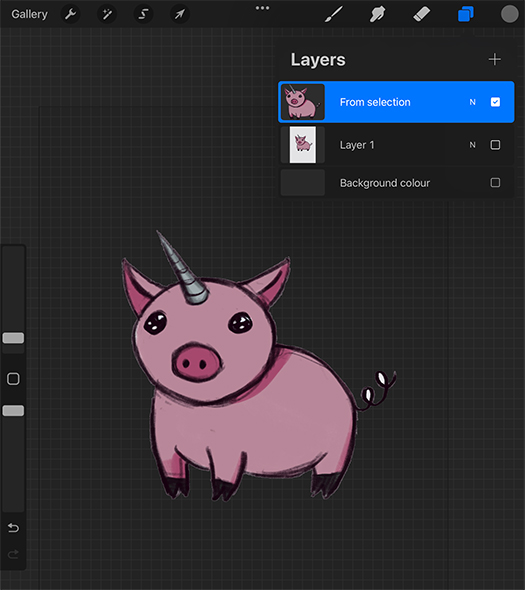
Delete/hide your original image layer and you have successfully removed the background from your image!
You should be able to see a gray grid behind your image to show that it now has a transparent background.
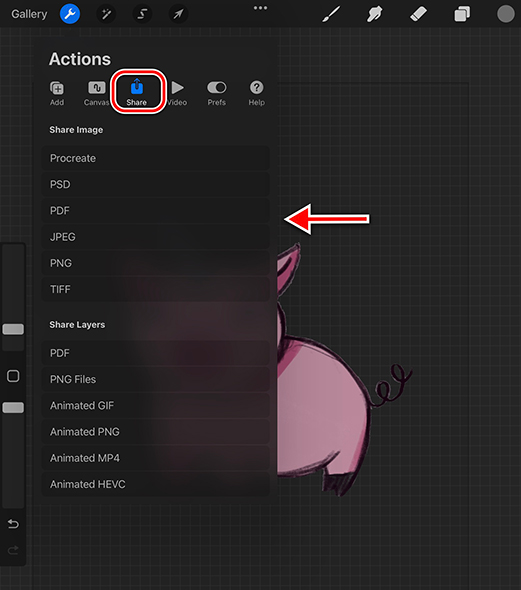
Your image is now ready to be used in your project or exported via the ‘Share’ subsection of the ‘Actions’ Menu (Wrench Icon).
If you decide to export your image at this stage, you should be presented with a range of file types to choose from including: Procreate, PSD, PDF, JPEG, PNG and TIFF.
Sometimes ‘Auto-Selection’ is not going to be able to identify and select your background for you.
This can happen if your background is too complicated or there isn’t a clear distinction between your subject and their background.
Unlike in Adobe Photoshop, which has a lot more tools centered around photo-editing, when your image falls under this scenario in Procreate, the eraser tool might be your next best option.
So what is the best way to use the eraser tool to remove background elements?
Just as in the previous method, select the ‘Actions’ menu found under the wrench icon and navigate to the ‘Add’ tab on the drop-down menu.
Tap on ‘Insert a Photo’ and locate your desired image in your device’s camera roll. Resize the image to whatever you’d prefer then un-select it. Un-check the background layers box in the ‘Layers’ menu.
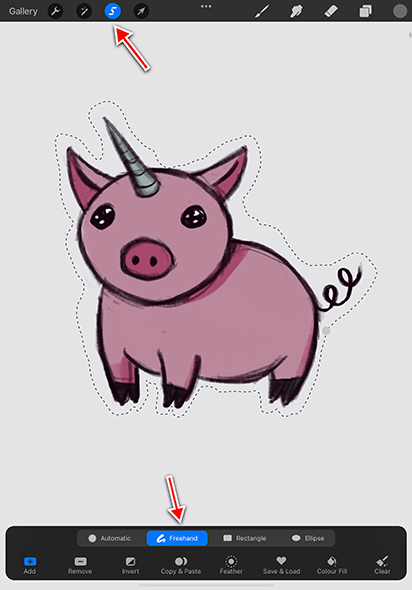
First tap on the ‘Selection’ tool to open up the selection menu. Select the ‘freehand’ tool from the options at the bottom of the screen.
Draw a rough outline with the selection tool around your subject. When the outline is complete tap on the ‘invert’ button and you should see some gray stripes covering your subject.
Swipe down on your screen with 3 fingers and you should see the ‘Copy, Cut and Paste’ pop-up menu. Select ‘Cut’ from the options and the bulk of your background should now be deleted.
Once the bulk of the background has been removed you have two options: Manually erase it using the Eraser tool (set to a hard brush shape such as the round brush), or continue to use the Selection tool to remove the background in small, more precise chunks.
Both options give you the ability to work around a few minor details in your illustration.
Once you have removed the entire background you can export your file as a PNG with no background so it can be used as an asset later on, or just simply close your project file to save its progress.
What did you think of these different methods to remove background colors/elements?
Hopefully you were able to learn how to remove a background in Procreate in the best way that works for you.
There are so many different Procreate functions to learn about, to help you along in your digital illustration journey we recommend taking one of our awesome Procreate courses.
You may also like to read our awesome blog posts on Procreate tips, how to animate in Procreate, and how to trace on procreate.
These courses will provide you with all the amazing knowledge you need to get started creating in Procreate today.
Rhea
Rhea is an Australian concept artist who is currently studying at Griffith University. She is passionate about spreading her love of art to others.
Hola! He hecho estos pasos para poder guardar en png la imagen y usarla después en Slide AR, pero a mi siempre se me queda un marco blanco alrededor de la imagen y cuando la uso en AR me aparece el fondo blanco. ¿Como lo eliminó?
Hi! Have you made sure that you erased around the edge of the background? Sometimes a small amount of pixels can remain around the edge of the file, even after you remove the rest of the background. Let me know if you have any further questions! Thanks :)


 Gift Cards