Sale Ends Today! 75% off our annual membership. Get skills that fulfill.

 Rhea
Rhea
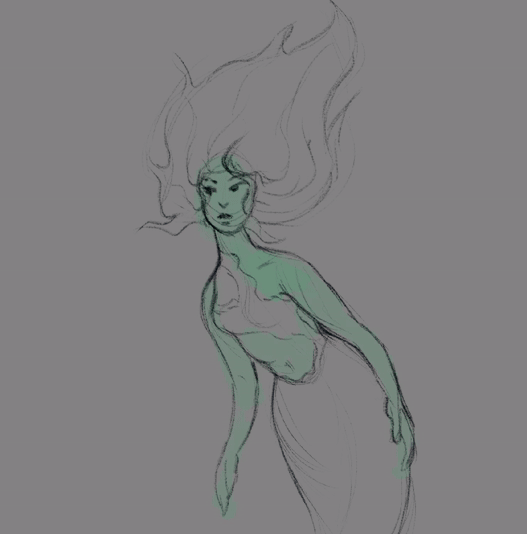
Learning a new digital art program can be daunting, and there are often loads of different functionalities that get overlooked.
Procreate, one of the most popular current illustration applications is jam-packed with awesome features that allow artists to create impressive illustrations on the go!
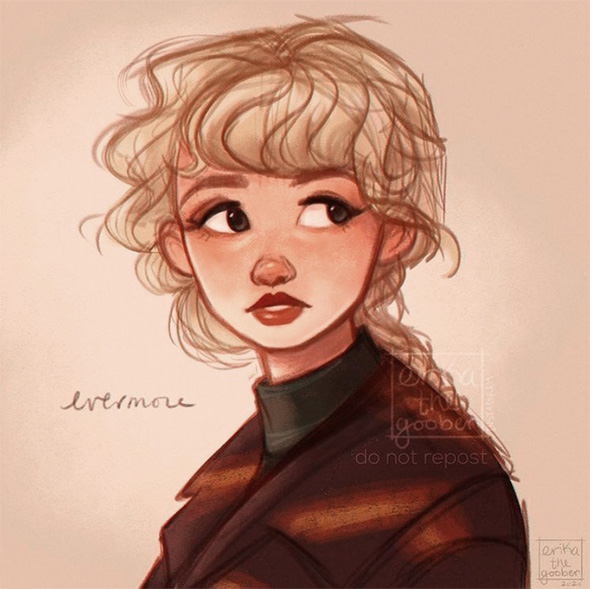
If you are looking to learn all about this program, Erika Wiseman’s amazing course, ‘Digital Drawing in Procreate for Beginners’ (⭐ 4.9), might be just what you need!
To make sure you don’t miss out on any of Procreate’s useful functionalities, we have compiled a list of our favourite Procreate tips & tricks that you may not know about! All you need is your iPad and Apple Pencil!
Have you ever wondered how to draw precise shapes and lines in Procreate? Well, the good news is, that Procreate has a super intuitive feature just for this!
Want a perfectly straight line? All you have to do is to simply draw your line with any of the Procreate brushes and then hold down your pen for a moment at the end of the gesture until it straightens out.
This trick works perfectly for shapes as well, so you never have to worry about trying to create the perfect freehand circle ever again!
Many beginners to the Procreate app often don’t realise that you can simply drag a color from your palette to fill in a section of your illustration.
All you have to do is select your desired color on the Color Wheel and then drag it down onto whatever you wish to fill.
This fill-layer-tool trick is great as it allows you to quickly test out different colors in your illustrations!
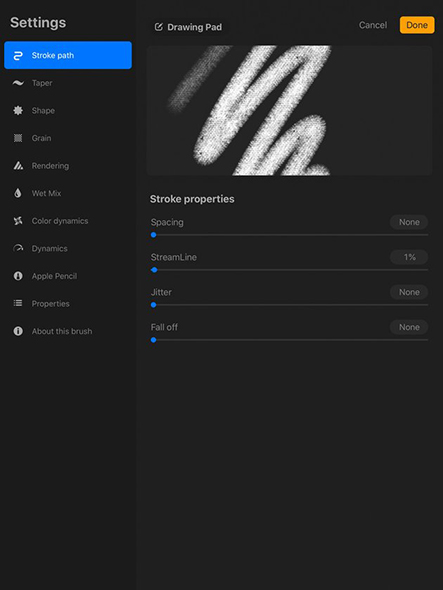
Have you ever been using a default Procreate brush, and thought that with a few tweaks it would be perfect? Well luckily, with a few simple steps, you will be able to edit or create any brushes you want!
To edit an existing brush tool, simply swipe left on it in the Brush Library and select ‘Duplicate’.
Once you have duplicated your chosen brush, simply double-tap on it to open its settings. There are so many different aspects of the brush you can play with, including Shape, Stroke-Path, Taper, Stabilisation, Grain, Mixing, and Color Dynamics!
With so much customization available, you are sure to be able to create the exact brush you are looking for! Looking to create a brush from scratch? Simply press the little plus icon (+) at the top of the Brush menu and get creating!

The Liquify tool is one that often gets overlooked in the Procreate app, even though it has many awesome uses!
The tool can be easily accessed via the Adjustments drop-down menu in the top left-hand corner (Magic Wand icon). Once it is selected, you will be able to adjust or warp parts of your illustration simply by dragging them with your pen.
This tool is great if you need to make any minor edits to your illustration, such as slightly changing the shape of an eye or moving the corner of a character’s mouth. Liquify can also be used to create some really cool abstract effects in your work!
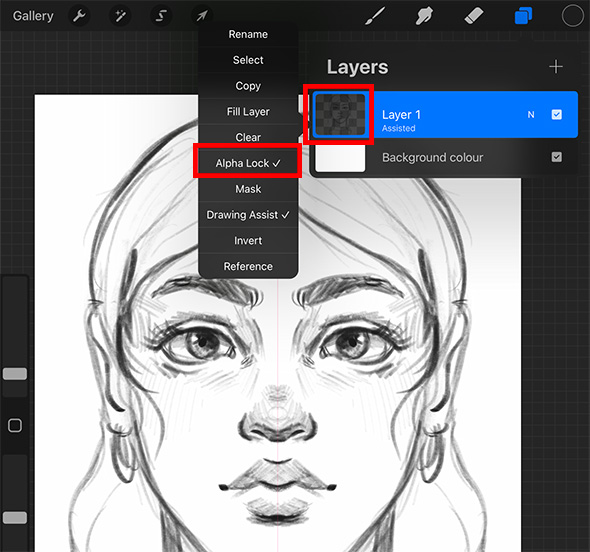
The Alpha Lock tool can be used to lock the alpha channel of any given layer. The alpha channel represents the opacity and transparency values of the entire layer.
When the alpha lock is enabled you will not be able to draw on any of the transparent areas of your layer.
This is really useful when you want to color your work without going outside of your existing colored areas. To use the Alpha Lock tool, simply open your Layers panel, tap your desired layer, and select Alpha Lock from the flyout menu!
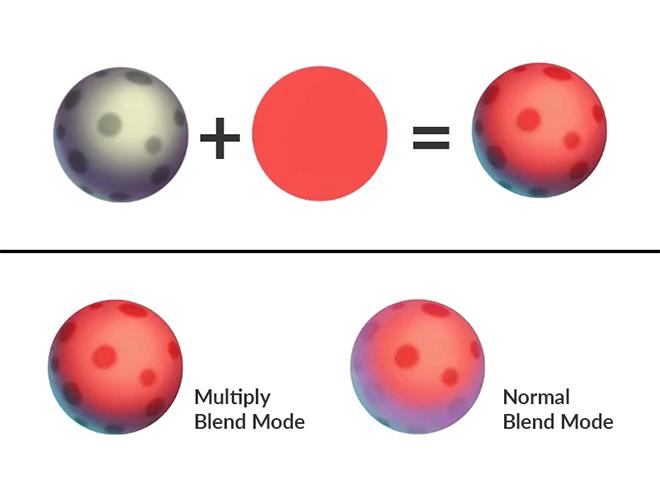
Similar to other digital drawing software, Procreate offers a range of awesome blend modes! This tool allows you to change the way the colors interact between multiple layers in your illustration.
To access these blend modes, simply open your Layers menu and then select the little letter ‘N’ on your desired layer. This should open up a whole list of blend modes that you can experiment with!
There are so many different uses for blending modes. For example, the ‘Multiply’ blending mode is great for shadows, whereas the ‘Overlay’ and ‘Soft Light’ modes can be used for adding highlights.
Learning about blending colors in Procreate with our detailed blog post on how to blend in Procreate.
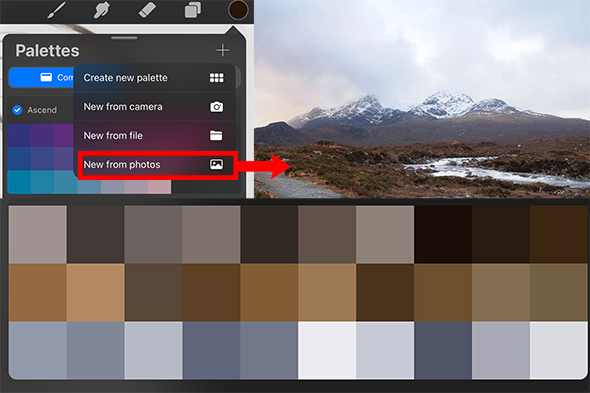
Did you know you can create your own custom color palette in Procreate? To create your own palette, all you need to do is open up the Color Panel, select the Palettes tab, and press the plus icon (+) in the top corner.
Your new palette will be called ‘Untitled’, but you can rename it to whatever you would like. This color palette will become the new default for your project.
Guess What?
You can even make a custom Palette using an image or drawing! All you have to do is follow the previous steps but instead, select ‘New from File’ when you are creating your color palette.
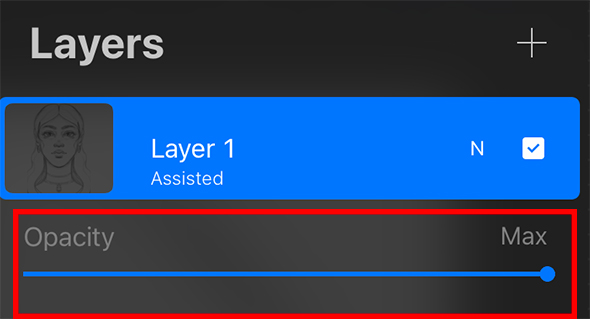
This tool allows you to change the opacity of your layers in Procreate. To access the Opacity Slider simply open the Layers menu and tap your desired layer with two fingers.
A slider bar should appear, allowing you to adjust the opacity of your layer.
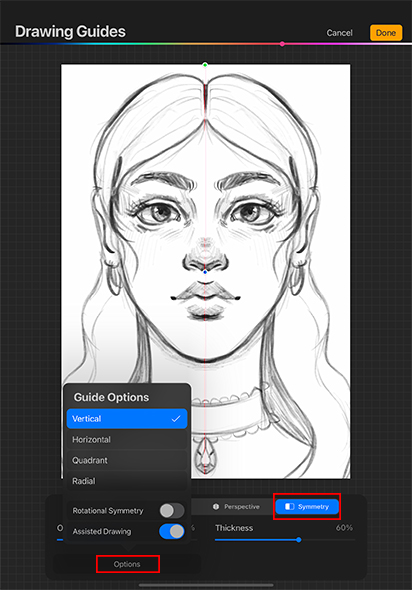
Want to be able to create perfectly symmetrical illustrations in Procreate?
All you have to do is open up the Actions Menu in the top left-hand corner of the screen (Wrench icon) > Canvas menu > turn on Drawing Guide > select Edit Drawing Guide.
You will then be taken to a separate screen where you can select the Symmetry button at the bottom of the screen. Vertical symmetry will be enabled by default, but you can also select horizontal, quadrant or radiant symmetry in the Options menu.
The Symmetry tool can be great for creating accurate drawings of your characters for things such as model sheets!
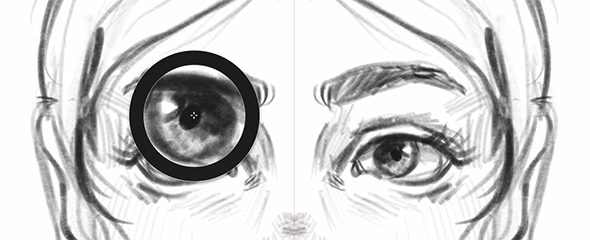
The Procreate interface is known for its really intuitive gesture-controlled tools.
To select any color from your canvas using the Eyedropper tool, simply tap and hold anywhere on your canvas and then drag the color picker over the color you want to select.
Your selection should now be displayed in the Color menu for you to draw with!

Similar to Alpha Lock, Clipping Masks allow you to keep your drawings within a specific set area. The difference is that Clipping Masks require multiple layers to be used.
To create a Clipping Mask, simply add a new layer above the layer you wish to lock your coloring onto. Then, tap your new layer and select Clipping Mask from the pop-up menu.
Everything you draw on that entire layer will now be constrained to the bounds of the illustration in the layer below it. This can be a great method for adding texture or shading to an object without directly drawing onto its base layer.
Procreate has a ton of awesome gesture controls to help make the illustration process easier for artists. Here are a few that you might find useful:
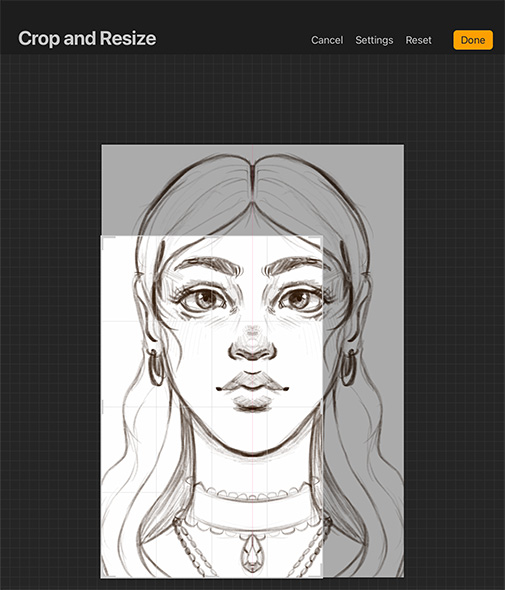
To access the Crop and Resize tool in Procreate, simply press the Wrench icon in the top-right corner (Actions menu) and select the Canvas menu. You will see the Crop and Resize button at the top of this menu. Tap this button and you will be taken to a screen where you will be able to easily crop your canvas.

Want to move an object or selection area in Procreate? Tap on the ‘S’icon at the top of the screen, select ‘Freehand’ and draw a selection around the object you wish to move. Tap the Mouse icon at the top of the screen and then use your Apple Pencil to move your object to the desired location.
Did you know Procreate allows you to export awesome time lapse videos of your drawings?
To access this feature, simply open the Actions menu by tapping the Wrench icon > navigate to the Video menu > Select Export Time-Lapse Video.
If you just want to watch the video and not export it, try pressing ‘Time-Lapse Replay’ instead.
Did you know that you can also create animations in Procreate? This blog post teaches you how to animate on Procreate in five steps.
Did these Procreate tips inspire you to create artwork in Procreate? Now that you know all about these basic tools, you are on your way to making impressive illustrations of your own!!
Need some more guidance to start out?
Why not give the course ‘Digital Drawing in Procreate for Beginners’ (⭐ 4.9) a go and learn even more amazing Procreate tips and tricks!!
Rhea
Rhea is an Australian concept artist who is currently studying at Griffith University. She is passionate about spreading her love of art to others.


 Gift Cards