Sale Ends Today! Get annual membership for only $59! You save: $176 ($235).

 21 Draw
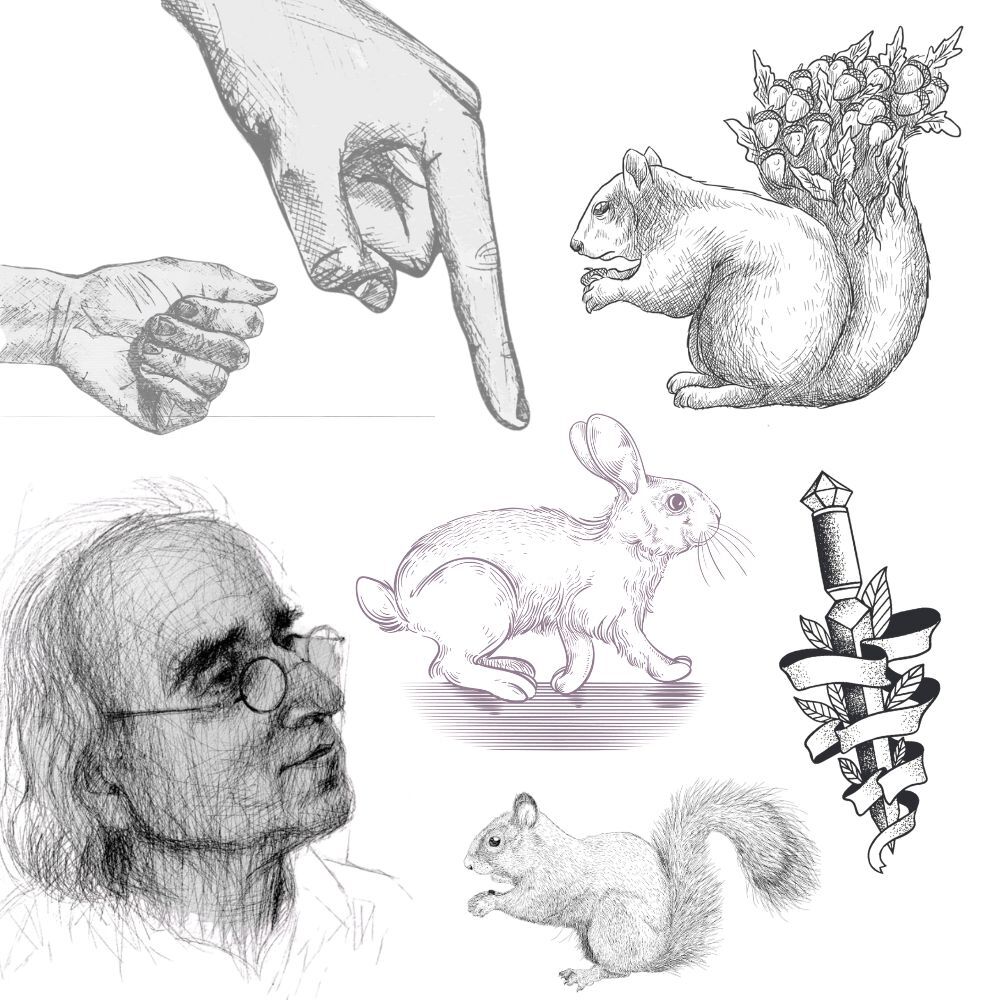
In this guide, we will explore seven pencil shading techniques and how you can use them to create beautiful and realistic drawings.
Shading is adding dark and light areas to a drawing to create the look of form, space, and light. For example, when drawing an apple, you would use shading to make one side darker than the other, giving the apple a rounded, three-dimensional appearance.
Let’s begin exploring shading techniques.
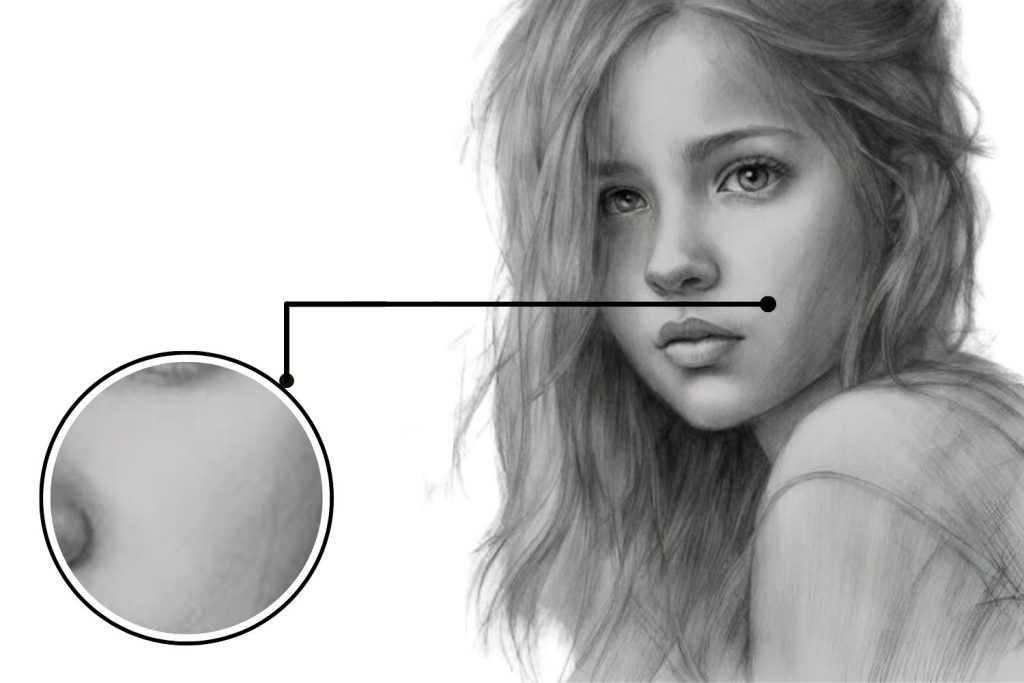
Blending is probably the most commonly used pencil shading technique. This technique focuses more on concealing the application of marks instead of making specific marks. It can be done with any medium but often works best with pencil and charcoal drawings.
The goal of blending is to create a smooth gradation from one tone to another rather than a sharp transition. This can be achieved by applying the media seamlessly or rubbing it with a finger or smudging tool.
When blending, it’s important to build up the tone gradually and use a light touch. Blending too aggressively can result in a muddy or blurry effect.
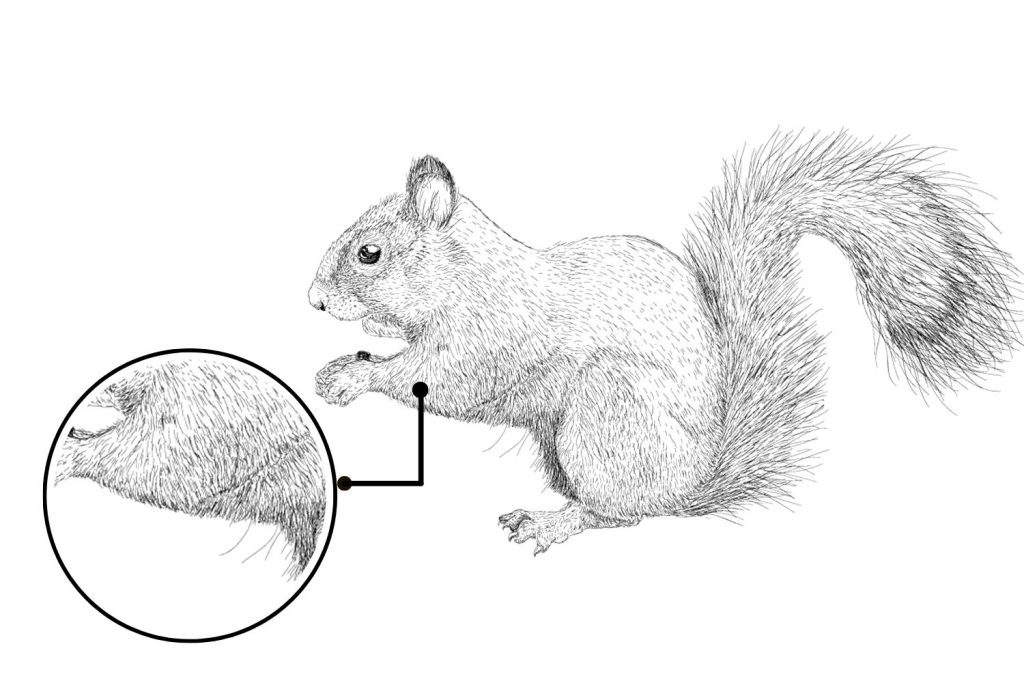
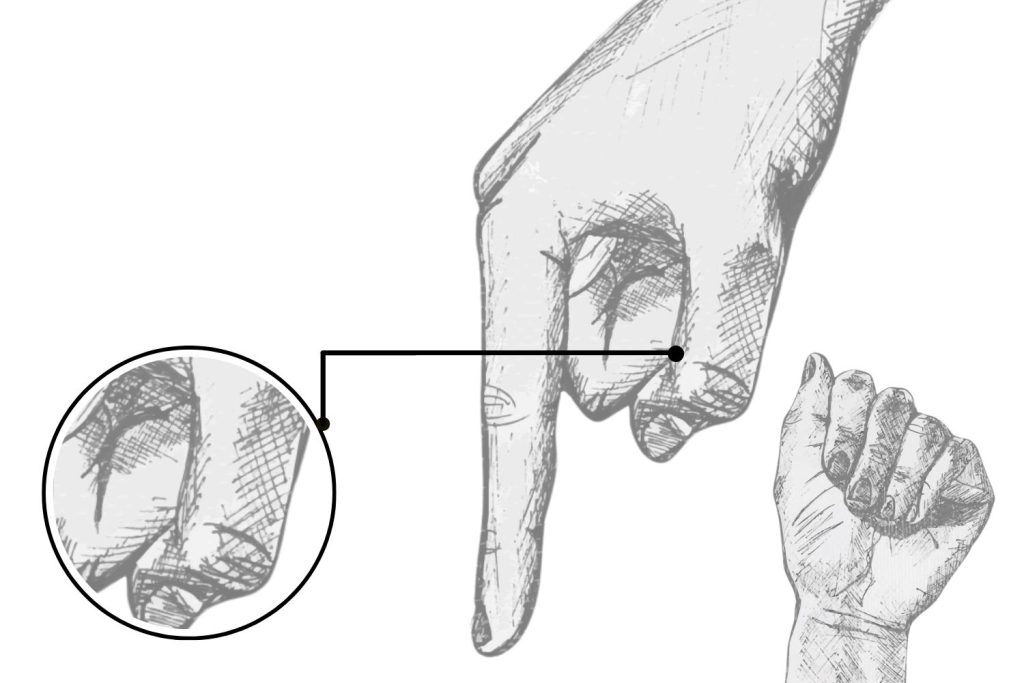
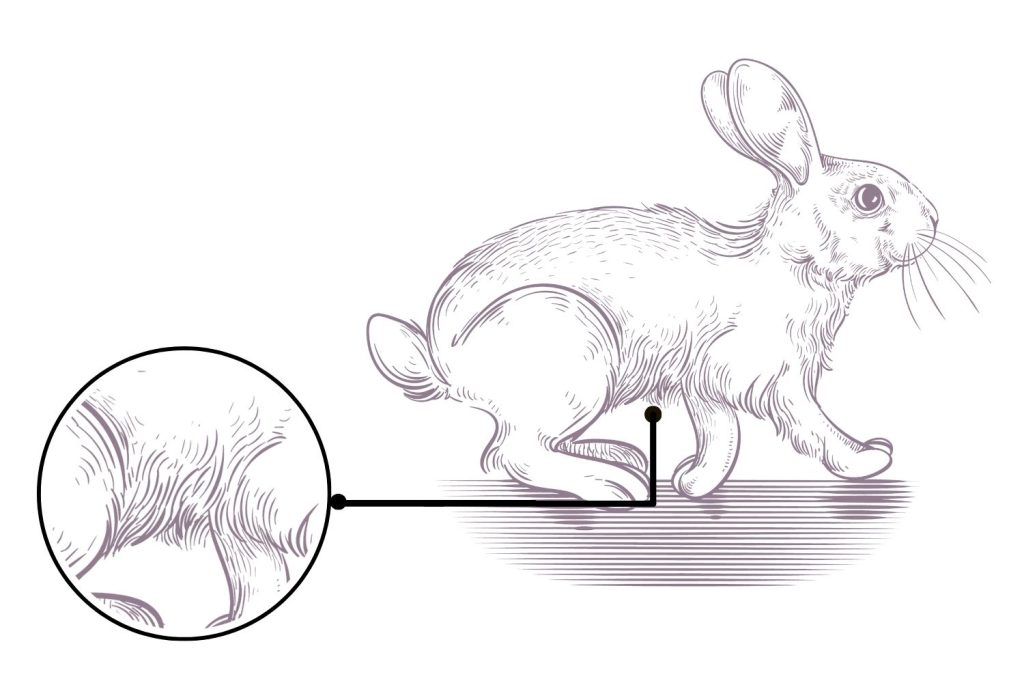
Hatching is done by drawing a series of closely spaced parallel lines. These lines can be drawn at any angle. However, the direction should be uniform throughout the area being shaded.
The closer together the lines are, the darker the shading will be. Varying the line width and spacing can create different effects.
Hatching can also be used to create the illusion of texture, like the fur of an animal.
Hatching can be used alone or in combination with other shading techniques, such as cross-hatching and stippling.
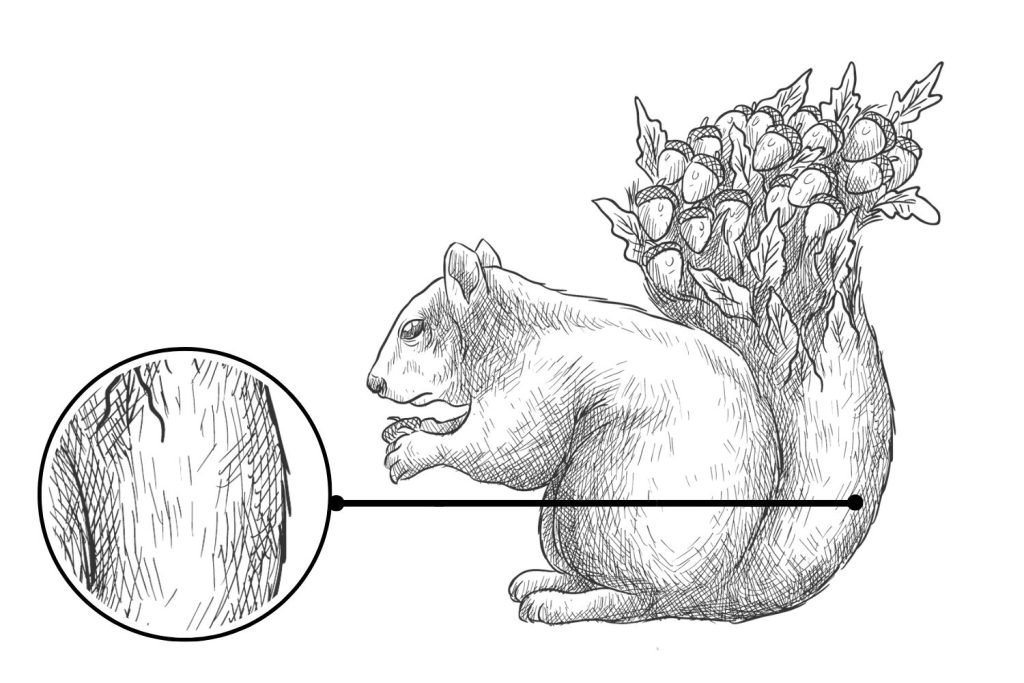
Cross-hatching is a shading technique that uses two sets of parallel lines crossed at an angle. This creates a mesh-like effect that can create different shading effects.
Cross-hatching is done by drawing one set of parallel lines in one direction and then drawing another set of parallel lines over the first set in a perpendicular direction.
The closer-spaced lines will create a darker shading, while further-spaced lines will create a lighter shading. By playing with the spacing and angle of the lines, you can create shading that ranges from subtle to dramatic.
Cross-hatching can be done alone or with other shading techniques to create even more complex and interesting effects.
This technique is slightly similar to hatching. However, instead of parallel lines, contour hatching uses curved lines that follow the object’s shaded contours (or outlines). This creates a more natural look and can create different effects depending on the line width, spacing, and direction.
To contour hatch, draw a contour line of the object you want to shade. Then, draw a series of curved contour lines within that contour, following its shape.
This technique can also be combined with hatching and cross-hatching to create more complex effects.
Woven hatching is done by drawing a set of parallel lines in one direction. Next, a second set of parallel lines is drawn next to the first set in a perpendicular or nearly perpendicular direction. This creates a woven effect that can create different illusions and shading effects.
Cross-hatching can be added to woven hatching to add density in darker areas.
Woven hatching can create different effects depending on the spacing between the lines and the sets of lines. Experiment with different spacing to see what effects you can create.
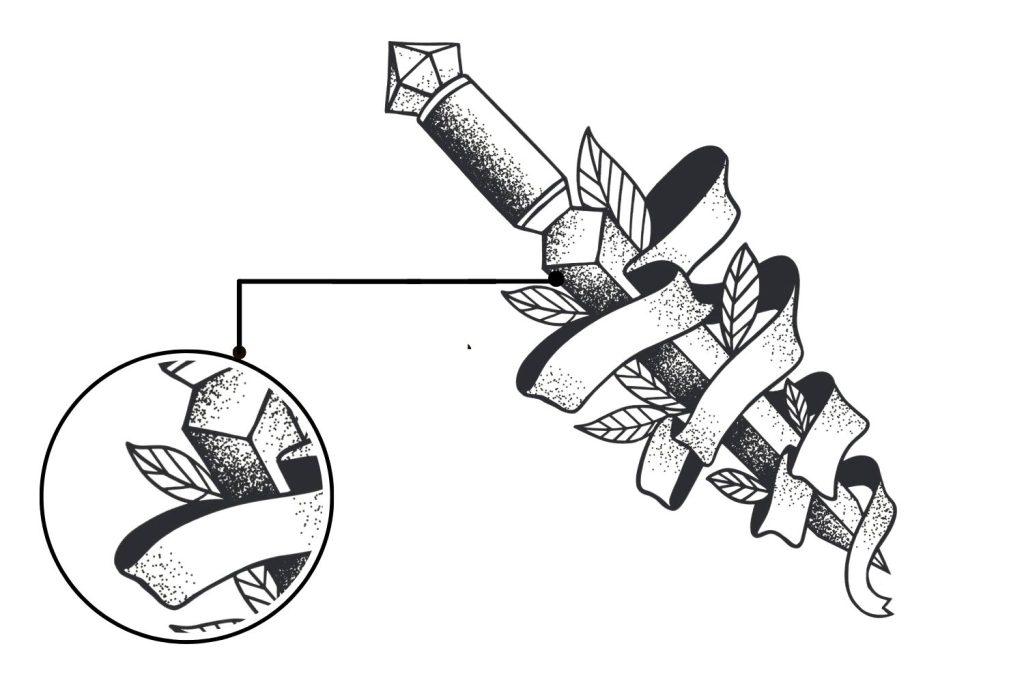
Stippling is a shading technique that uses small dots to create shadows and highlights. The dots can be any size, but they are usually uniform in size throughout the area being shaded.
The number of dots used and their placement can be varied to create different effects. The closer together the dots are, the darker the shading will be.
Stippling requires patience as it can be time-consuming, but the results can be worth it.
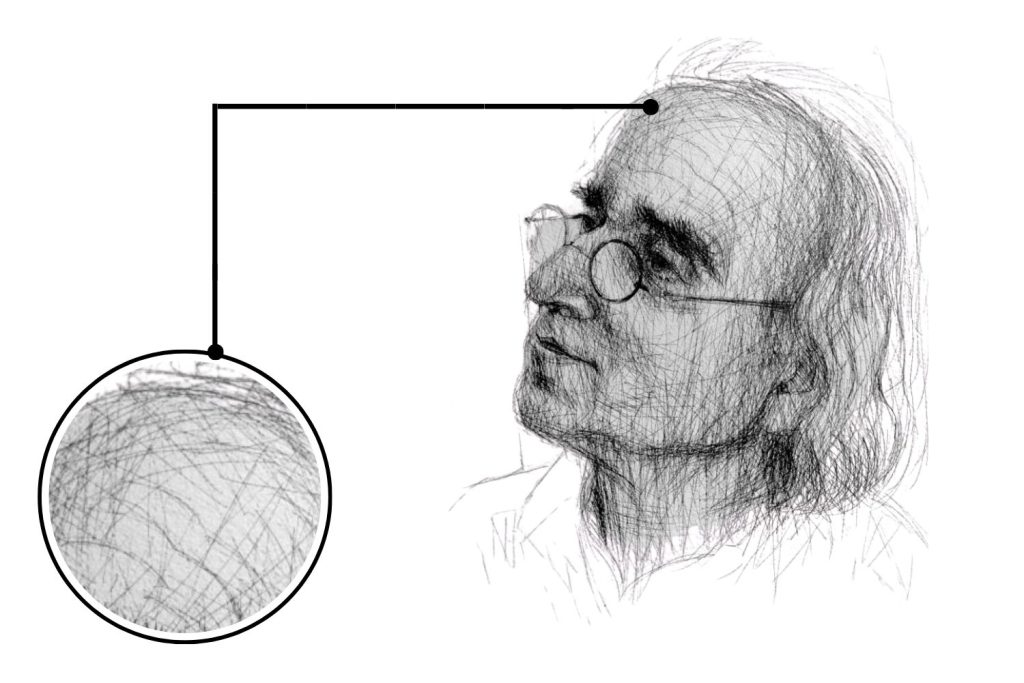
Scribbling is a shading technique that uses random, unplanned strokes to produce shadows and highlights. It is a quick way to add shading to an image.
This shading technique also creates a textured look and is often used on artworks depicting trees or hair.
You can control the effects by increasing or decreasing the density of the scribbles. The closely packed strokes or scribbles will create a darker shading, while further apart strokes will create a lighter shading.
Shading is a great way to add interest and dimension to your drawings. However, there are a few things you should avoid doing while shading.
First, don’t simply fill in large areas with a single tone. This will give your drawing a flat and lifeless appearance. Instead, try using various shading techniques to add depth and interest.
Second, be careful not to overshade. Just as too much light can wash out a drawing, too much shading can make it look muddy and indistinct.
Understand the light source. When shading, it’s important to consider where the light source is. This will determine how the shadows fall on the object you’re drawing.
Create a range of tones. To create a sense of depth, you’ll want to use a range of tones in your drawing, from light highlights to dark shadows.
Use light and dark values. The contrast between light and dark values gives a drawing a sense of dimension. To create this contrast, use various shading techniques to add light and dark values to your drawing.
By following these tips, you can make your shading look more three-dimensional.
One way to make your shading smoother is to use a blending tool. This will help to seamlessly blend one tone into another.
Another way to achieve a smooth shading effect is by using a light touch. When shading, be sure to build up the tone gradually. This will help to avoid a muddy or blurry effect.
Finally, be sure to use a range of tones in your drawings. This will create a sense of depth and dimension, making the overall effect more smooth and more polished.
Values refer to the range of tones in a drawing, from lighter highlights to darker shadows. When shading, it’s important to use both light and dark values for maximum impact.
Light values are used to create highlights and add detail to an object. Dark values, on the other hand, can be used to create depth or emphasize certain areas. By using a range of values, you can make your drawing look more realistic and three-dimensional.
That’s it. Now you know all about shading.
Use these techniques to add dimension, depth, and interest to your drawings. You can also combine shading techniques to create more complex subjects.
Also, experiment with different shading techniques and mediums until you find the ones that work best for you.
To better understand the concept of lighting and shading, check out our courses “Mastering Lighting and Shading” and “Lighting + Shading: Make Your Art Shine.”
If you want to create realistic figures using these shading techniques, our courses “Figure Drawing for Beginners” and Stylised Figure Drawing” are perfect for you.
Whether you are a beginner or a skilled artist the collection of our online courses has something for everyone.
21 Draw
VERY INFORMATIVE AND PRACTICAL, EASY TO UNDERSTAND FOR MY STUDENTS.
gracias, practicare
Stippling hatching smudging
Thank u soooo informative, it was just the thing i wanted to see for a midterm project. Keep it up.
Reply


 Gift Cards