メンバーシップを75%節約。
アーティスト
コース
レビュー
コミュニティ

Procreate 簡単ガイド

ディズニー、マーベル、ドリームワークスのアーティストからステップバイステップの指導を受けて、キャラクターと環境デザインをマスターしよう!
30日間返金保証!
4.8
(8,303件のレビューに基づく)

アクセスする

1000+
短いレッスン
55+
アートクラス
34
世界クラスの先生たち

インストラクターに会いましょう

最高のアーティストとさらに優れた教師を厳選しています。

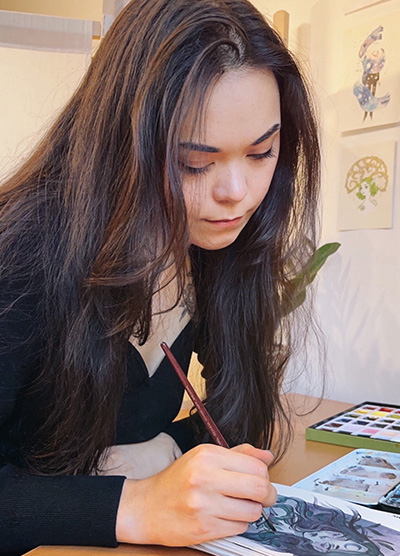
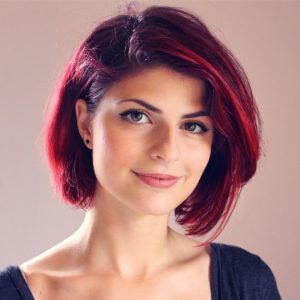
Aveline Stokart

DreamWorksアニメーションデザイナー + コミックアーティスト

Aveline Stokart

Aveline is not just an amazing comic book artist designing characters that feel real – she’s also a fantastic teacher. And a very curious one too!

She’s explored everything from drawing to pottery, always looking to try something new and make art that hits you right in the feels.

She currently works as a freelance concept artist/character designer for various clients in the field of publishing, animation, and video games.

Her clients include Simon and Schuster and Skydance Media, HarperCollins Publisher, DreamWorks Animation…

From an early age, she showed a particular interest in drawing—a natural fit, as she is highly curious and observant, but also quite sensitive. She marvels at the beauty held within the simplest of things. 

Fascinated by character design and creating universes, she developed a unique dimension to her creations by studying 3D Animation at the Haute Ecole Albert Jacquard in Belgium, where she graduated in 2011. 

When she’s not drawing, Aveline likes to express herself musically, by singing and playing the guitar, piano and the ukulele.

I am always trying to evolve and discover new things and challenges. My goal is to create beautiful images and atmospheres that release many different emotions.

アヴェリンのMastering Lighting & Shadingクラスで、異なるブレンドモードを使用して照明効果を操作する方法を学びましょう。

1/6
アーティストのポートフォリオを見る

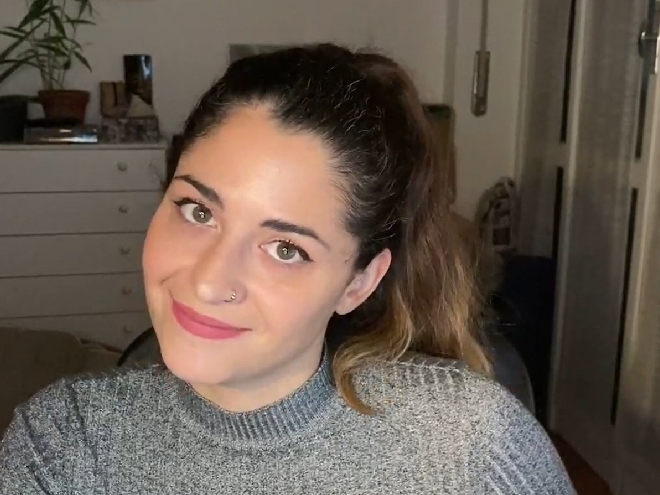
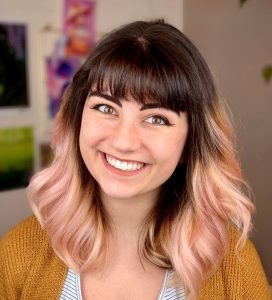
Erika Wiseman

ディズニーで訓練を受けたイラストレーター(Ravensburgerg)。Adobeでの勤務経験あり。

Erika Wiseman

This illustrator’s feed is a burst of joy with her colorful and cute creations. Starting in 2008, she’s carved out a space where creativity meets encouragement, making her an inspiration for budding artists everywhere.

Erika Wiseman (aka Erika the Goober) is a freelance illustrator and character designer who lives in the US. She loves drawing cute, colorful things and experimenting with new drawing techniques.

Erika began teaching herself to draw digitally in 2008. Since then, she has been working with a graphics tablet and Photoshop as well as Procreate to create her digital illustrations.

In 2017, she graduated from the University of Louisville with a Bachelor in Fine Arts (with a dissertation in drawing). She made a name for herself on Instagram, which is the best place to find her art! One of her goals is to help and inspire others along their creative journey to be the best artists they can be.

Inspiration

Much of my inspiration comes from the things I love, the colorful worlds of video games and animated movies.

Tools

I use Photoshop CS6 and a Wacom Intuos Pro. I use an iPad Pro, Apple Pencil, and the Procreate app as well! It really just depends on how I’m feeling that day and if I want to draw at my desk or somewhere else!

Advice

My top 3 tips: Draw every day, draw from life, and study anatomy!
✏️ Create a character from scratch, step by step. Learn more in the beginner course: Digital Drawing in Procreate.

1/4
アーティストのポートフォリオを見る

Feefal (Linnea Kikuchi)

100万人以上のInstagramフォロワー

Feefal (Linnea Kikuchi)

Dive into Feefal’s world, where cute meets the mysterious. With a palette that ranges from digital to traditional, her art is a favorite among over a million fans. If you’re into charming yet slightly spooky visuals, she’s your artist.

Linnea is a Swedish/Japanese artist with a following of over 1 million on Instagram.

She is known for creating anthropomorphized figures and cute, spooky characters.

Linnea lives in Stockholm with her Sphynx cat called Tofu. Feefal shares her art on a regular basis on Instagram, which she creates through a variety of media, such as Procreate (digital software), graphite, and gouache. She also published an art book, ‘The Art of Feefal’.

Fans know her by her unique, charming style featuring beautiful visuals and cute characters with horror/spooky elements. In her words, ‘I put my artistic soul in a blender’!

Don’t think your work has to be perfect or be afraid of your art being ugly. Art will be ugly sometimes. That’s how you get better!

The best part of creating art for me is definitely the sense of fulfillment I get putting my creative works out into the world. It’s really rewarding to see something you’ve put your soul into getting so many positive responses from people. It’s quite the rush!

Inspiration

I mostly get inspiration from nature, death, space, and occasionally spirituality. Space is probably my main muse. It’s just way too large for any human to quite wrap their head around, and its incomprehensible size makes it so intriguing.

手描きのスケッチをiPadに転送して色を付ける簡単なステップバイステッププロセスを学びましょう。このクラスでさらに詳しく学べます。

1/3
アーティストのポートフォリオを見る
1.1m フォロワー

Isabelle Staub

マーベルコラボの肖像画アーティスト

Isabelle Staub

Isabelle Staub artist photo

From viral Disney reimaginings to Marvel collabs, this Philly-based digital artist dazzles with detailed portraits and character designs. With a passion shared through art and teaching, her creations are a must-see.

Isabelle Staub is a US-based freelance artist, specializing in vibrant digital portraits and character design with incredible attention to detail.

Isabelle started creating art at a very young age and went on to receive a BFA in Illustration at Moore College of Art and Design in Philadelphia. The culmination of dedicated work and a burning passion has propelled her to become a recognized artist worldwide.

Her popular series ‘Disney animals transformed into human characters’ went viral on social media, leading to collaborations with companies such as Marvel and MGA Entertainment.

Art has always been a love of mine from before I could remember. I pour my heart, mind, and soul into every piece I create.

Isabelle’s versatility and creative talent allowed her to work with brands such as Dynamite Comics, Wacom, TikTok, Corel Painter, and more. Teaming up with CASETiFY, she created an entire line of gorgeous device cases.

Along with creating original artwork for her clients, she also uses her social media platforms to educate others, passing on her artistic knowledge and expertise. Isabelle currently lives in Philadelphia and has two adorable cats.

What advice would you give to new artists?

Be easy on yourself! Being an artist is a journey, not a destination. Try not to compare yourself to people further along in their journey. You will get there!
Create stunning art with a basic set of Procreate tools. Learn more in Isabelle’s Procreate Made Easy class.

1/4
アーティストのポートフォリオを見る
385k フォロワー

Simone Grünewald

DreamWorksコラボアートディレクター

Simone Grünewald

Meet “Schmoe,” your go-to artist for illustrations that breathe life into the everyday with charm and wit. Her vibrant creations, filled with humor and the realness of motherhood, are a breath of fresh air, promising a smile and a new perspective with every piece.

Simone Grünewald is a Visual Development artist from Germany who worked in the gaming industry for over 10 years as an art director, character designer, and 2D animator.

In addition to her commercial work, she loves creating emotive, dynamic designs that document her life, including the experiences of motherhood. Having followed the creative path all her life, Simone has a wealth of knowledge in traditional and digital art.

She shares beautiful, entertaining artwork as well as insights and tips with her followers on social media and is known for her humorous characters and everyday themes. Simone is also the author of Draw What You Love and Sketch Every Day.
いろいろな例を見て絵のアイデアを見つけましょう。🖌️ 詳細はDigital Illustration in Procreateで。

1/4
アーティストのポートフォリオを見る
606k フォロワー

Maria Lia Malandrino

ディズニーコラボ ビジュアル開発アーティスト

マリア・リア・マランドリーノ

ビデオゲームからストーリーブックまで、このイタリア人アーティストは彼女の鮮やかなイラストで物語を生き生きとさせます。彼女の多様なプロジェクトは世界中の心を捉え、魅力的で物語性のあるアートを創り出す才能を示しています。

マリアはイタリア・トリノ出身のイラストレーター兼ストーリーアーティストです。彼女はロンドン芸術大学で雑誌出版の学士号を取得し、トリノのインターナショナルスクールオブコミックスで伝統的なアニメーションを学び、オンラインスクールCGMAでストーリーボードのマスタークラスを受講しました。

2018年に彼女はトリノでインディーゲームスタジオを立ち上げ、現在は二作目のインハウスゲーム『Out of The Hat』に取り組んでいます。これは悪役の心の中を探る奇妙な旅です。

ここ数年、マリアはイラストレーターやキャラクターデザイナーとして数多くの編集プロジェクトに携わり、オックスフォード大学出版局、アシェット、ディズニーなどの著名な出版社やブランドと共に仕事をしてきました。彼女のイラスト作品はイラストレーションエージェンシーAdvocate Artによって代表されています。

彼女はまた、個人的なイラストやグラフィックノベルのプロジェクトを追求しており、彼女のブログやInstagramフィードでフォローすることができます。

インスピレーション

私は見たり読んだりしたものすべてからインスピレーションを得ます。確かに本やテレビシリーズ、映画、さらにストリートスタイル、建築、カフェの中の人々などもあります。出会ったすべてのものは私の潜在意識のどこかに閉じ込められ、それが私が描いたり書いたりするものに絶えず再構築されています。

お気に入り

引用: 『取るに足らないものはない』。これは私の好きな小説シリーズ『Wheel of Time』の引用です。私たち全員が自分自身に忠実に生きる選択ができるというアイデアが好きです。たとえそれが結果をもたらすことがわかっていても、それを行うことを決めることができるのです。

アーティスト: アレッサンドロ・バルブッチ、TBチョイ、オットー・シュミット、ジン・キム、パトリック・オズボーン

映画/シリーズ: リトル・ミス・サンシャイン、ラピュタ、ヒックとドラゴン / 鋼の錬金術師ブラザーフッド(シリーズとして)

ゲーム: バイオショック インフィニット、ウィッチャー3、サンレスシー、シヴィライゼーションのいずれかのゲーム

ツール

イラストとキャラクターデザインにはiPad ProとProcreateを使用していますが、アニメーションの仕事にはiMacに接続されたWacom Cintiq 22HDを好んで使っています。

アドバイス

すべての人に100%効くアドバイスはないように感じます。

私はゲームとイラストの世界にかなり遅れてアプローチしました。正式な教育はなく、何年も非常に異なる分野で学び働いてきた後です。私のアドバイスは、決して遅くはないということです。ライナー・マリア・リルケをパラフレーズするなら、朝起きたときに何も考えずにただ描くことだけを考えているなら、それをあなたの主要な職業にするべきです!あなたが『一般的に』かっこいいとか美しいと考えられるスタイルで描かなくても、それが自分を表現するために必要なことであれば、それを追求する価値があります!

マリアのクラスで、最初から最後まで漫画キャラクターの描き方を学びましょう。

1/3
アーティストのポートフォリオを見る

Meike Schneider

Pixarコラボ3Dアーティスト

マイケ・シュナイダー

彼女はキャラクターを通じて3Dアートシーンに革新をもたらし、画面から飛び出すようなキャラクターを生み出しています。アニメのクラシック作品からインスピレーションを受けており、キャラクターデザインや教育における彼女の作品は業界を照らし、未来のアーティストたちにとっての光となっています。

マイケはドイツのケルンを拠点に活動するキャラクターに特化した3Dアーティスト&イラストレーターです。彼女はInstagramやトム・バンクロフトの『MerMay』を通じてよく知られています。彼女の作品には児童書のイラストレーション、キャラクターデザイン、ビジュアル開発、3Dキャラクター&環境モデリング、ルックデベロップメントなどがあります。現在、彼女はフリーランスとして様々なアニメーションスタジオや企業で働きながら、ケルンのSchool of Gamesでインストラクターとして教えています。

彼女の作品はウォルト・ディズニーの名作であるアラジンポカホンタスに大きく影響を受けています。塔の上のラプンツェルアナと雪の女王シュガー・ラッシュといったCG映画は、彼女がアニメーションのキャリアを追求するきっかけとなりました。

RebusFarmの2016年5月のアーティスト・オブ・ザ・マンスを受賞した後、彼女の3Dキャラクター『小さなメアリー』は、CGアーティスト向けの世界で最も売れている雑誌である3D World Magazineの211号に掲載されました。

2012年に学校を卒業するとすぐに、彼女はPIXL VISNメディアアーツアカデミーで3Dアニメーション&VFXを学び始めました。アニメーションのディプロマを取得して卒業した後、彼女は『The Rookie Awards 2014』のファイナリストとなり、プロダクトビジュアライゼーションのスタジオ、Dooblexでの仕事に繋がりました。フルタイムで働きながら、彼女は委託制作を始め、自分自身のブランドをアーティストとしてゆっくりと構築し始めました。

2019年中頃、マイケはフルタイムのフリーランサーになるために仕事を辞め、『Finni & Fredo』や『My Best Book』の児童書イラスト、Adobeのアートワーク、今後のTV番組『Coral Kins』のビジュアル開発やキャラクターデザイン、パリス・ヒルトンのモバイルゲームのキャラクターデザインなどのプロジェクトに取り組んでいます。

簡単なステップで色を付けて詳細を追加しましょう。🖌️ 詳しくはDrawing a Female Character by Meikeで。

1/3
アーティストのポートフォリオを見る

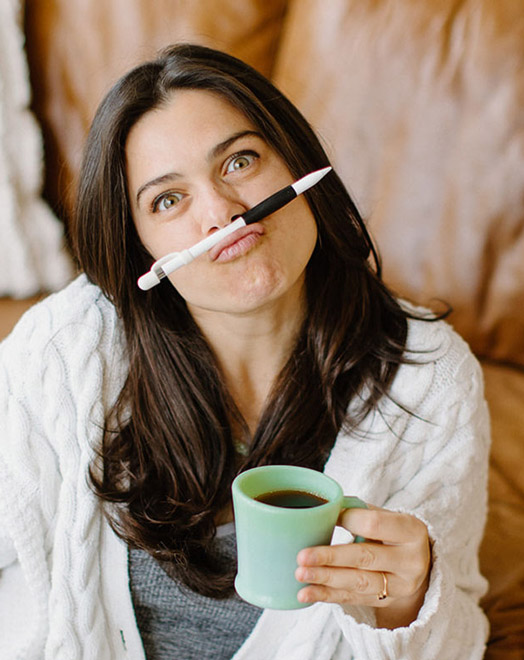
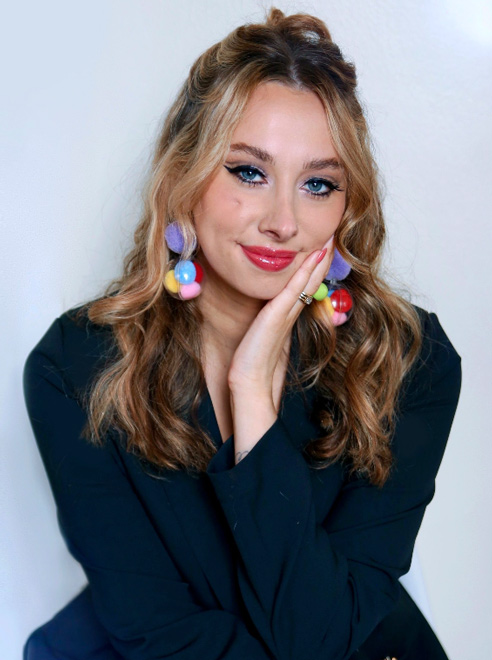
Lauren Barger

ディズニー&マテルのコラボ 動物カートゥニスト

Lauren Barger

Lauren Barger profile picture

Lauren transforms pets into digital art in Procreate, enchanting with her ‘Coffeedraws’ and humorous animal cartoons. Her collaborations with Disney and Mattel, paired with co-hosting MerMay, spotlight her as a beacon of creativity and fun in character design.

Lauren is a character designer based in Charlotte, NC, known for creating ‘Coffeedraws’, being a co-host of MerMay on Instagram and for her comical cartoons of animals and people.

Lauren Barger, Character Designer & Illustrator

Lauren attended Herron School of Art and Design, where she pursued a BFA with a focus on illustration.

In 2019, she opened her company, LB Fine Art, producing mainly portrait artwork on commission both traditionally, using watercolors and colored pencils, and digitally.

She has gone on to work in visual development and character design with notable companies in the animation and toy industries, including SonyDisney, Pixelle Studioand Mattel.

Lauren is also a co-host and partner of MerMay, a social media drawing contest founded by Disney animation veteran, Tom Bancroft.

I am passionate about visual development and character design and love making my audience laugh and smile through my artwork!

Lauren is known for her engaging illustration projects, such as the ‘Animal Butt’ watercolor series, ‘Coffeedraws’ series, and ‘Pets to People’ series.

‘Coffeedraws’ is an interactive social media series that ran for 200 consecutive days, generating a strong following on Instagram. This series has been a highlight of Lauren’s artistic journey and a delightful way to interact with her followers.

I create fun art, or “F-ART” as I call it. I am a F-ART maker!

Master basic anatomy for drawing dogs and cats! 🐕  Discover more in Drawing Pets from Scratch class.

1/3
アーティストのポートフォリオを見る

Procreateのスキルを急速に向上させよう

ゼロからアートを作成する方法を学ぶ

レイヤー管理、ブレンドモード、ブラシの使い方をマスターする

初心者の作品を見事なデジタルペインティングに変え、誇りを持って共有できるようにしましょう

これらの詳細なクラスを見て、レベルアップしましょう!

Procreate
アニメーション
環境デザイン
ドローイングの基本

メンバーシップについて

このメンバーシップでは11のProcreateコース40の他のアートコースが含まれています。

初心者でも経験者でもすべてのスキルレベルに対応したクラスがあります!

私たちの講師がブラシの使い方🖌️を教え、さらにシェーディングとライティングで絵を引き立てる方法を教えます!

最後にはiPadで自信を持って描けるようになり、証明書も手に入ります!

毎月の更新
新しいクラス
毎月新しいクラスが自動で追加され、追加料金はかかりません! 🤩
コミュニティ
21万人以上のメンバー
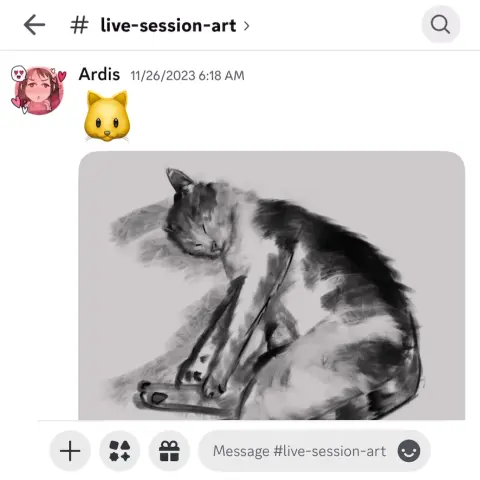
仲間やティーチングアシスタントのコミュニティに参加し、フィードバックを受け取ったり、他の人が共有する作品からインスピレーションを得ましょう。
ライブイベント
ライブイベント
お気に入りのアーティストからリアルタイムで学びましょう。

学べること

Digital Workspace Setup & Navigation

  • Set up your digital workspace with Erika Wiseman 🖌️
  • Navigate & utilize Procreate’s main tools & features with Isabelle Staub 🌟

Artistic Techniques & Styles

  • Select brushes that complement your style and drawings 🖌️
  • Hone your drawing technique and stroke pressure control ✍️
  • Explore concepts of light and shading with Aveline Stokart 💡

Workflow Efficiency & Productivity

  • Discover time-saving shortcuts for efficient workflow 🕒
  • Uncover hidden tips and tricks for maximizing productivity 💡
  • Learn to create captivating time-lapse videos of your artwork 🎥

File Management & Sharing

  • Master file importing and exporting processes 📤
  • And most importantly giving you the confidence to share your art! 💪

Progress Tracking & Assignments

  • Each video lecture comes with easy-to-follow assignments that you can use to track your progress 📚

Get ready for an exciting adventure and discover how amazing you can be as a digital artist! Start now! 🚀
ゼロからヒーローへの道を進む準備はできましたか?💥

年間わずかUSD $59でサインアップ!
急いで、期間限定です!

オンラインクラス以上のものが手に入ります…

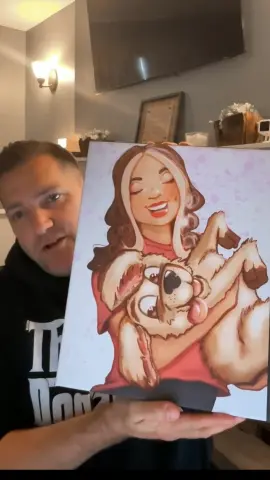
プロのフィードバックをもらおう

課題や作品で悩んでいるときに、実際の先生から詳細なフィードバックをもらう

称賛を得る

アートをシェアしたり(そうしたい場合は😉)課題を完成させて先生からの称賛を受けましょう!

クラスメートと話す

素晴らしいDiscordコミュニティに参加して、交流したり質問したり、お互いに学び合いましょう。

課題を使って練習する

ほとんどのレッスンには、練習を助けるための提案された課題や例があります。

ライブイベント

お気に入りのアーティストからリアルタイムで学びましょう。

最近の学生作品

ここにあるイラストはすべて私たちの生徒が作成したものです。あなたもできますよ!
1/24
Catie Ilic
Alisa
Jay Thatcher
Nida Özer
@saramakdessi
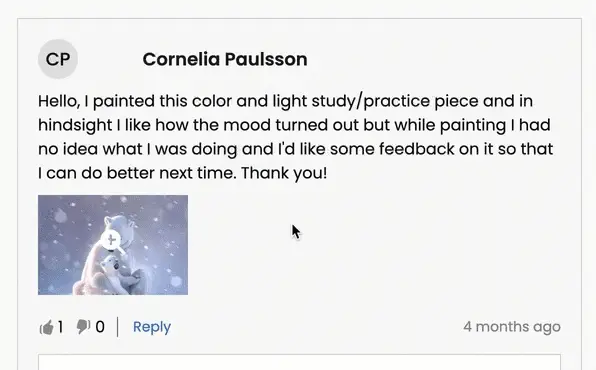
Cornelia Paulsson
Laura Davies
Prapti Bhetawal
Oksana Shvedenko
Louise Broesky
Viktoriya Storozhuk
Berna Pekustun
Simone
Nesreen Alturkistani
Gautham R
Marjolijn De
Jason K.
Gabriella Antonicelli
Sophie Mattocks
Perrine I
Melissa
Marjolijn De
Kristina Veraldi
Frank Griffen

私たちの先生がどのように学生をサポートしているかをご覧ください...

生徒の質問
Q8
Quinn 88

I recently completed the course and I'm really happy with it. Helped me improve on my time and Layer management easily. would love to get some feedback to see in what parts I could improve o... さらに表示n.

Quek Jae Sern (Jae)
公認21 Draw・ティーチングアシスタント

Hello Quinn,

Congratulations on finishing the course! I’m happy that it helped you out.

Your submission is absolutely stunning! I can see that you’ve put a lot of work into it and we can appreciate all the intricate details you’ve included in the design of your character.

Overall, I think you’ve executed on all the teachings of the course well and you’re definitely ready for a more advanced course. With that said, here is some more advanced feedback that would be outside the scope of this course:

Perspective of Leaves

  • It’s subtle, but I noticed that the leaf surfaces are mostly angled towards the viewer giving a very flat look. I’d encourage you to imagine the leaves being stuck on a surface of a sphere and draw them radiating outward from the center (the shoulder joint). You can check the attached image to see what I mean.

Neck & Collarbone

  • I saw that you included a V-shaped line to denote your character’s collarbone. I realize that this is a stylized piece and that there is an urge to keep things simplified. However, I think your implementation makes it look like there is an additional layer of clothing. Look up references to see how to best simplify the neck/collarbone area.

With that said, I think you did an amazing job. I hope this was helpful and all the best with your future illustrations!

生徒の質問
MB
Morgan B

Thanks for the course, I learned a lot! Attached is my mood board and the final piece. For this course I decided to draw a dark elf character I’ve been coming up with. I had a lot of fun m... さらに表示aking this but would appreciate any feedback on how to make it better :)

Quek Jae Sern (Jae)
公認21 Draw・ティーチングアシスタント

Hi Morgan!

Thanks for your submission and sorry for the delayed response. I’m happy to hear that you got a lot out of the course. First of all, I think you utilized the references and the moodboard wonderfully. Your final designs of your character as well as the environment are cohesive as a result. The colors you used also go a long way in conveying the mysterious and magical feeling of your illustration.

With that said, let me point out some areas with room for improvement.

Symmetry

  • I noticed that some of the facial features and the torso of your character aren’t symmetrical. I recommend the use of guidelines during your drawing phase to help you put elements in the right place and have them be properly aligned.

  • While you’re drawing, you should also flip your canvas horizontally from time to time as it helps you spot errors more easily. Once you’ve identified something that’s asymmetrical or warped in an undesirable way, you can redraw that section or use the liquify tool to correct it.

Armor

  • The design of the armor looks great. I like its curved edges and the ornate etchings. Where I think there is room to improve is in the rendering of the material – in this case, metal. Metal can be tricky to paint. It is a reflective material, so make sure you keep it high contrast. Highlights should be bright and shadows should be dark.

  • In addition to that, try to avoid soft edges as they can make the armor appear “mushy”. Use hard and distinct edges especially where there is overlap between two or more layers of metal.

Overall, I think you did an excellent job. I forgot to point out that you also did great for the background. I hope this feedback helps and good luck for your future illustrations!

生徒の質問
YM
Yazmary Melendez

I'm very new to procreate, and I like drawing cute frogs. It was fun to learn so many features in procreate, I look forward to drawing more things in procreate and incorporate more of the th... さらに表示ings included in the course. I can definitely see an improvement in how I color and the layering really helped.

Quek Jae Sern (Jae)
公認21 Draw・ティーチングアシスタント

Hello Yazmary,

I’m glad that you’re learning a lot from the course about using Procreate. Procreate has such powerful tools that many of us can benefit from if only we knew how to use them!

And what a lovely illustration this is. It’s giving such cozy vibes and I also really like the complementary color palette you used for this.

Best of luck with your future drawings and keep drawing!

生徒の質問
GA
Gabriella Antonicelli

Fantastic course! I tried to follow Simone's directions in my illustration, from blocking in to choosing brushes to handling shadows and lighting. I would be enormously pleased if I could ge... さらに表示t some feedback so that I can improve my next illustrations. Thank you very much Gabriella

Jade Lefevre
公認21 Draw・ティーチングアシスタント

Hi Gabriella!

Apologies for the delay in getting back to you!

We're delighted to know you enjoyed the course and found it useful! You did an amazing job on this illustration. I'm a huge fan of the style and your composition skills are impeccable!

Following, you can find a couple of suggestions you can look into for your next illustration, as well as an example attached to this message:

  • You can decide to have a more contrasted, darker shading in some areas of the drawing in order to help the viewer make out some of the shapes better. For example, under the yellow excavator.
  • By deciding the location of the light source, you can make sure to have a consistent direction for your shadows. In my example, I have it set in the middle.
  • The same way, some edges could use an even brighter highlight in order to help the shapes really stand out from the background.

You can find more explanations in the attached pictures. Don't hesitate to ask if you have any question!

Keep up the good work and have a great day!

生徒の質問
AC
Andrew Carlyon

I’m following along on this course, but I feel like I’m “stuck” and I’m not sure what to do to improve. I feel like my painting is very flat and I’m struggling with colors. Also,... さらに表示 it seems very “blocky’, and I’m struggling to get a fluid, painterly look. Can anyone provide me some guidance? Unfinished painting attached>

Jade Lefevre
公認21 Draw・ティーチングアシスタント

Hi Andrew!

Thank you very much for sharing your painting with us! The proportions of your portraits are on point and I can tell you've applied all of the teacher's advice very well! Here are a few suggestions to help you with your problem:

  • You can start by having these little dark areas (such as the inside of the mouth, the corners of it, the eyes and eyelids and the nostrils) be darker and stand out more, with a thicker brush.
  • You can also add some more bright and saturated colors to your color blocks. In this case, shades of orange and red! It helps bring life to your undertones!
  • Don't hesitate to either lay your color blocks with a more blurry brush, or to blend them slightly afterwards. One shouldn't make the mistake to over-blend, but a little does help a lot in making the whole thing come together. It's the variation of textures between blended and non-blended which makes the surface interesting to look at.

You can refer to the attached images for reference! Have a great day and don't hesitate to ask if you have any questions!

生徒の質問
A
Alisa

Hello, I finished the Aveline’s course and would like to get some feedback how I can improve my illustrations.. I am not completely satisfied with my work so hope your feedback can help.. ... さらに表示Thank you.

Rhea Tibbey
公認21 Draw・ティーチングアシスタント

Hey Alisa! I love your work, you have done an amazing job of following along with Aveline's assignments :)

To keep your feedback simple, I have chosen to refer to your night-time lighting scenario. Check out the tips and images I have attached below, I hope they help :)

  • When you are illustrating an environment a good practice for adding depth is to ensure your foreground uses more saturated colors than your background. Currently they are at a similar level of saturation, this is something you can adjust using your ‘Hue, Saturation and Brightness’ tool.
  • Around the edge of your highlights and shadows you may have a soft line that is a more saturated color.
  • Folds on clothing usually follow a triangular draping pattern down from where they hang from the body. In this case her sweatshirt would mostly be draping from her shoulders. When in doubt with drawing folds in an outfit, a reference picture can make things much easier!
  • If you have warmer tones in your foreground, make the color pop even more by using an ‘Overlay Layer’ to add cooler colors to the background.

I have attached some images with tips and edits to help guide you through this process. Let me know if you have any questions :)

生徒の質問
BP
Berna Pekustun

Do much focus on the eyes and not enough focus a the rest of the art. Still the face is not quite right ( used a reference feature) but really learned a lot from class.

Quek Jae Sern (Jae)
公認21 Draw・ティーチングアシスタント

Hello Berna,

Thanks for submitting this wonderful painting. I think the loose painting style works great and the extra detail around the face compared to the rest of the body does a good job at focusing the viewer’s attention.

I do notice that the dog’s face seems a little off. Sometimes it can be hard to tell which part of the painting needs to be worked on. Two tools I can suggest for checking your painting/drawing are:

  • Guidelines down the center of the face

You can place a guideline on a separate layer to make sure the facial features you draw are symmetrical.

  • Flipping canvas horizontally

Procreate allows you to flip the canvas horizontally. By occasionally flipping the canvas, it allows you to “reset” your perception of your painting, and it will be easier to spot your errors while painting or drawing. Try it out on this one and it should be easy to see where and what needs fixing!

I know that for painterly styles like this, it can be hard to make changes without essentially re-painting a section again. Procreate has a built-in Liquify tool that is perfect for situations like this. You can use the liquify brush to push or nudge your painting around until it is correct.

I hope this helps and I’m glad that you learned a lot from this class. Good luck with your future art pieces!

生徒の質問
Nida Özer

Hello Aveline, I congratulate you on your art and I follow your art with enthusiasm. I would also like to thank you for meeting us on such a occasion. I am adding my works and waiting for yo... さらに表示ur comment :)

JP
Jessica Paton
公認21 Draw・ティーチングアシスタント

Hi Nida!

Wow, you did such a great job of applying the techniques from this course! I love that you've put your own characters into the scenes as well! I only have a few small notes for you.

For the Night Scene:

  • Increase the glow in the night scene! Use a soft brush to lighten that part of the scene (I used a light yellow with a soft-light layer setting)

  • Add more highlights/rim lighting on the night scene as well. Make sure you have lots of contrast and really make the most of the fun lighting!

For the Day Scene:

  • Because you have made most of the background quite light, try and keep that somewhat consistent. Keep the background light, and the foreground more dark. Keeping this contrast makes it easier to see the characters as seperate from the background and makes it easier to read.

*Add a few extra shadows to reflect the size of the skirt/around the skirt to imply more 3D form

You've done such a fantastic job with these, and they're honestly great the way they are! Well done!

生徒の質問
Lana Grushnik

I absolutely loved this course! Very inspiring and simple :) Turned out that I'm really good at drawing dogs. Cats are harder to draw for some reason:)

JP
Jessica Paton
公認21 Draw・ティーチングアシスタント

Hi Lana!

This is such a cute drawing! It's very lively and there is a great personality coming from them!

When drawing cats focus very much on the flow - lots of round fluid movements. The line of action will be very important for their poses.

For this particular drawing I just have a couple suggestions!

  • Push the snout slightly further forward. This will help make the head feel a little more round and improve the sense of dimension. Think of the base of the head not as a circle, but as a sphere!

  • When drawing complicated shapes like limbs, especially when they're folded up, think about how each segment is a basic shape. Using the right amount of lines, you can force a sense of perspective by overlaying some with others. In this case, you can add a couple extra lines to make the back leg seem more like it is bent away from the "camera".

  • Use the tail to emphasize the sense of movement! Follow the line of action you already have moving through the pose! Treat it as an extention of this. But also try to consider where the dog was in space before - the tail can have a very lovely flow to it if it is shaped as though it is coming from where the dog was just a moment ago. You were very close to this I think, but lowering it slightly makes it feel less like the dog has dropped down very suddenly.

It's great to hear that you loved the course! I hope you continue to draw more fun animals in the future!

生徒の質問
DK
DIM K

Hi recently I finished this drawing and I would like to get some feedback to improve my illustration.

Jade Lefevre
公認21 Draw・ティーチングアシスタント

Hi!

Thank you for sending in your painting! This is incredible work. The subject is beautiful and your use of color is mind-blowing!

You could maybe try to have the hair on the chin flow in more various and natural directions. Even with the head clearly in motion within the scene and the hair following in the same direction, I think there could be a little more variation.

You can check out the attachments for a more visual explanation!  I hope you’ll find them helpful!  Don’t hesitate to ask if you have any more questions and I wish you a beautiful day!

生徒の質問
MD
Marjolijn De

I really enjoyed creating the thumbnails and the final piece. I love to keep my rough sketch slightly visible and I like to add some more texture to my designs. But I loved the gloaming brus... さらに表示h and I’m going to use it more often:) Thank you very much for this fantastic class!

Jade Lefevre
公認21 Draw・ティーチングアシスタント

Hi Marjolijn!

I'm glad to hear you enjoyed the course! I'm a huge fan of the way you used the brushes and the colors! Your characters have a lot of personality and I think your final drawing looks really professional.

Keep up the great work and have a fantastic day!

生徒の質問
SM
Sara Makdessi

Hi Aveline, thank you so much for this fun and super informative course. I really enjoyed your lessons! Here are my interpretations of the four light scenarios with my characters. Any feedb... さらに表示ack would be very appreciated. Many thanks, Sara

Rhea Tibbey
公認21 Draw・ティーチングアシスタント

Hey Makdessi! These illustrations look amazing! You have done a great job of using the lighting and shading techniques from this course :)

Here are a few feedback suggestions that you could try in future illustrations/ to improve these:

  • In areas of your character that are highlighted, change the colour of your line-art to a colour brighter than the highlighted area.
  • Additionally, it can look nice if you set your line-art to a darkened version of an ambient colour in your image rather than black.
  • Add soft shadows to objects that aren't in direct light.
  • For your night-time scene, you could decrease the saturation of the background and perhaps add even more blur to make your character stand out even more.

Try these out and see what you think! Wishing you a creative week, Rhea

生徒の質問
LB
Louise Broesky

I have never used Procreate before so I did the first lessons on paper working my way through the other ones I’m not used to drawing with circles and lines of actions. I pick a body part ... さらに表示and then I draw from there that’s what I’m used to so I didn’t use the circles the way I was supposed to

JP
Jessica Paton
公認21 Draw・ティーチングアシスタント

Hi Louise!

This is such a great drawing so far!

I do recommend trying to start a drawing with the basic shapes before you get too far into detail to make sure that the drawing has a solid foundation.

  • Break things into spheres and cylinders. Spheres for the head and joints, and cylinders for the limbs and snout. Using these as a guide and it will help add dimension

  • Another thing that will add dimension is layering one shape of the other. Having a shape hidden behind another will instantly add a sense of 3D.

  • Think about their skeleton! Look at where their bones bend. This is the natural basic building of an animal. You don't have to draw every bone, but you can break it into areas - The ribcage as one oval, the pelvis as another. The forearm bone as a cylinder, the joints as spheres. It helps a lot to understand how a creature can move and bend, and how they can't.

You're well on the right track and each drawing you have done is very expressive and has lovely poses, good job!

生徒の質問
Polina Lutseva

Hello!! I love the course and tried to do all types of lighting by myself, it would be really great to hear feedback, comments and critics about my work. Thank you very much in advance!! Pa... さらに表示uline

Rhea Tibbey
公認21 Draw・ティーチングアシスタント

Hello Polina! I love your drawings, they are so gorgeous! Thanks for sharing them :)

Check out my feedback below and notes I have added to your drawing! I hope you find them helpful :)

  • Don’t be afraid to use ‘Overlay’ blending layers with vivid colors to help establish the time of day, especially for the sunset and daytime photos.
  • In the indoor scene: the walls and the character should be in soft shadow due to the backlighting from the window.
  • Your character has a few spots on their face that might have highlights including their: eyes, nose, lips and cheekbones.
  • Your overcast lighting scenario could be de-saturated to convey the gray-diffused light source. This is something you can adjust using the ‘Hue, Saturation and Brightness’ tool.
  • Even on an overcast day you will still have some soft shadows where clothes fold or different objects meet each other.
  • You can try and make the direction of your light source more clear by adding color variation to your sky using an overlay or multiply layer.
  • When in doubt, practice by studying photographs! This can be a great way to learn about illustrating hard shadows.

I have attached some images with tips and edits to help guide you through this process. Let me know if you have any questions :)

ゼロからヒーローへの道を進む準備はできましたか?💥

年間わずかUSD $59でサインアップ!
急いで、期間限定です!

どこから始めればいいかわからない?おすすめのクラス順をチェックしてみてください

クラス 1
初心者向けProcreate
続きを見る
初心者
クラス 2
Procreate 簡単ガイド
続きを見る
初心者
クラス 3
カラー理論
続きを見る
初心者
クラス 4
カートゥーンキャラクターを描く
続きを見る
初心者
クラス 5
デジタルカラーリング
続きを見る
初心者
クラス 6
ペットを描く
続きを見る
中級者
クラス 7
女性キャラクターを描く
続きを見る
初心者
クラス 8
ライティング + シェーディング
続きを見る
中級者
クラス 9
ライティング + シェーディング
続きを見る
中級者
クラス 10
デジタル・イラストレーション
続きを見る
中級者
クラス 11
ポートレートを描く
続きを見る
中級者

生徒がクラスについてどう思っているかをご覧ください...

初心者に優しい!
わかりやすい!
本当に楽しい!

他の人が私たちのコースを絶賛する理由を見てみましょう...

4.8
(8,303件のカスタマーレビューに基づく)
V0
Vivee 0.
4 週前
購入
このコースには本当に感謝しています。私が学びたいことをあなた以上によく教えてくれる人はいません。しかし、レイヤーやマスクの使用などは、私にとってはまだ少し複雑に思えます。何を、いつ、どのように、なぜ使うのか理解するのに苦労しています。また、レイヤーの 1 つで、ハード ライトに設定すると言っていたのに、実際には追加に設定されていたことに偶然気づきました。:/ いずれにせよ、残りのレッスンを続けるのが楽しみです。すでに非常に多くの役立つヒントを示していただいており、その点に特に感謝しています。:)
+ さらに表示
ライティングとシェーディングをマスターするのコースのレビュー
LH
Luc H.
3 週前
購入
これは間違いなく、私がこれまで受けたオンライン チュートリアル コースの中で最高のコースです。Rodgon は、キャラクター デザインのための完璧な方法を編み出した天才で、このコースは、さまざまな角度からキャラクターを一貫して描く方法や比率の測定方法など、私が抱いていた多くの疑問に答えてくれました。私はプロのデザイナー兼イラストレーターですが、このコースによって、過去数十年間、参照できる確実なフレームワークを持たずに目分量ですべてを測定してきた、何となく試行錯誤してきた手法が解き明かされました。
+ さらに表示
Rodgon は思いやりのある講師でもあり、このコースは基礎的な描画スキルを持たない人でも始められるようになっていますが、最後にはエキスパート レベルにまでレベルアップします。私は間違いなく、スケッチブックにあるとおりにコンテンツを確実に再現できるように、以前のモジュールのいくつかに戻るつもりです。素晴らしいコースで、人間のキャラクターの描き方を知りたい人には、いくらお勧めしても足りません。私は、これからこれらのテクニックの多くを自分の作品に取り入れていくつもりです。
21日間で解剖学を学ぶのコースのレビュー
LC
Lorena C.
3 週前
購入
このコースは本当に役に立ちました。まったくの初心者として、私が実現したい物語に基づいて、一貫したポーズとプロポーションを持つキャラクターを描くために考慮する必要がある人体の描き方とさまざまな部分や筋肉について多くを学びました。Rodgon は、人体構造に関する多くの情報を提供し、重要な知識を共有しています。私は、学んだことと、レッスンに従って練習するために費やした時間に本当に満足しています。
+ さらに表示
21日間で解剖学を学ぶのコースのレビュー
SM
Stefan M.
3 週前
購入
真の、そして唯一無二のRODGON先生から学ぶのはいつも楽しいです!複雑なことを分かりやすく説明してくださり、本当にありがとうございます!想像力からキャラクターを創造したい方、そして大切な基礎を学びたい方に、このコースをぜひおすすめします!改めて感謝申し上げます!
+ さらに表示
21日間で解剖学を学ぶのコースのレビュー
AT
Allison T.
1週後
購入
このコースは素晴らしかったです!ローレンはとても分かりやすく説明してくれるので、初心者でもきっとできると感じさせてくれます。彼女の教え方は楽しく、親しみやすく、そしてとても励みになります。もしあなたが愛するペットのスケッチを描いてみたいと夢見ていたなら、ぜひこのコースに挑戦してみてください。
+ さらに表示
ゼロからペットを描くのコースのレビュー
RK
Rama K.
6日前
購入
ステップバイステップでプロセスを説明してくれるチュートリアルは、いつも重宝しています。これは21Drawの2つ目のコースです。1つ目はAveline Stokart氏の「Mastering Lighting and Shading」です。そのコースを修了した後、私のプロジェクトにぴったりのこのコースを見つけました。このコースで説明されているプロセスは、私のような学習者がプロのアート作品やイラストの謎を解き明かし、望む最終結果を達成するための予測可能で明確な方法を見つけるのに役立ちます。詳細な例を
+ さらに表示
用いて辛抱強く説明してくれたKenneth Anderson氏に感謝します!
キャラクター主導のイラストのコースのレビュー
LC
Lidia C.
2月前
購入
このコースは Erika のコースを補完するものだと思います (彼女には Photoshop のコースが 2 つあることは知っていますが、Procreate のコースもあるといいのですが)。Erika のコースを受講した後、このコースを受講することを強くお勧めします。Isabelle は他のコースで詳しく説明されている多くのことを簡単に説明し、いくつかのことを別の方法で実行します。これは素晴らしいことです。特定の機能にアクセスする方法が変わったからです。私は主に自分のブラシを作成するのを楽しみま
+ さらに表示
した。また、「ヒント、コツ、よくある間違い」のレッスンも非常に役立ちました... 有罪です。このコースを「初心者向けパート 2」と名付けることもできます。このサブスクリプションは日に日に好きになっています <3
Procreate 簡単ガイドのコースのレビュー
GM
Gladys M.
2月前
購入
私はアヴェリンから学ぶ機会に恵まれ、彼女をどれだけ推薦しても足りません!デジタル グラフィックスにおける光と影を教える彼女のスキルは、非常に優れています。アヴェリンは、単にテクニックに集中するのではなく、光と影がどのように感情を喚起するかを時間をかけて説明し、クリエイティブ プロセスに対する理解を深めてくれます。特に印象的だったのは、彼女が色と感情表現を結び付けたことです。これにより、自分の作品の可能性をまったく新しい観点から理解することができました。色の選択と陰影付けによって感情をよりよく表現
+ さらに表示
する方法について受けたアドバイスは、本当に有益でした。講義は非常に教育的であるだけでなく、とても楽しかったです。今では自分のスキルにずっと自信が持てるようになり、彼女の指導のおかげで、練習と開発を続けるのが待ちきれません。アヴェリン、ありがとう!
ライティングとシェーディングをマスターするのコースのレビュー
LG
Laura G.
3月前
購入
このコースのすべてが気に入ったことを念頭に置いておくと、最も気に入ったことの 1 つは、ポーズや表情、キャラクターが生き生きと動き出すときに Rodgon がとても楽しんでいるのを見たことです。これは、私が上達するためにこれほど多くの投資をしている理由を思い出すのに役立ちました。なぜなら、絵を描くことは私にとって幸せな場所であり、上達してさらに学ぶことでさらに幸せになれるからです。そしてもちろん、すべての説明が非常にわかりやすく、例が完璧に的を射ており、ヒントやコツが完璧で非常に覚えやすいという
+ さらに表示
事実もあります。このレビューの冒頭で述べたように、私はこのコースのすべてが気に入りました。ありがとうございます!
キャラクターに命を吹き込む方法のコースのレビュー
OP
Ondřej P.
2月前
購入
各レッスンでもう少し情報が得られると思っていましたが、それでも気づいたことがありました。宇宙で描くペットについては、遠近法について少し触れておく必要があるかもしれません。宇宙でペットの基本的な輪郭を描くのに最も難しいのは遠近法だからです。
+ さらに表示
ゼロからペットを描くのコースのレビュー
RT
Rômulo T.
2月前
購入
ああ、これはまさに金の 1 時間です! 先生がこのコースで秘密を明かしているような気がします (笑)。なぜなら、私はこれまで、複数の素晴らしいアーティストの作品を見て「でも、どうやってやっているの?」といつも思っていた、たくさんの素晴らしいテクニックやコツを学んだからです。私は Procreate も好きです。私が選んだソフトウェアは CSP ですが、Procreate でたくさんの便利なコツを学ぶことができました。そして、CSP でもすべてのテクニックを簡単に作れると思います。また、先生の説明
+ さらに表示
もとてもよく、アートもとても美しいです。このコースは本当に気に入りました。
カートゥーンキャラクターの描き方のコースのレビュー
TS
Taylor S.
2月前
購入
これは間違いなく、Procreate のツールとテクニックにすでに慣れている人向けのコースです。私は多くのことを学びましたが、彼女が実行している手順を理解するために、「ペイントしましょう」ビデオを頻繁に一時停止する必要がありました。明確で基本的な指示 (どのブラシに切り替えるかなど) があれば助かりました。そうは言っても、Aveline の光に関する知識は素晴らしく、このコースは理解を深めるのに非常に役立ちました。リソースと例を頻繁に参照するつもりです。
+ さらに表示
ライティングとシェーディングをマスターするのコースのレビュー
LW
Lana W.
3月前
購入
すばらしい!!!! とても楽しくて喜びを感じ、すべてのレッスンが大好きでした。マークはとても素晴らしい先生で、素晴らしい人間です。とてもクリエイティブで、あなたにもできると信じさせてくれます。自分の子供向けの本にイラストを描くためにアートブロックをいくつか用意しましたが、これは挑戦でしたが、このコースは私の恐怖や不安を取り除き、再び創作する意欲を掻き立ててくれました。本当にありがとう、マーク。また受講したいと思います!!
+ さらに表示
21日間でデッサンを学ぶ (Season 1)のコースのレビュー
LC
Lidia C.
1 月後
購入
骨格を使って解剖学を学ぶなんて考えたこともありませんでしたが、ヒントやコツは素晴らしいです... 初心者向けのコース (Erika) を受講してからレッスン 8 に取り組むことをお勧めします。アルファ ロックやガウス ブラー、その他の Procreate 関連の手順について、よりわかりやすく説明されています。素晴らしいコースです。猫に試してみます :)
+ さらに表示
ゼロからペットを描くのコースのレビュー
NL
Nancy L.
1 月後
購入
トニーのコースがきっかけで、私は 21 Draw を購読するようになりました。キャラクターの描き方を改善して、キャラクターにもっと生命感を与え、もっと面白くしたいと思っています。トニーは、もっと面白いポーズを描くための基本を本当にうまく伝えてくれます。私は初心者ではありませんが、彼のコースは初心者だけでなく中級者にも適していると思います。
+ さらに表示
個性的なキャラクターポーズを描くのコースのレビュー
AS
Ani S.
3月前
購入
デジタルイラストレーション(Procreate)の初心者に最適なこのコースでは、Isabelleが基本を説明し、Procreateのツールの使い方を示し、初めてのデジタルアート作品の作成をお手伝いします。私は長い間Procreateで絵を描いてきましたが、私にとってもこのコースは興味深く役に立ちました。基本を復習し、スキルを向上させるための新しいヒントを学ぶのに最適な方法です。
+ さらに表示
Procreate 簡単ガイドのコースのレビュー

このレベルの品質を提供するバンドルは他にありません...

11のオンラインクラスは合計で595ドルの価値がありますが、それをほんの一部の価格で手に入れられます!

想像してみてください。かつて楽しんでいた趣味が今や経済的自由への切符となるのです。

そして素晴らしいことに、新しいジーンズ👖や20杯のラテ☕、または2人分のディナー💑の価格だけで手に入ります。

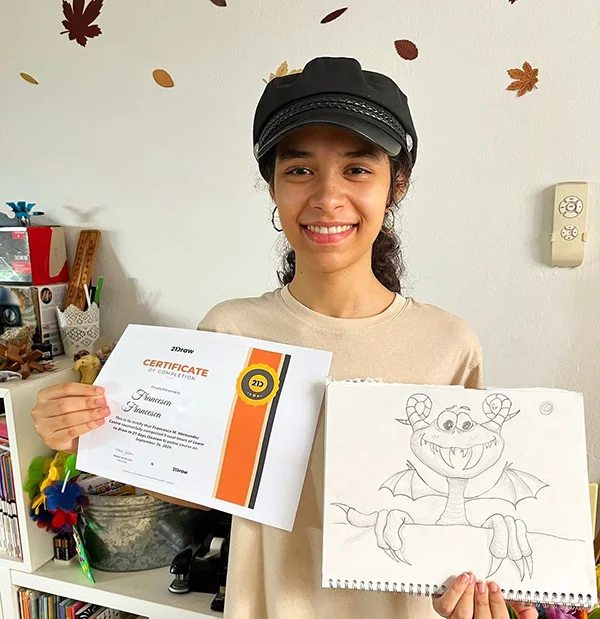
達成を祝うための証明書

各クラスを終えると、修了証を取得できます。ポートフォリオやソーシャルメディアなど、お好きな場所で共有してください。

私たちの比較方法

プレミアムクラス
シンプルでステップバイステップのシステム
認定アーティストと教師
体系的なカリキュラム
広告なしのビデオ
無駄や埋め草なし
質問に対する答えを得よう
フィードバックを得るために描いたものを提出する
コースリソース
コース修了証明書
今すぐこのお得な情報をゲット!期間限定です!
30日間返金保証!

このバンドルは誰のためにあるのか...

最近iPadとProcreateを購入し、始めたいと思っている方

Procreateの問題をすべて解決するALL in ONEバンドルをお探しですか

キャラクターデザインのスキルを向上させたい初心者

Procreateで人物画やポージング、ジェスチャードローイングを学びたい初心者

他では見られない素晴らしいProcreateのハック、ヒント、トリックをお探しですか

長年の伝統的な描画からデジタルアートに追いつくのに苦労している

たとえ経験豊富なイラストレーターでも、Procreateのスキルを次のレベルに引き上げたい方へ

Procreateを使っているけど、新しい視点が必要な方

デジタルアートスキルをプロフェッショナルにしてアートで収入を得たい人のために

キャラクターデザイン&デジタルイラストに興味のあるアーティスト

Procreateの機能と能力を深く理解し、ワークフローを最適化し、アートを向上させたいアーティスト

Procreateのレイヤー管理やブレンディングモード、ブラシの使い方など、特定の機能に興味がある方へ

よくある質問

メンバーシップには何が含まれますか?

Membership includes unlimited access to all 50+ courses taught by the world’s best artists PLUS new courses as they are released.

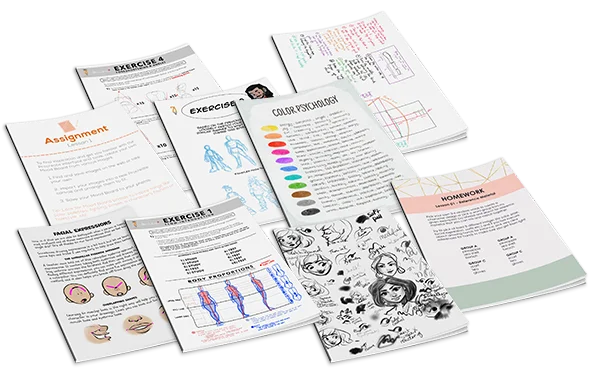
Each class includes 10-20 video lessons that are 7 minutes long on average. Most classes include exercise sheets, assignments, and layered PSD or PNG files.

Some classes include the ability to chat with the instructor in a public forum, e.g. if you want feedback on your artwork.

これらはオンラインコースですか、それともライブコースですか?

All classes are pre-recorded and you can watch them online with any digital device, anytime, and for an unlimited number of times! This means you can easily watch (and rewatch) them at your own pace and convenience.

We also have bonus live sessions that are free of charge for all our students.

コースのスキルレベルはどのくらいですか?

The classes are approachable for beginners and has advanced techniques for those with more experience.

If you have no art experience whatsover or struggle to draw a basic character, we recommend starting off by taking our 'Learn to draw in 21 days' classes.

コースは英語以外の言語でも利用可能ですか?

All classes are available in English (original narration) and most have dubbed narration in Spanish, French, Italian, German, & Portuguese.

Subtitles are available for all course in the following languages: English, Spanish, Japanese, French, German, Italian, Portuguese & Indonesian.

保証はありますか?

もちろんです!すべてのメンバーシップには30日間の満足保証があります。もし完全に満足されなかった場合は、30日以内にご連絡ください。質問なしで全額返金いたします!

21 ドロー...

21 Drawとは?

数字で見る2013年以降
  • 7万人の強力なコミュニティ
  • 40kアートブック販売
  • 10,000人のキックスターター支援者
  • KSで63万2000ドルの資金調達

私たちは2013年にスウェーデンで21 Drawを始めました。目標は、みんながより良いアーティストになる手助けをすることです!

私たちが「21ドロー」と呼ばれているのは、スタート当初は21人のアーティストを雇う予算しかなかったからです。しかし、非常に多くのアーティストが熱心に参加してくれたので、私たちはさらにアーティストを増やし、本からオンライン・コースまで、さらに多くの製品を作らずにはいられなかったのです。

私たちのゴールは、世界最高のアーティストたちと共に働き、私たちのコミュニティと皆さんが芸術的なゴールに到達するのを助けることです。私たちは、誰もが手頃な価格で素晴らしい芸術教育を受けられるようにしたいと考えています。

閉じる
年間わずかUSD $59でサインアップ! 30日間返金保証