メンバーシップを75%オフで!


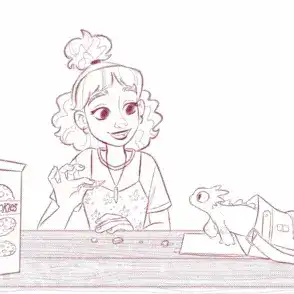
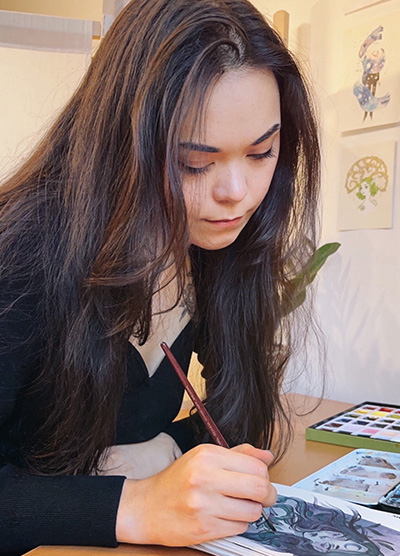
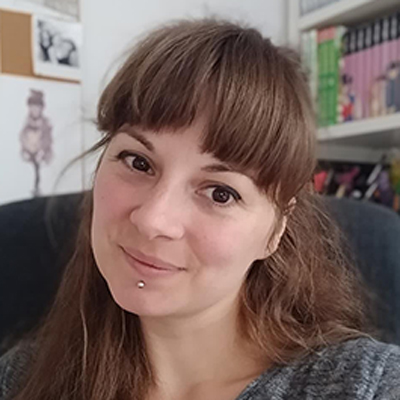
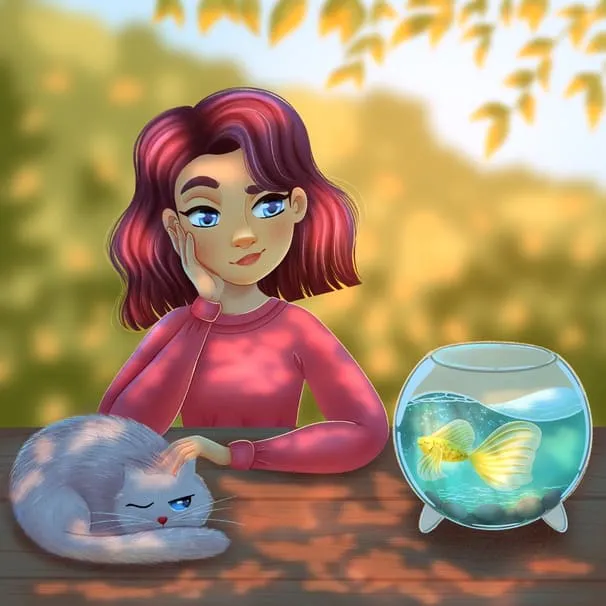
Aveline is not just an amazing comic book artist designing characters that feel real – she’s also a fantastic teacher. And a very curious one too!
She’s explored everything from drawing to pottery, always looking to try something new and make art that hits you right in the feels.
She currently works as a freelance concept artist/character designer for various clients in the field of publishing, animation, and video games.
Her clients include Simon and Schuster and Skydance Media, HarperCollins Publisher, DreamWorks Animation…
From an early age, she showed a particular interest in drawing—a natural fit, as she is highly curious and observant, but also quite sensitive. She marvels at the beauty held within the simplest of things.
Fascinated by character design and creating universes, she developed a unique dimension to her creations by studying 3D Animation at the Haute Ecole Albert Jacquard in Belgium, where she graduated in 2011.
When she’s not drawing, Aveline likes to express herself musically, by singing and playing the guitar, piano and the ukulele.
I am always trying to evolve and discover new things and challenges. My goal is to create beautiful images and atmospheres that release many different emotions.
 アーティストのポートフォリオを見る

This illustrator’s feed is a burst of joy with her colorful and cute creations. Starting in 2008, she’s carved out a space where creativity meets encouragement, making her an inspiration for budding artists everywhere.
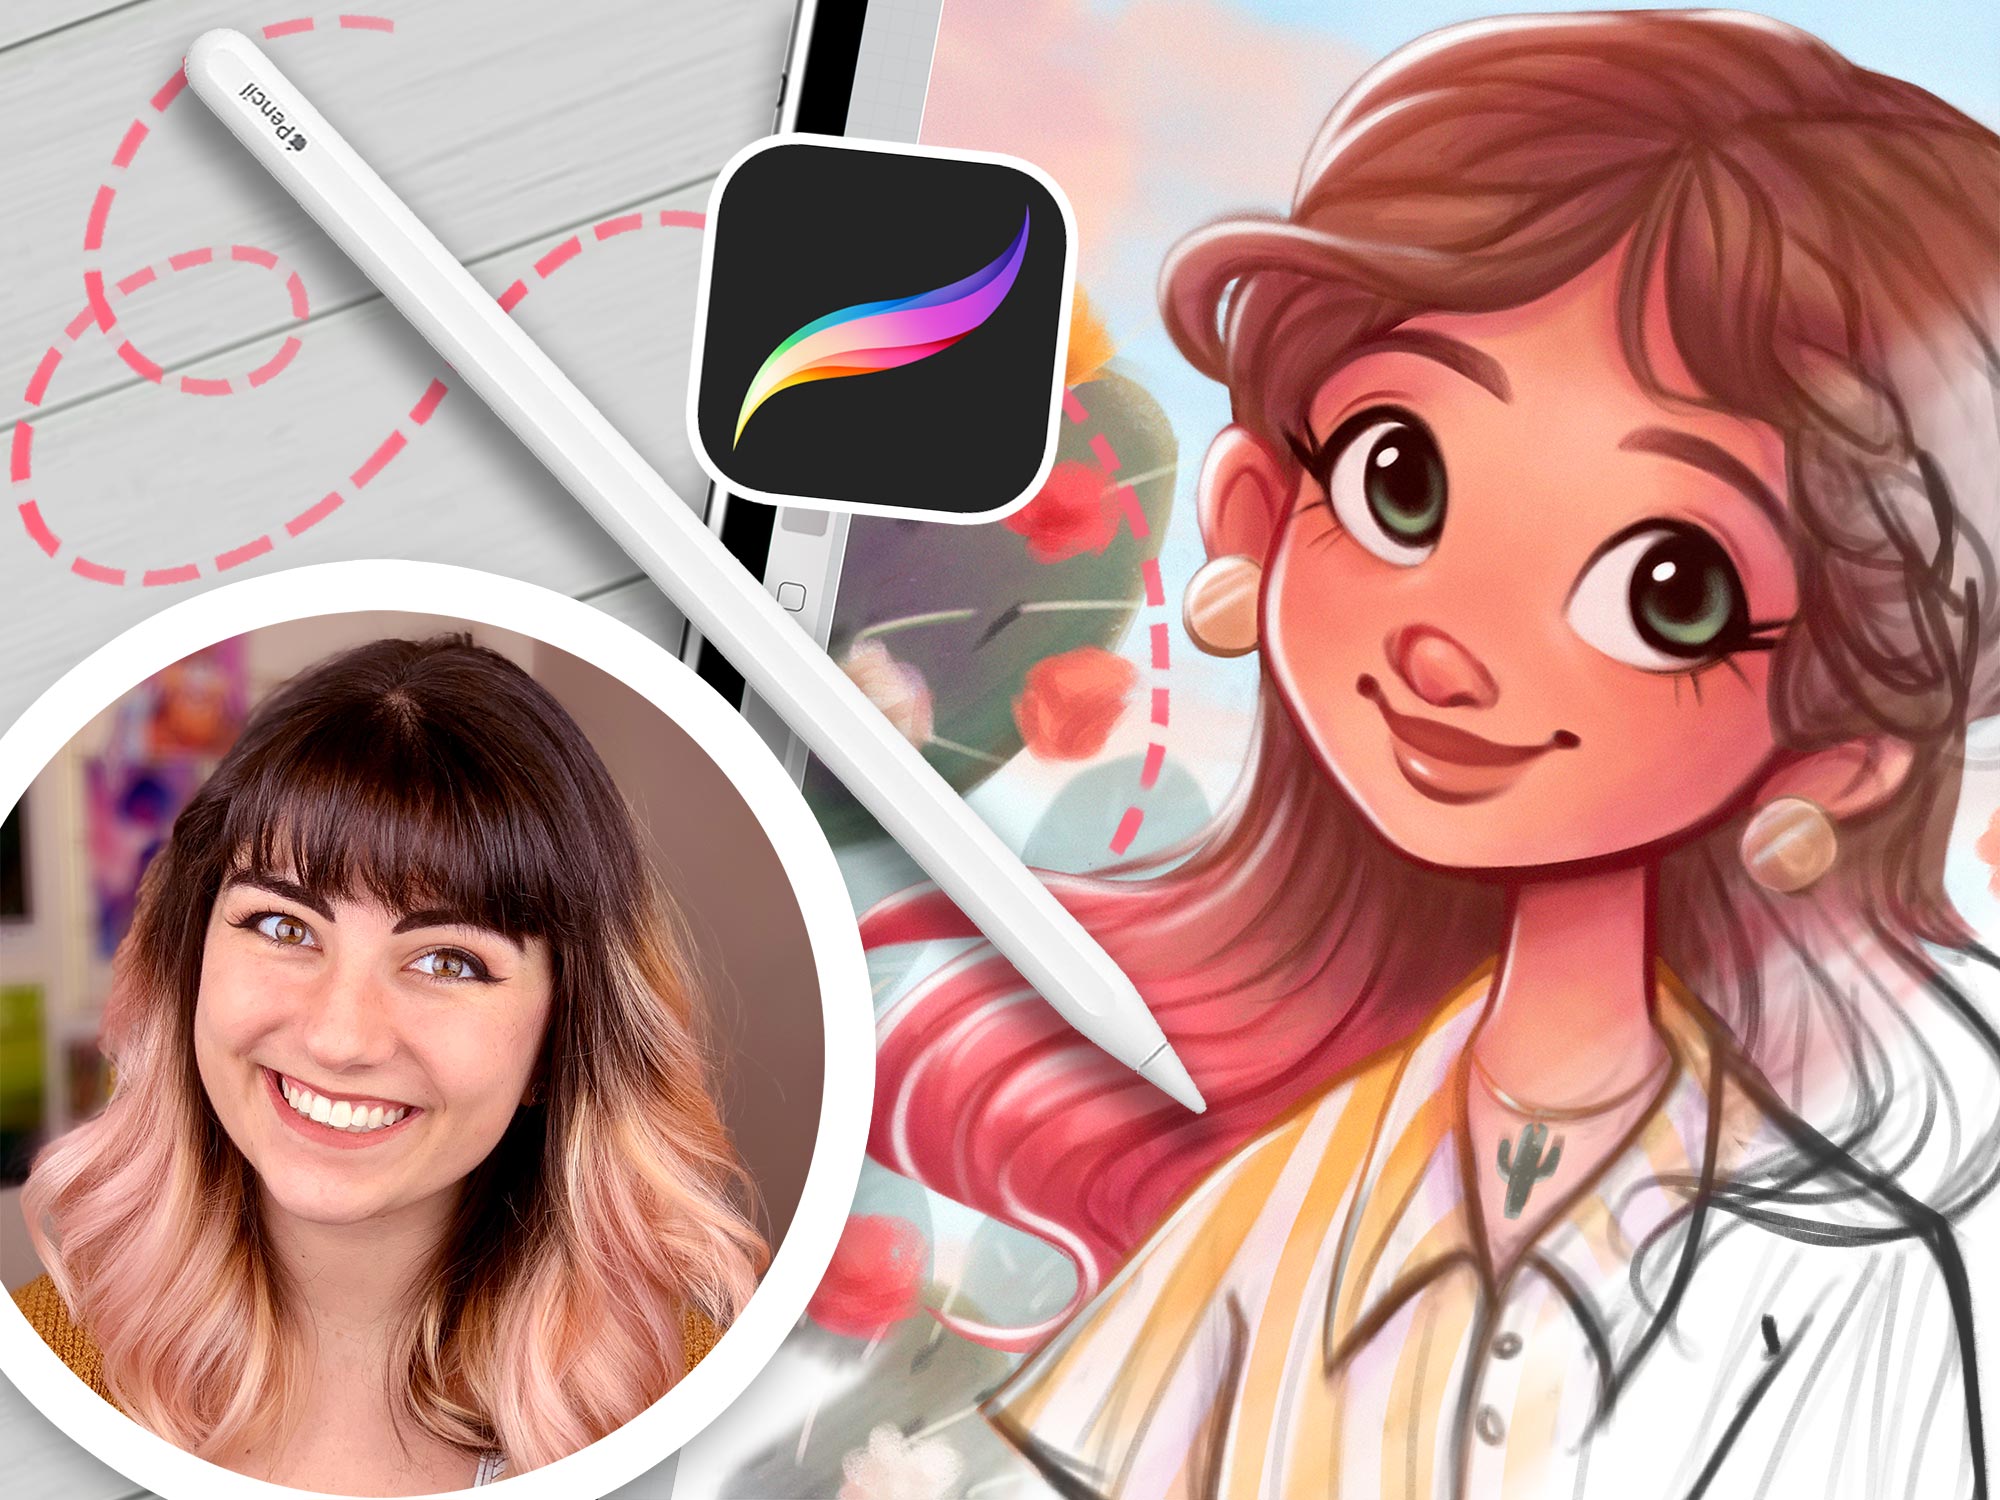
Erika Wiseman (aka Erika the Goober) is a freelance illustrator and character designer who lives in the US. She loves drawing cute, colorful things and experimenting with new drawing techniques.
Erika began teaching herself to draw digitally in 2008. Since then, she has been working with a graphics tablet and Photoshop as well as Procreate to create her digital illustrations.
In 2017, she graduated from the University of Louisville with a Bachelor in Fine Arts (with a dissertation in drawing). She made a name for herself on Instagram, which is the best place to find her art! One of her goals is to help and inspire others along their creative journey to be the best artists they can be.
Much of my inspiration comes from the things I love, the colorful worlds of video games and animated movies.
I use Photoshop CS6 and a Wacom Intuos Pro. I use an iPad Pro, Apple Pencil, and the Procreate app as well! It really just depends on how I’m feeling that day and if I want to draw at my desk or somewhere else!
My top 3 tips: Draw every day, draw from life, and study anatomy!
 アーティストのポートフォリオを見る
Dive into Feefal’s world, where cute meets the mysterious. With a palette that ranges from digital to traditional, her art is a favorite among over a million fans. If you’re into charming yet slightly spooky visuals, she’s your artist.
Linnea is a Swedish/Japanese artist with a following of over 1 million on Instagram.
She is known for creating anthropomorphized figures and cute, spooky characters.
Linnea lives in Stockholm with her Sphynx cat called Tofu. Feefal shares her art on a regular basis on Instagram, which she creates through a variety of media, such as Procreate (digital software), graphite, and gouache. She also published an art book, ‘The Art of Feefal’.
Fans know her by her unique, charming style featuring beautiful visuals and cute characters with horror/spooky elements. In her words, ‘I put my artistic soul in a blender’!
Don’t think your work has to be perfect or be afraid of your art being ugly. Art will be ugly sometimes. That’s how you get better!
The best part of creating art for me is definitely the sense of fulfillment I get putting my creative works out into the world. It’s really rewarding to see something you’ve put your soul into getting so many positive responses from people. It’s quite the rush!
I mostly get inspiration from nature, death, space, and occasionally spirituality. Space is probably my main muse. It’s just way too large for any human to quite wrap their head around, and its incomprehensible size makes it so intriguing.
 アーティストのポートフォリオを見る

From viral Disney reimaginings to Marvel collabs, this Philly-based digital artist dazzles with detailed portraits and character designs. With a passion shared through art and teaching, her creations are a must-see.
Isabelle Staub is a US-based freelance artist, specializing in vibrant digital portraits and character design with incredible attention to detail.
Isabelle started creating art at a very young age and went on to receive a BFA in Illustration at Moore College of Art and Design in Philadelphia. The culmination of dedicated work and a burning passion has propelled her to become a recognized artist worldwide.
Her popular series ‘Disney animals transformed into human characters’ went viral on social media, leading to collaborations with companies such as Marvel and MGA Entertainment.
Art has always been a love of mine from before I could remember. I pour my heart, mind, and soul into every piece I create.
Isabelle’s versatility and creative talent allowed her to work with brands such as Dynamite Comics, Wacom, TikTok, Corel Painter, and more. Teaming up with CASETiFY, she created an entire line of gorgeous device cases.
Along with creating original artwork for her clients, she also uses her social media platforms to educate others, passing on her artistic knowledge and expertise. Isabelle currently lives in Philadelphia and has two adorable cats.
Be easy on yourself! Being an artist is a journey, not a destination. Try not to compare yourself to people further along in their journey. You will get there!
 アーティストのポートフォリオを見る
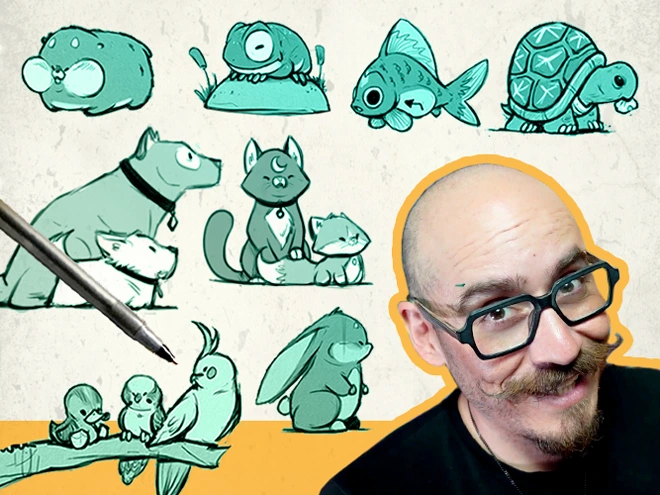
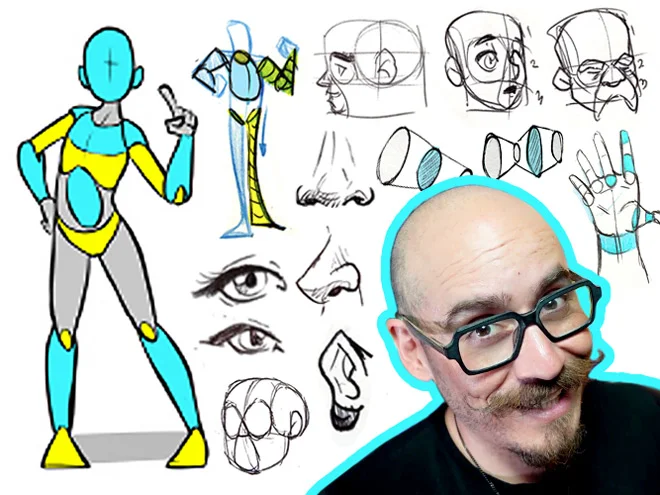
Meet “Schmoe,” your go-to artist for illustrations that breathe life into the everyday with charm and wit. Her vibrant creations, filled with humor and the realness of motherhood, are a breath of fresh air, promising a smile and a new perspective with every piece.
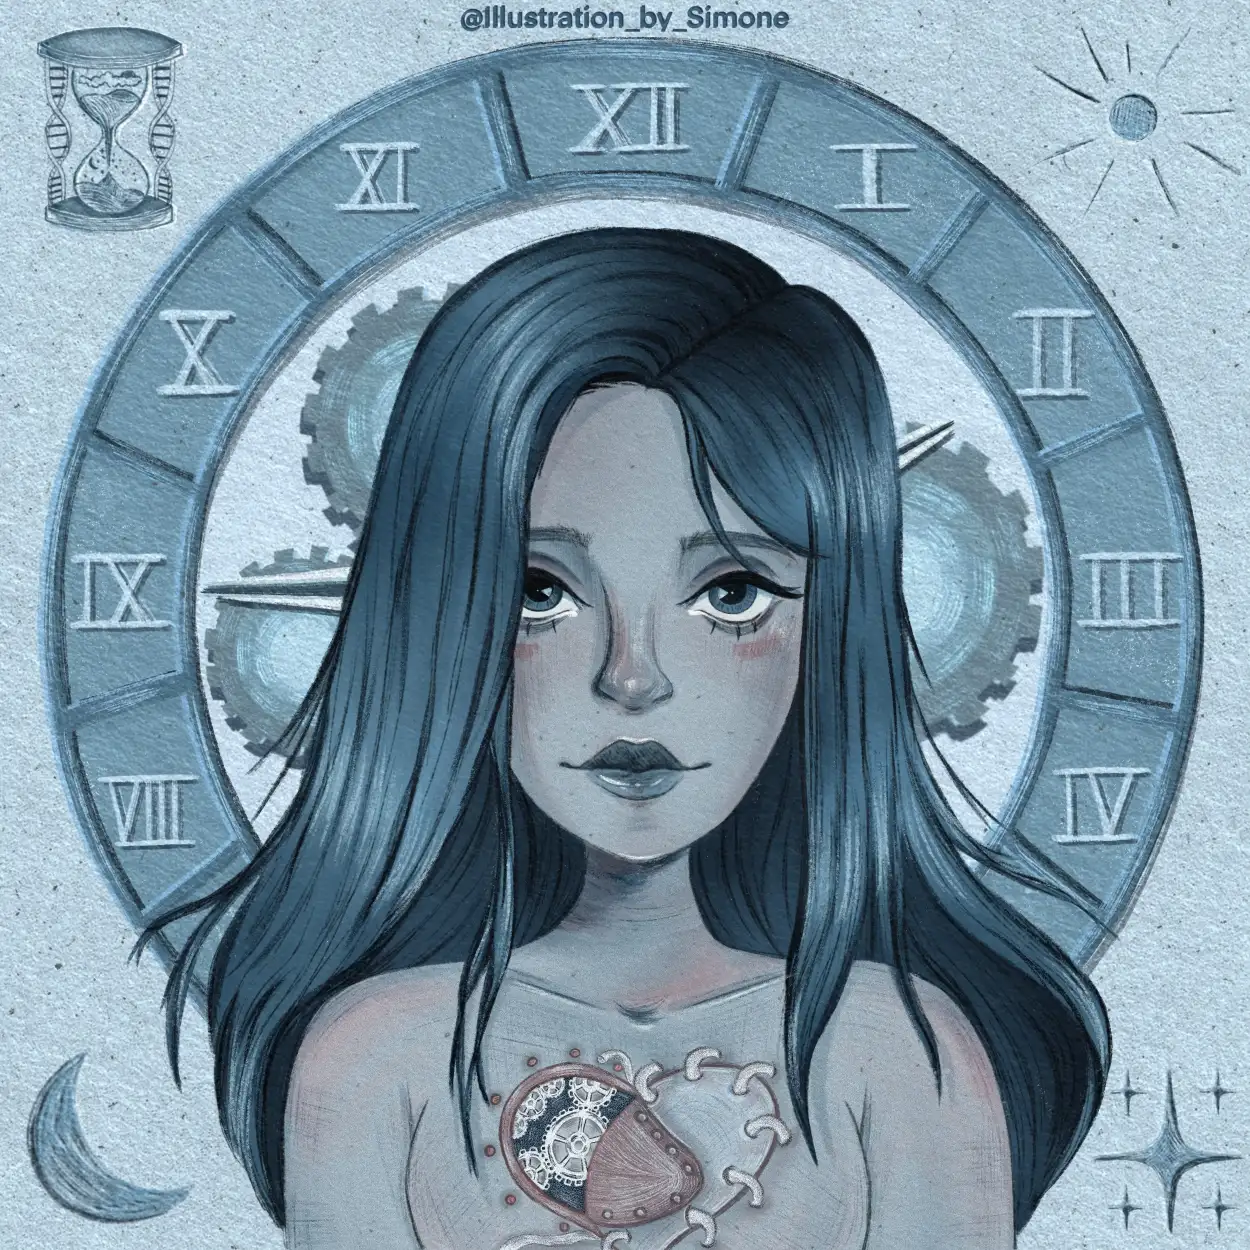
Simone Grünewald is a Visual Development artist from Germany who worked in the gaming industry for over 10 years as an art director, character designer, and 2D animator.
In addition to her commercial work, she loves creating emotive, dynamic designs that document her life, including the experiences of motherhood. Having followed the creative path all her life, Simone has a wealth of knowledge in traditional and digital art.
She shares beautiful, entertaining artwork as well as insights and tips with her followers on social media and is known for her humorous characters and everyday themes. Simone is also the author of Draw What You Love and Sketch Every Day.
 アーティストのポートフォリオを見る

 アーティストのポートフォリオを見る
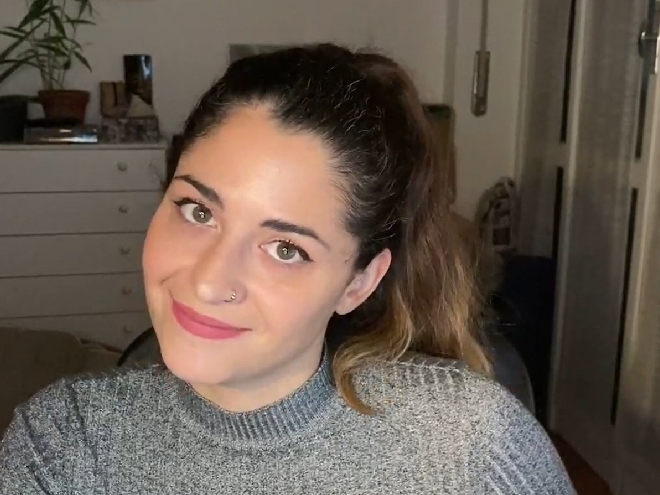
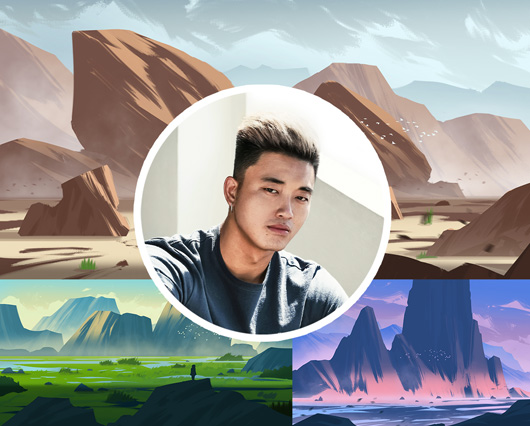
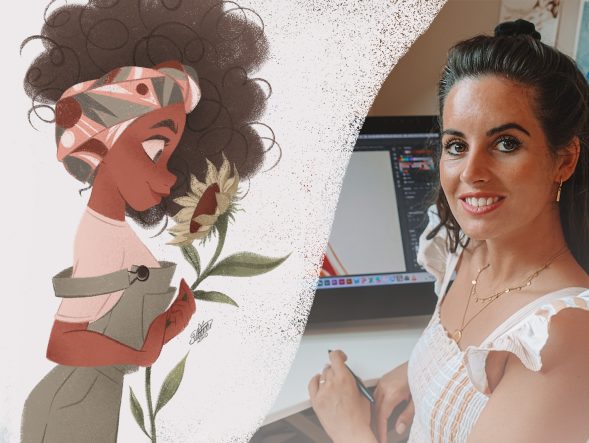
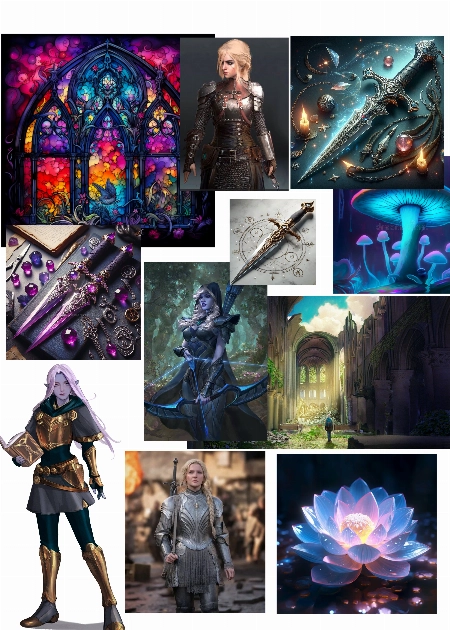
ビデオゲームから絵本に至るまで、このイタリアのアーティストは鮮やかなイラストで物語を命を吹き込みます。彼女の多様なプロジェクトは世界中の心をつかみ、魅力的な物語性のあるアートを創り出す才能を示しています。
 1つの課題
1つの課題
アーティストのポートフォリオを見る
Lauren transforms pets into digital art in Procreate, enchanting with her ‘Coffeedraws’ and humorous animal cartoons. Her collaborations with Disney and Mattel, paired with co-hosting MerMay, spotlight her as a beacon of creativity and fun in character design.
Lauren is a character designer based in Charlotte, NC, known for creating ‘Coffeedraws’, being a co-host of MerMay on Instagram and for her comical cartoons of animals and people.
Lauren Barger, Character Designer & Illustrator
Lauren attended Herron School of Art and Design, where she pursued a BFA with a focus on illustration.
In 2019, she opened her company, LB Fine Art, producing mainly portrait artwork on commission both traditionally, using watercolors and colored pencils, and digitally.
She has gone on to work in visual development and character design with notable companies in the animation and toy industries, including Sony, Disney, Pixelle Studio, and Mattel.
Lauren is also a co-host and partner of MerMay, a social media drawing contest founded by Disney animation veteran, Tom Bancroft.
I am passionate about visual development and character design and love making my audience laugh and smile through my artwork!
Lauren is known for her engaging illustration projects, such as the ‘Animal Butt’ watercolor series, ‘Coffeedraws’ series, and ‘Pets to People’ series.
‘Coffeedraws’ is an interactive social media series that ran for 200 consecutive days, generating a strong following on Instagram. This series has been a highlight of Lauren’s artistic journey and a delightful way to interact with her followers.
I create fun art, or “F-ART” as I call it. I am a F-ART maker!
 アーティストのポートフォリオを見る

私にとってアートを作ることの最高の部分は、自分の創造的な作品を世に出すことで得られる達成感です。自分の魂を込めた作品がたくさんの人から良い反応を受けるのは本当に報われる瞬間です。それはかなりの高揚感です!

Get ready for an exciting adventure and discover how amazing you can be as a digital artist! Start now! 🚀


I recently completed the course and I'm really happy with it. Helped me improve on my time and Layer management easily. would love to get some feedback to see in what parts I could improve o... もっと見るn.
Hello Quinn,
Congratulations on finishing the course! I’m happy that it helped you out.
Your submission is absolutely stunning! I can see that you’ve put a lot of work into it and we can appreciate all the intricate details you’ve included in the design of your character.
Overall, I think you’ve executed on all the teachings of the course well and you’re definitely ready for a more advanced course. With that said, here is some more advanced feedback that would be outside the scope of this course:
Perspective of Leaves
Neck & Collarbone
With that said, I think you did an amazing job. I hope this was helpful and all the best with your future illustrations!
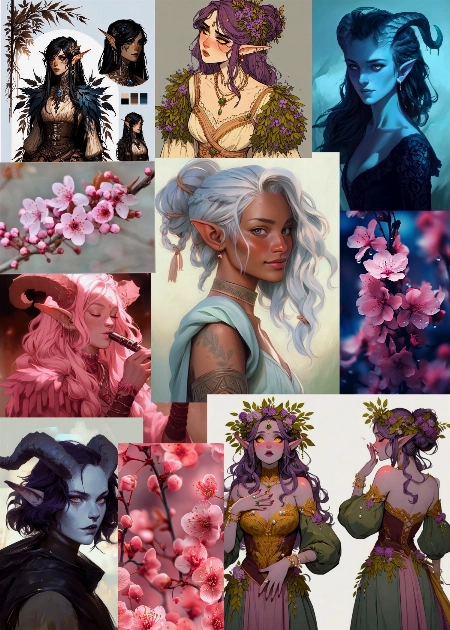
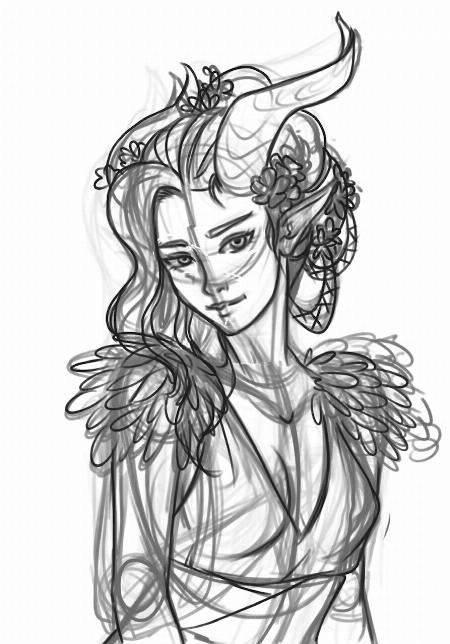
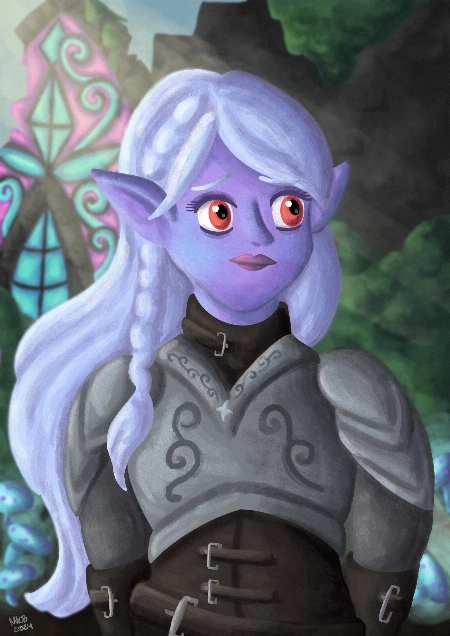
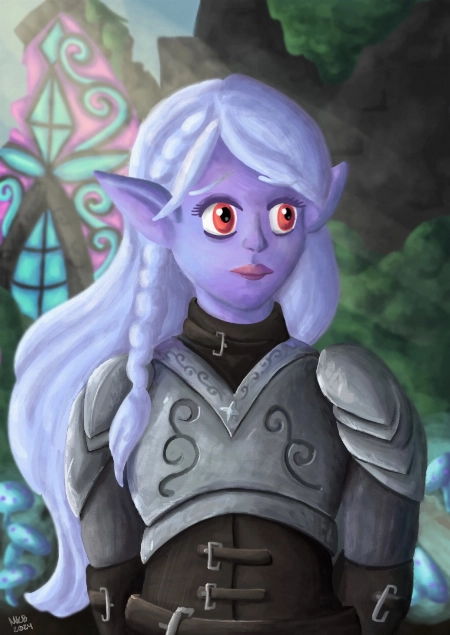
Thanks for the course, I learned a lot! Attached is my mood board and the final piece. For this course I decided to draw a dark elf character I’ve been coming up with. I had a lot of fun m... もっと見るaking this but would appreciate any feedback on how to make it better :)
Hi Morgan!
Thanks for your submission and sorry for the delayed response. I’m happy to hear that you got a lot out of the course. First of all, I think you utilized the references and the moodboard wonderfully. Your final designs of your character as well as the environment are cohesive as a result. The colors you used also go a long way in conveying the mysterious and magical feeling of your illustration.
With that said, let me point out some areas with room for improvement.
Symmetry
I noticed that some of the facial features and the torso of your character aren’t symmetrical. I recommend the use of guidelines during your drawing phase to help you put elements in the right place and have them be properly aligned.
While you’re drawing, you should also flip your canvas horizontally from time to time as it helps you spot errors more easily. Once you’ve identified something that’s asymmetrical or warped in an undesirable way, you can redraw that section or use the liquify tool to correct it.
Armor
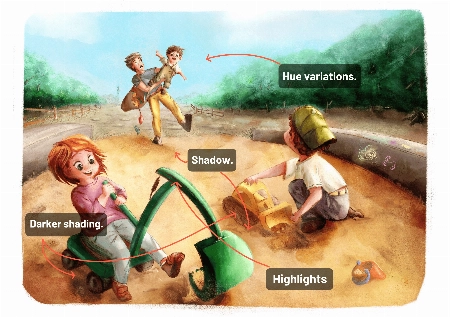
The design of the armor looks great. I like its curved edges and the ornate etchings. Where I think there is room to improve is in the rendering of the material – in this case, metal. Metal can be tricky to paint. It is a reflective material, so make sure you keep it high contrast. Highlights should be bright and shadows should be dark.
In addition to that, try to avoid soft edges as they can make the armor appear “mushy”. Use hard and distinct edges especially where there is overlap between two or more layers of metal.
Overall, I think you did an excellent job. I forgot to point out that you also did great for the background. I hope this feedback helps and good luck for your future illustrations!

I'm very new to procreate, and I like drawing cute frogs. It was fun to learn so many features in procreate, I look forward to drawing more things in procreate and incorporate more of the th... もっと見るings included in the course. I can definitely see an improvement in how I color and the layering really helped.
Hello Yazmary,
I’m glad that you’re learning a lot from the course about using Procreate. Procreate has such powerful tools that many of us can benefit from if only we knew how to use them!
And what a lovely illustration this is. It’s giving such cozy vibes and I also really like the complementary color palette you used for this.
Best of luck with your future drawings and keep drawing!
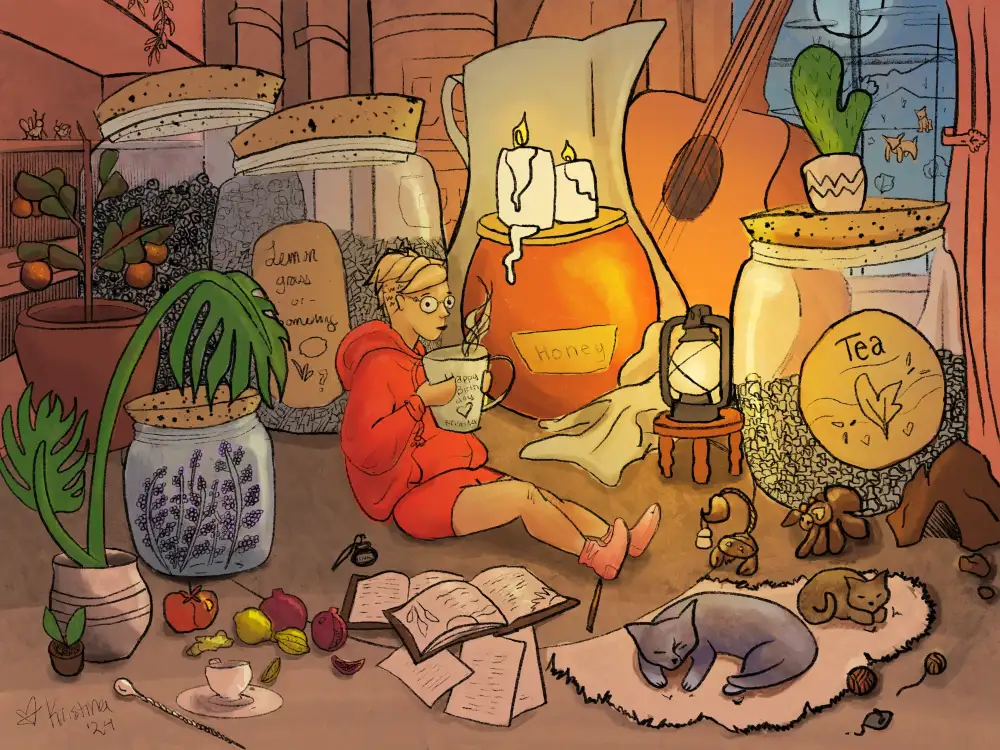
Fantastic course! I tried to follow Simone's directions in my illustration, from blocking in to choosing brushes to handling shadows and lighting. I would be enormously pleased if I could ge... もっと見るt some feedback so that I can improve my next illustrations. Thank you very much Gabriella
Hi Gabriella!
Apologies for the delay in getting back to you!
We're delighted to know you enjoyed the course and found it useful! You did an amazing job on this illustration. I'm a huge fan of the style and your composition skills are impeccable!
Following, you can find a couple of suggestions you can look into for your next illustration, as well as an example attached to this message:
You can find more explanations in the attached pictures. Don't hesitate to ask if you have any question!
Keep up the good work and have a great day!

I’m following along on this course, but I feel like I’m “stuck” and I’m not sure what to do to improve. I feel like my painting is very flat and I’m struggling with colors. Also,... もっと見る it seems very “blocky’, and I’m struggling to get a fluid, painterly look. Can anyone provide me some guidance? Unfinished painting attached>

Hi Andrew!
Thank you very much for sharing your painting with us! The proportions of your portraits are on point and I can tell you've applied all of the teacher's advice very well! Here are a few suggestions to help you with your problem:
You can refer to the attached images for reference! Have a great day and don't hesitate to ask if you have any questions!


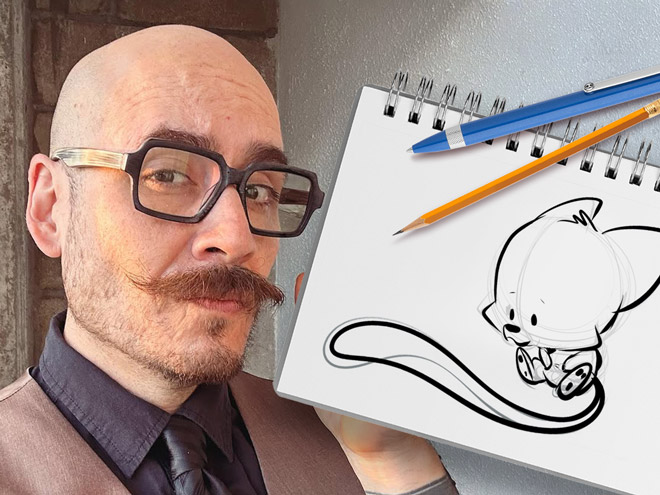
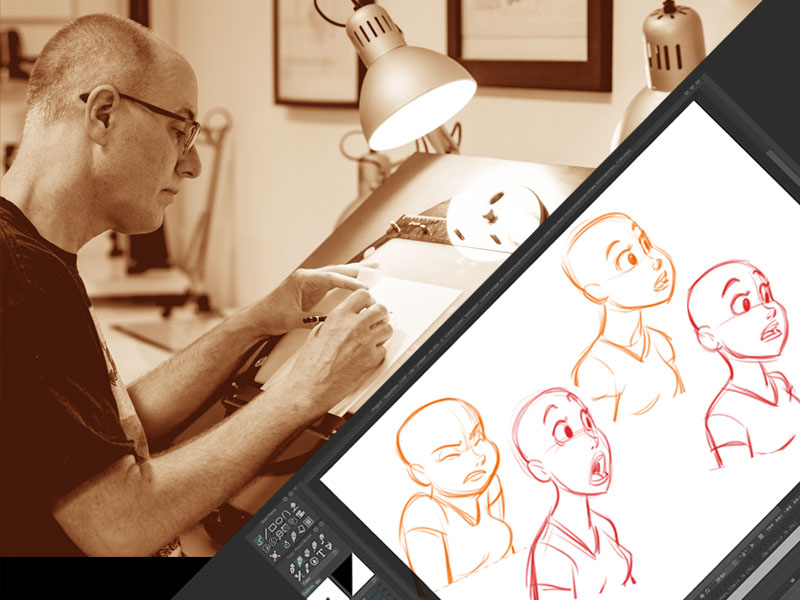
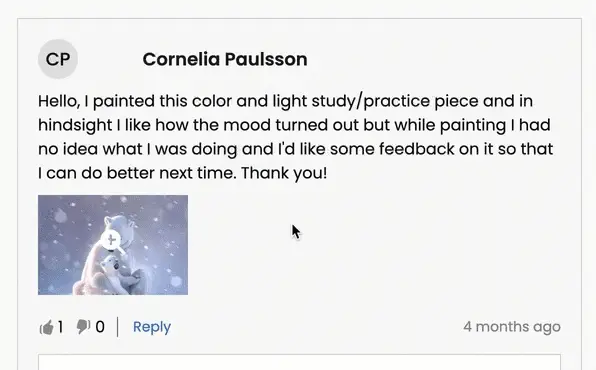
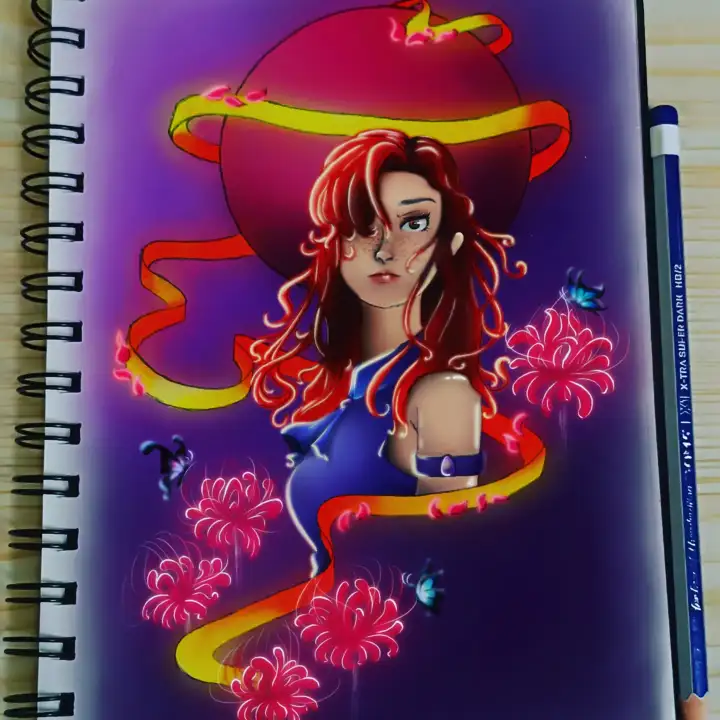
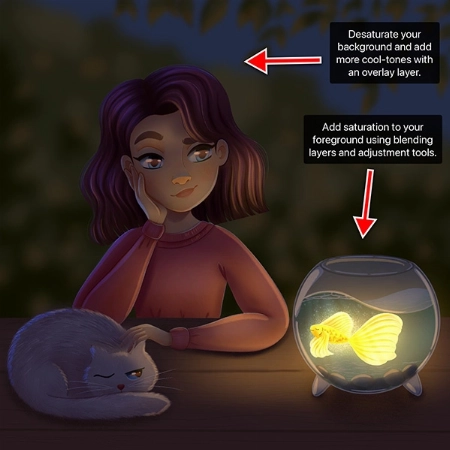
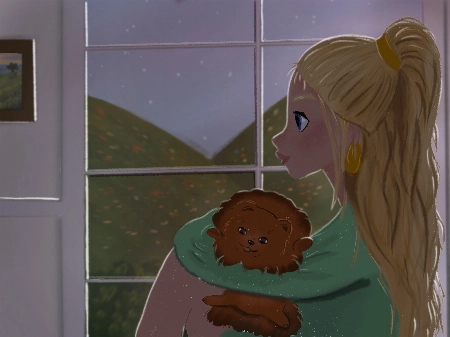
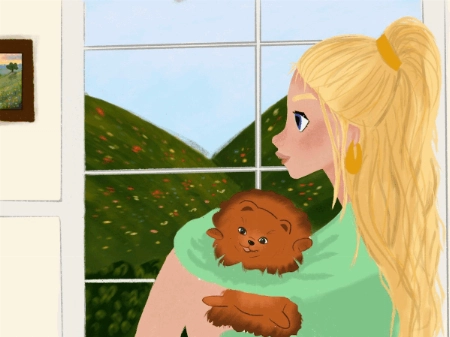
Hello, I finished the Aveline’s course and would like to get some feedback how I can improve my illustrations.. I am not completely satisfied with my work so hope your feedback can help.. ... もっと見るThank you.

Hey Alisa! I love your work, you have done an amazing job of following along with Aveline's assignments :)
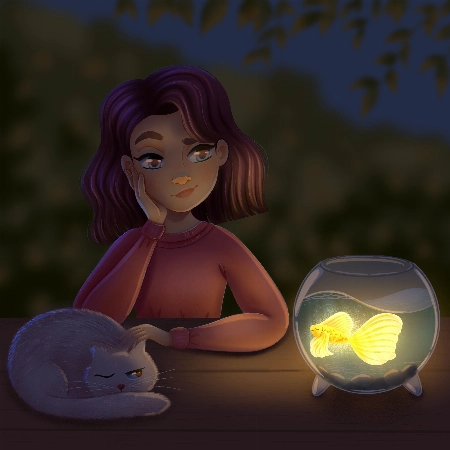
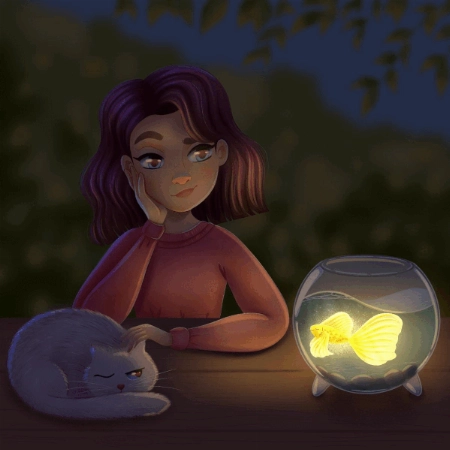
To keep your feedback simple, I have chosen to refer to your night-time lighting scenario. Check out the tips and images I have attached below, I hope they help :)
I have attached some images with tips and edits to help guide you through this process. Let me know if you have any questions :)
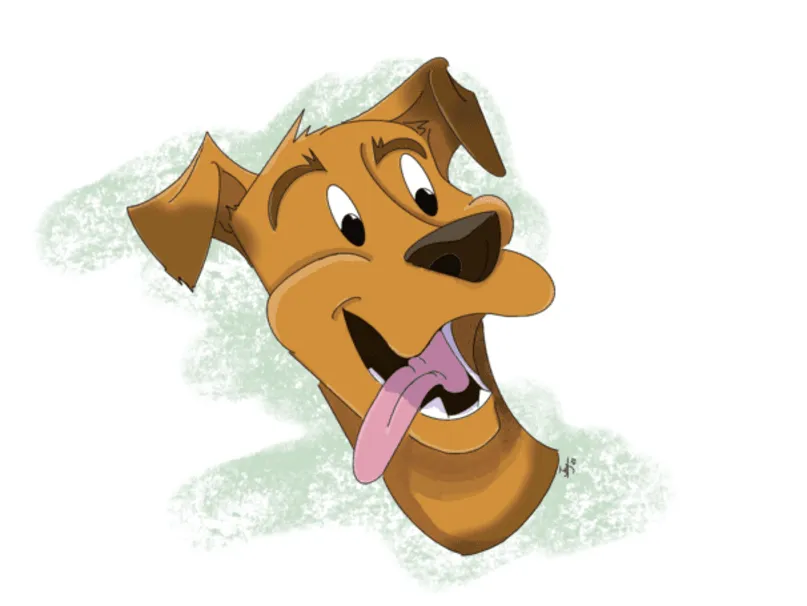
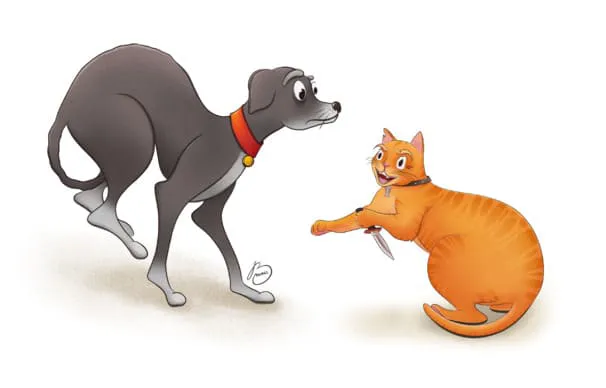
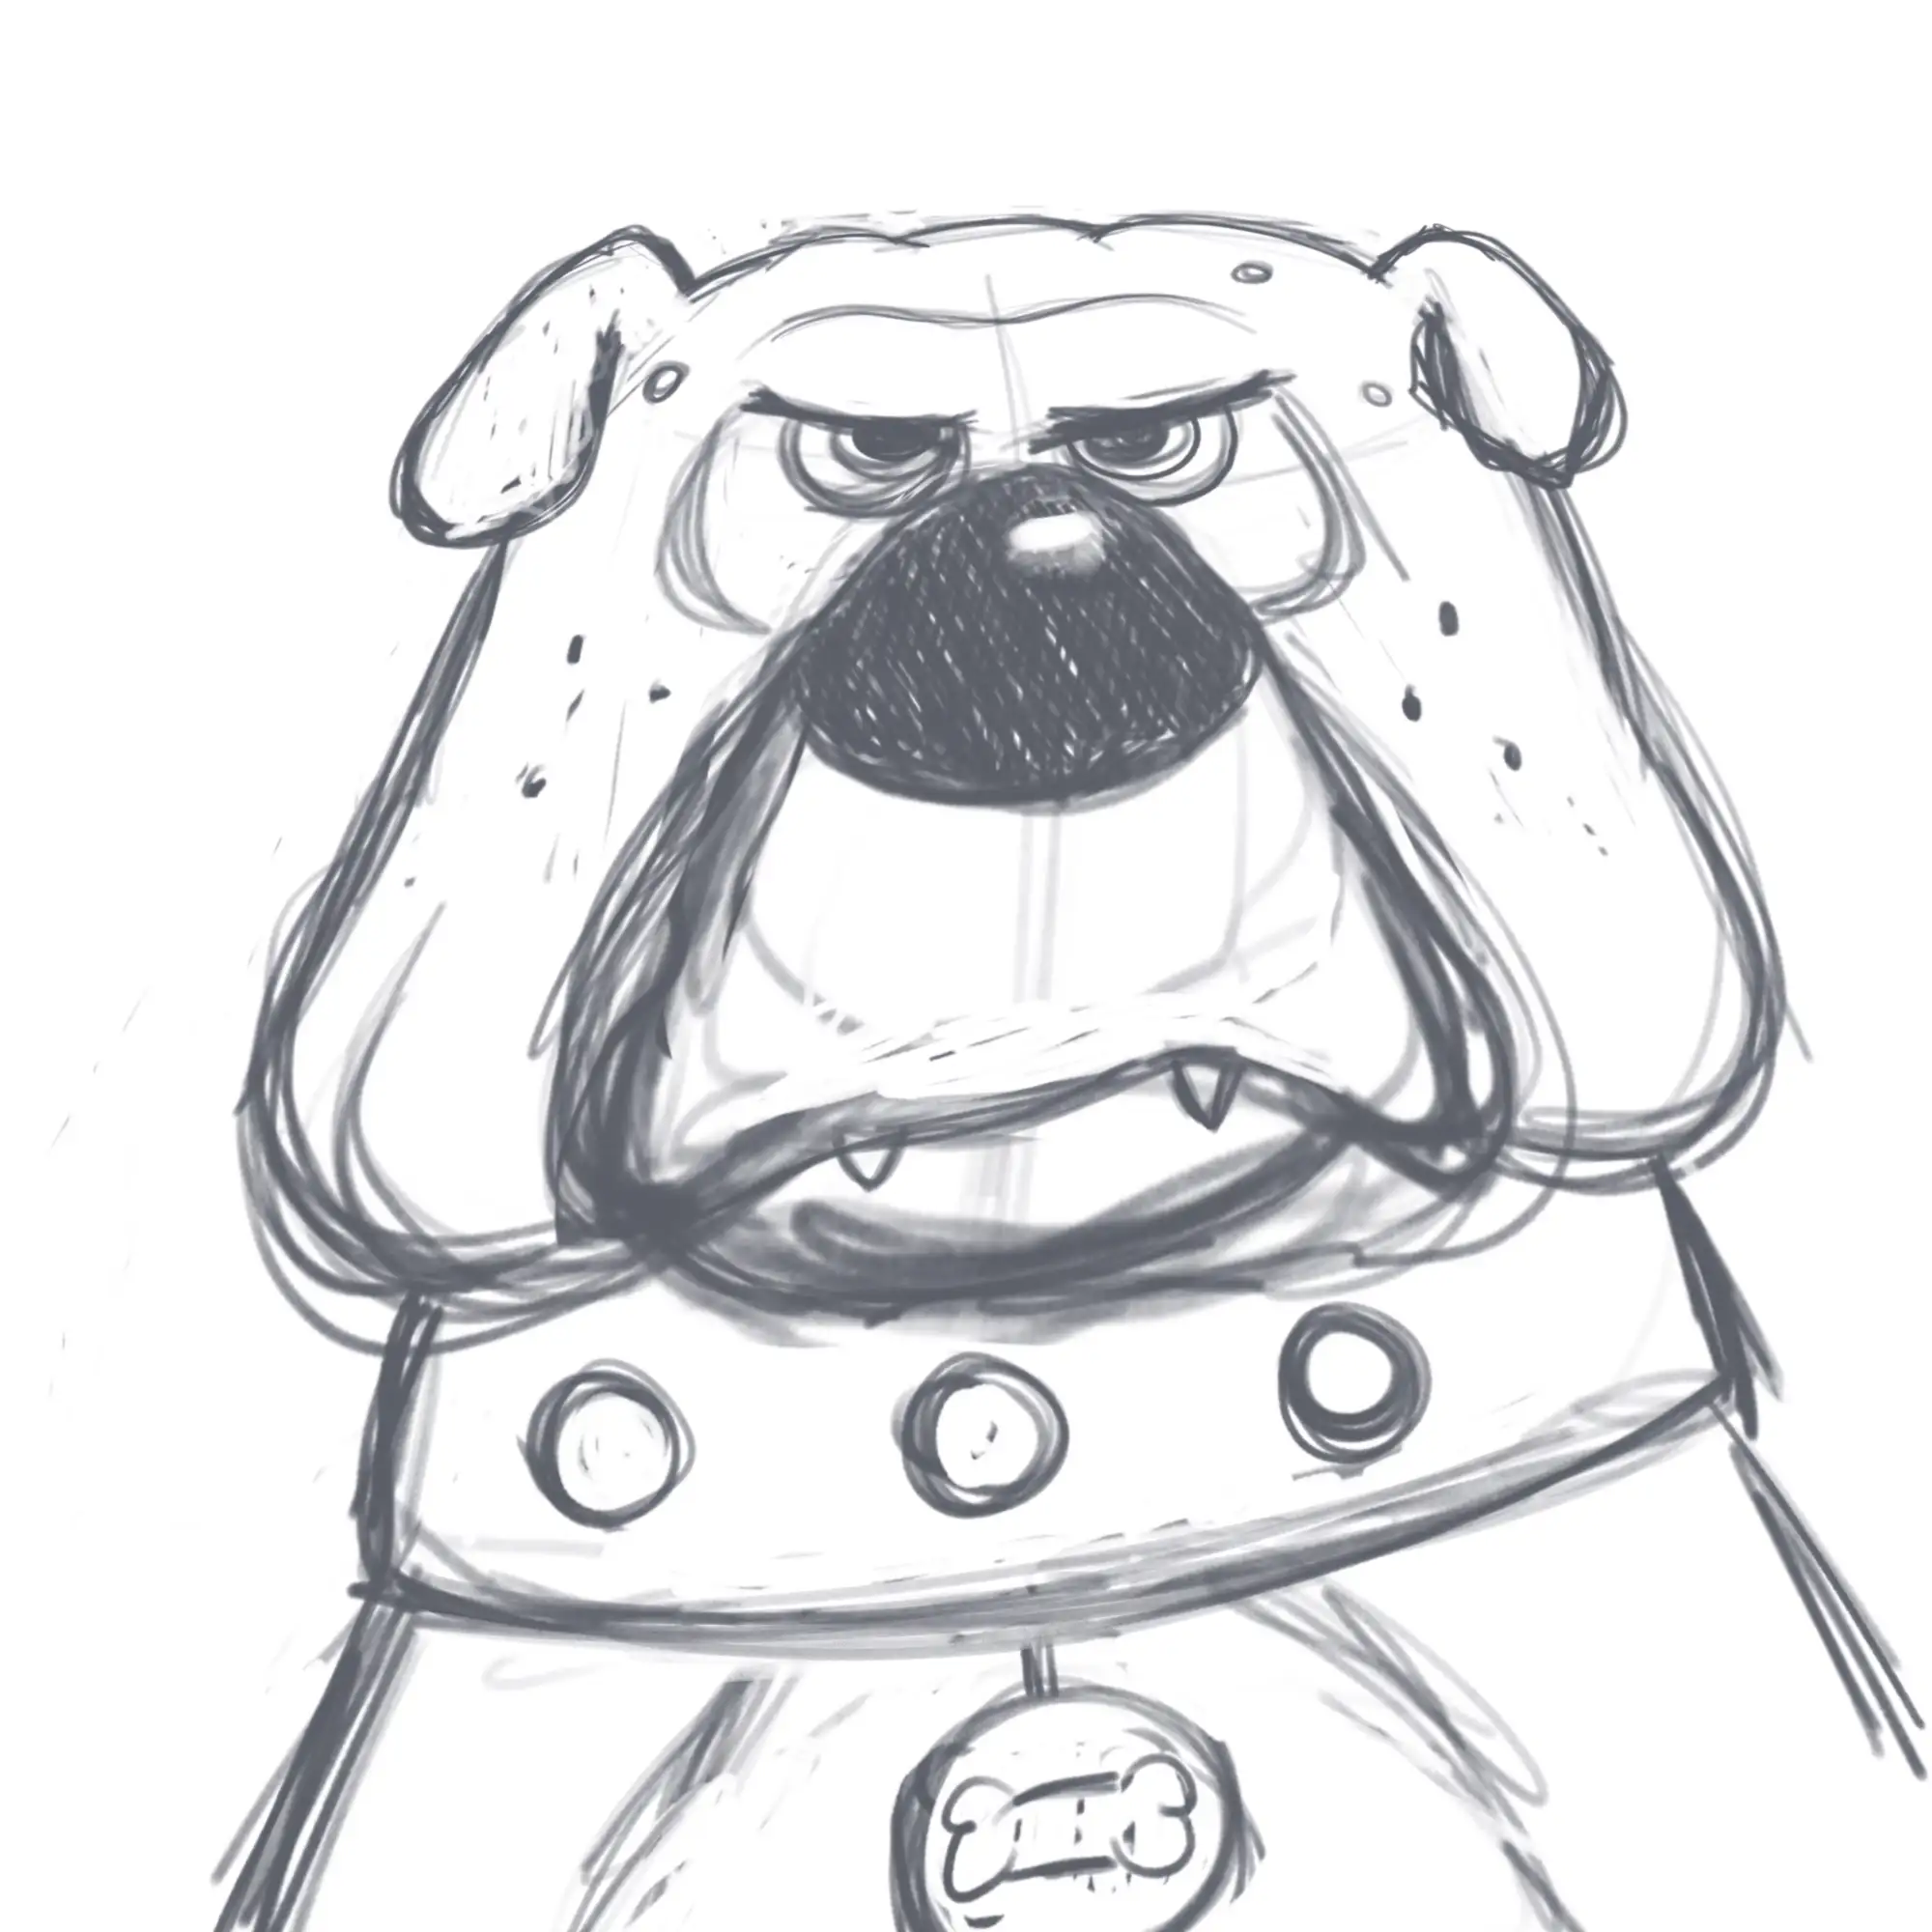
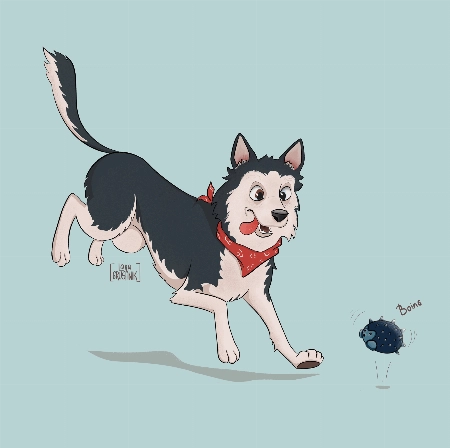
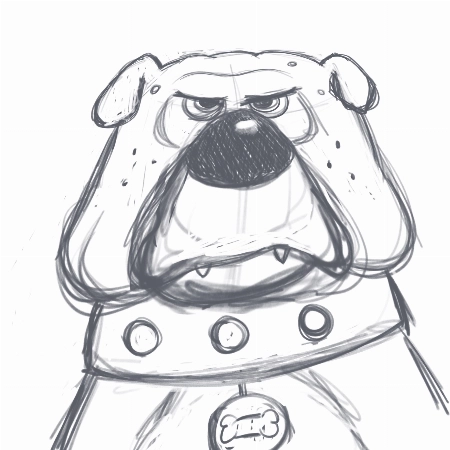
Do much focus on the eyes and not enough focus a the rest of the art. Still the face is not quite right ( used a reference feature) but really learned a lot from class.
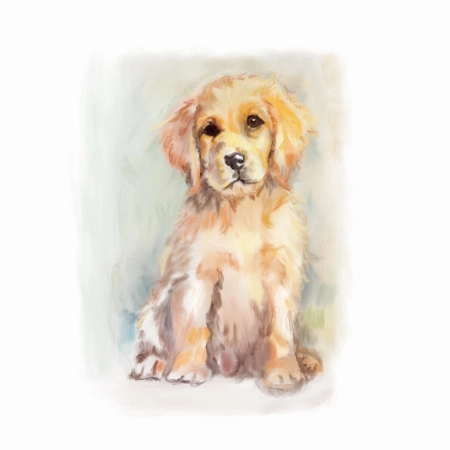
Hello Berna,
Thanks for submitting this wonderful painting. I think the loose painting style works great and the extra detail around the face compared to the rest of the body does a good job at focusing the viewer’s attention.
I do notice that the dog’s face seems a little off. Sometimes it can be hard to tell which part of the painting needs to be worked on. Two tools I can suggest for checking your painting/drawing are:
You can place a guideline on a separate layer to make sure the facial features you draw are symmetrical.
Procreate allows you to flip the canvas horizontally. By occasionally flipping the canvas, it allows you to “reset” your perception of your painting, and it will be easier to spot your errors while painting or drawing. Try it out on this one and it should be easy to see where and what needs fixing!
I know that for painterly styles like this, it can be hard to make changes without essentially re-painting a section again. Procreate has a built-in Liquify tool that is perfect for situations like this. You can use the liquify brush to push or nudge your painting around until it is correct.
I hope this helps and I’m glad that you learned a lot from this class. Good luck with your future art pieces!

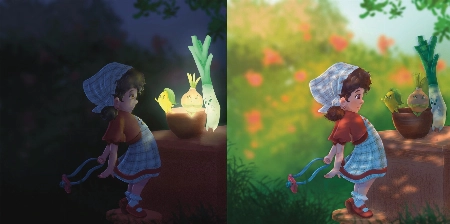
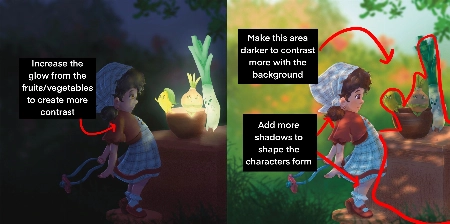
Hello Aveline, I congratulate you on your art and I follow your art with enthusiasm. I would also like to thank you for meeting us on such a occasion. I am adding my works and waiting for yo... もっと見るur comment :)

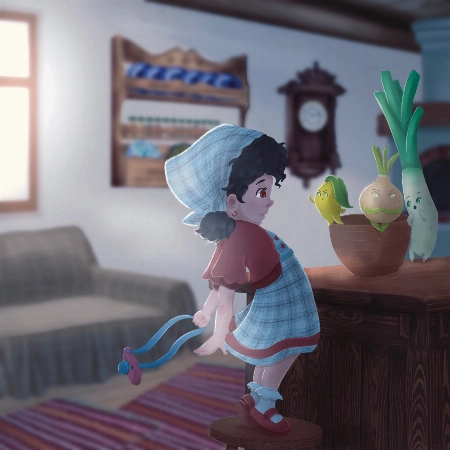
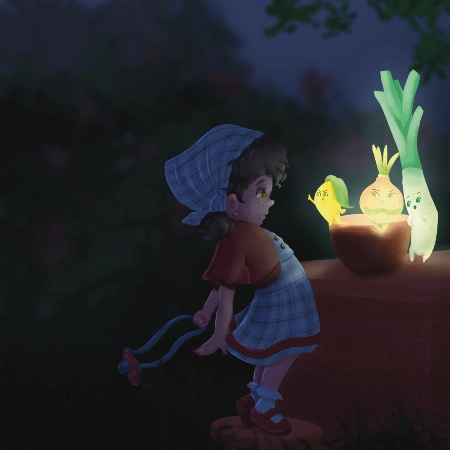
Hi Nida!
Wow, you did such a great job of applying the techniques from this course! I love that you've put your own characters into the scenes as well! I only have a few small notes for you.
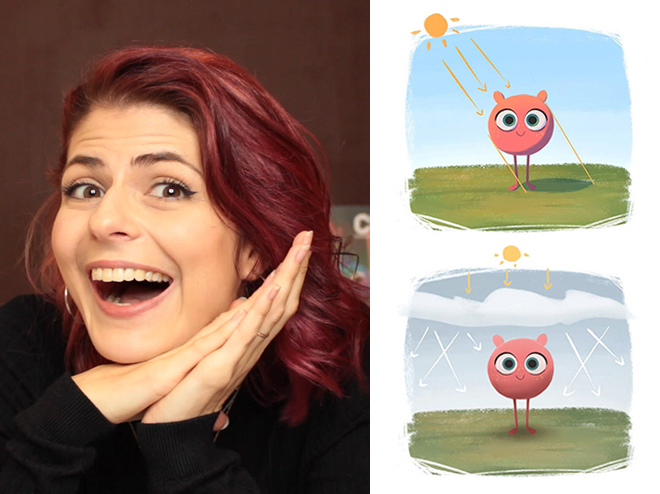
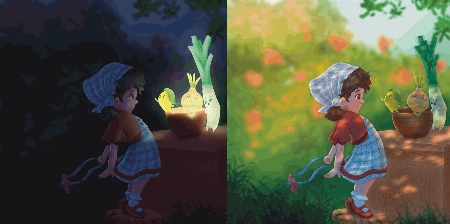
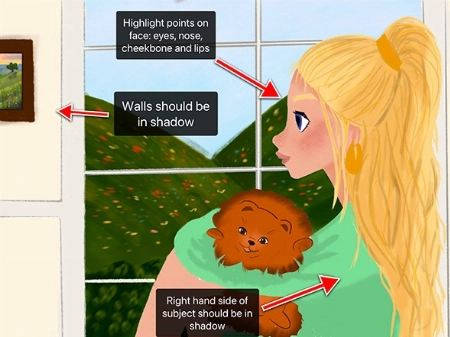
For the Night Scene:
Increase the glow in the night scene! Use a soft brush to lighten that part of the scene (I used a light yellow with a soft-light layer setting)
Add more highlights/rim lighting on the night scene as well. Make sure you have lots of contrast and really make the most of the fun lighting!
For the Day Scene:
*Add a few extra shadows to reflect the size of the skirt/around the skirt to imply more 3D form
You've done such a fantastic job with these, and they're honestly great the way they are! Well done!
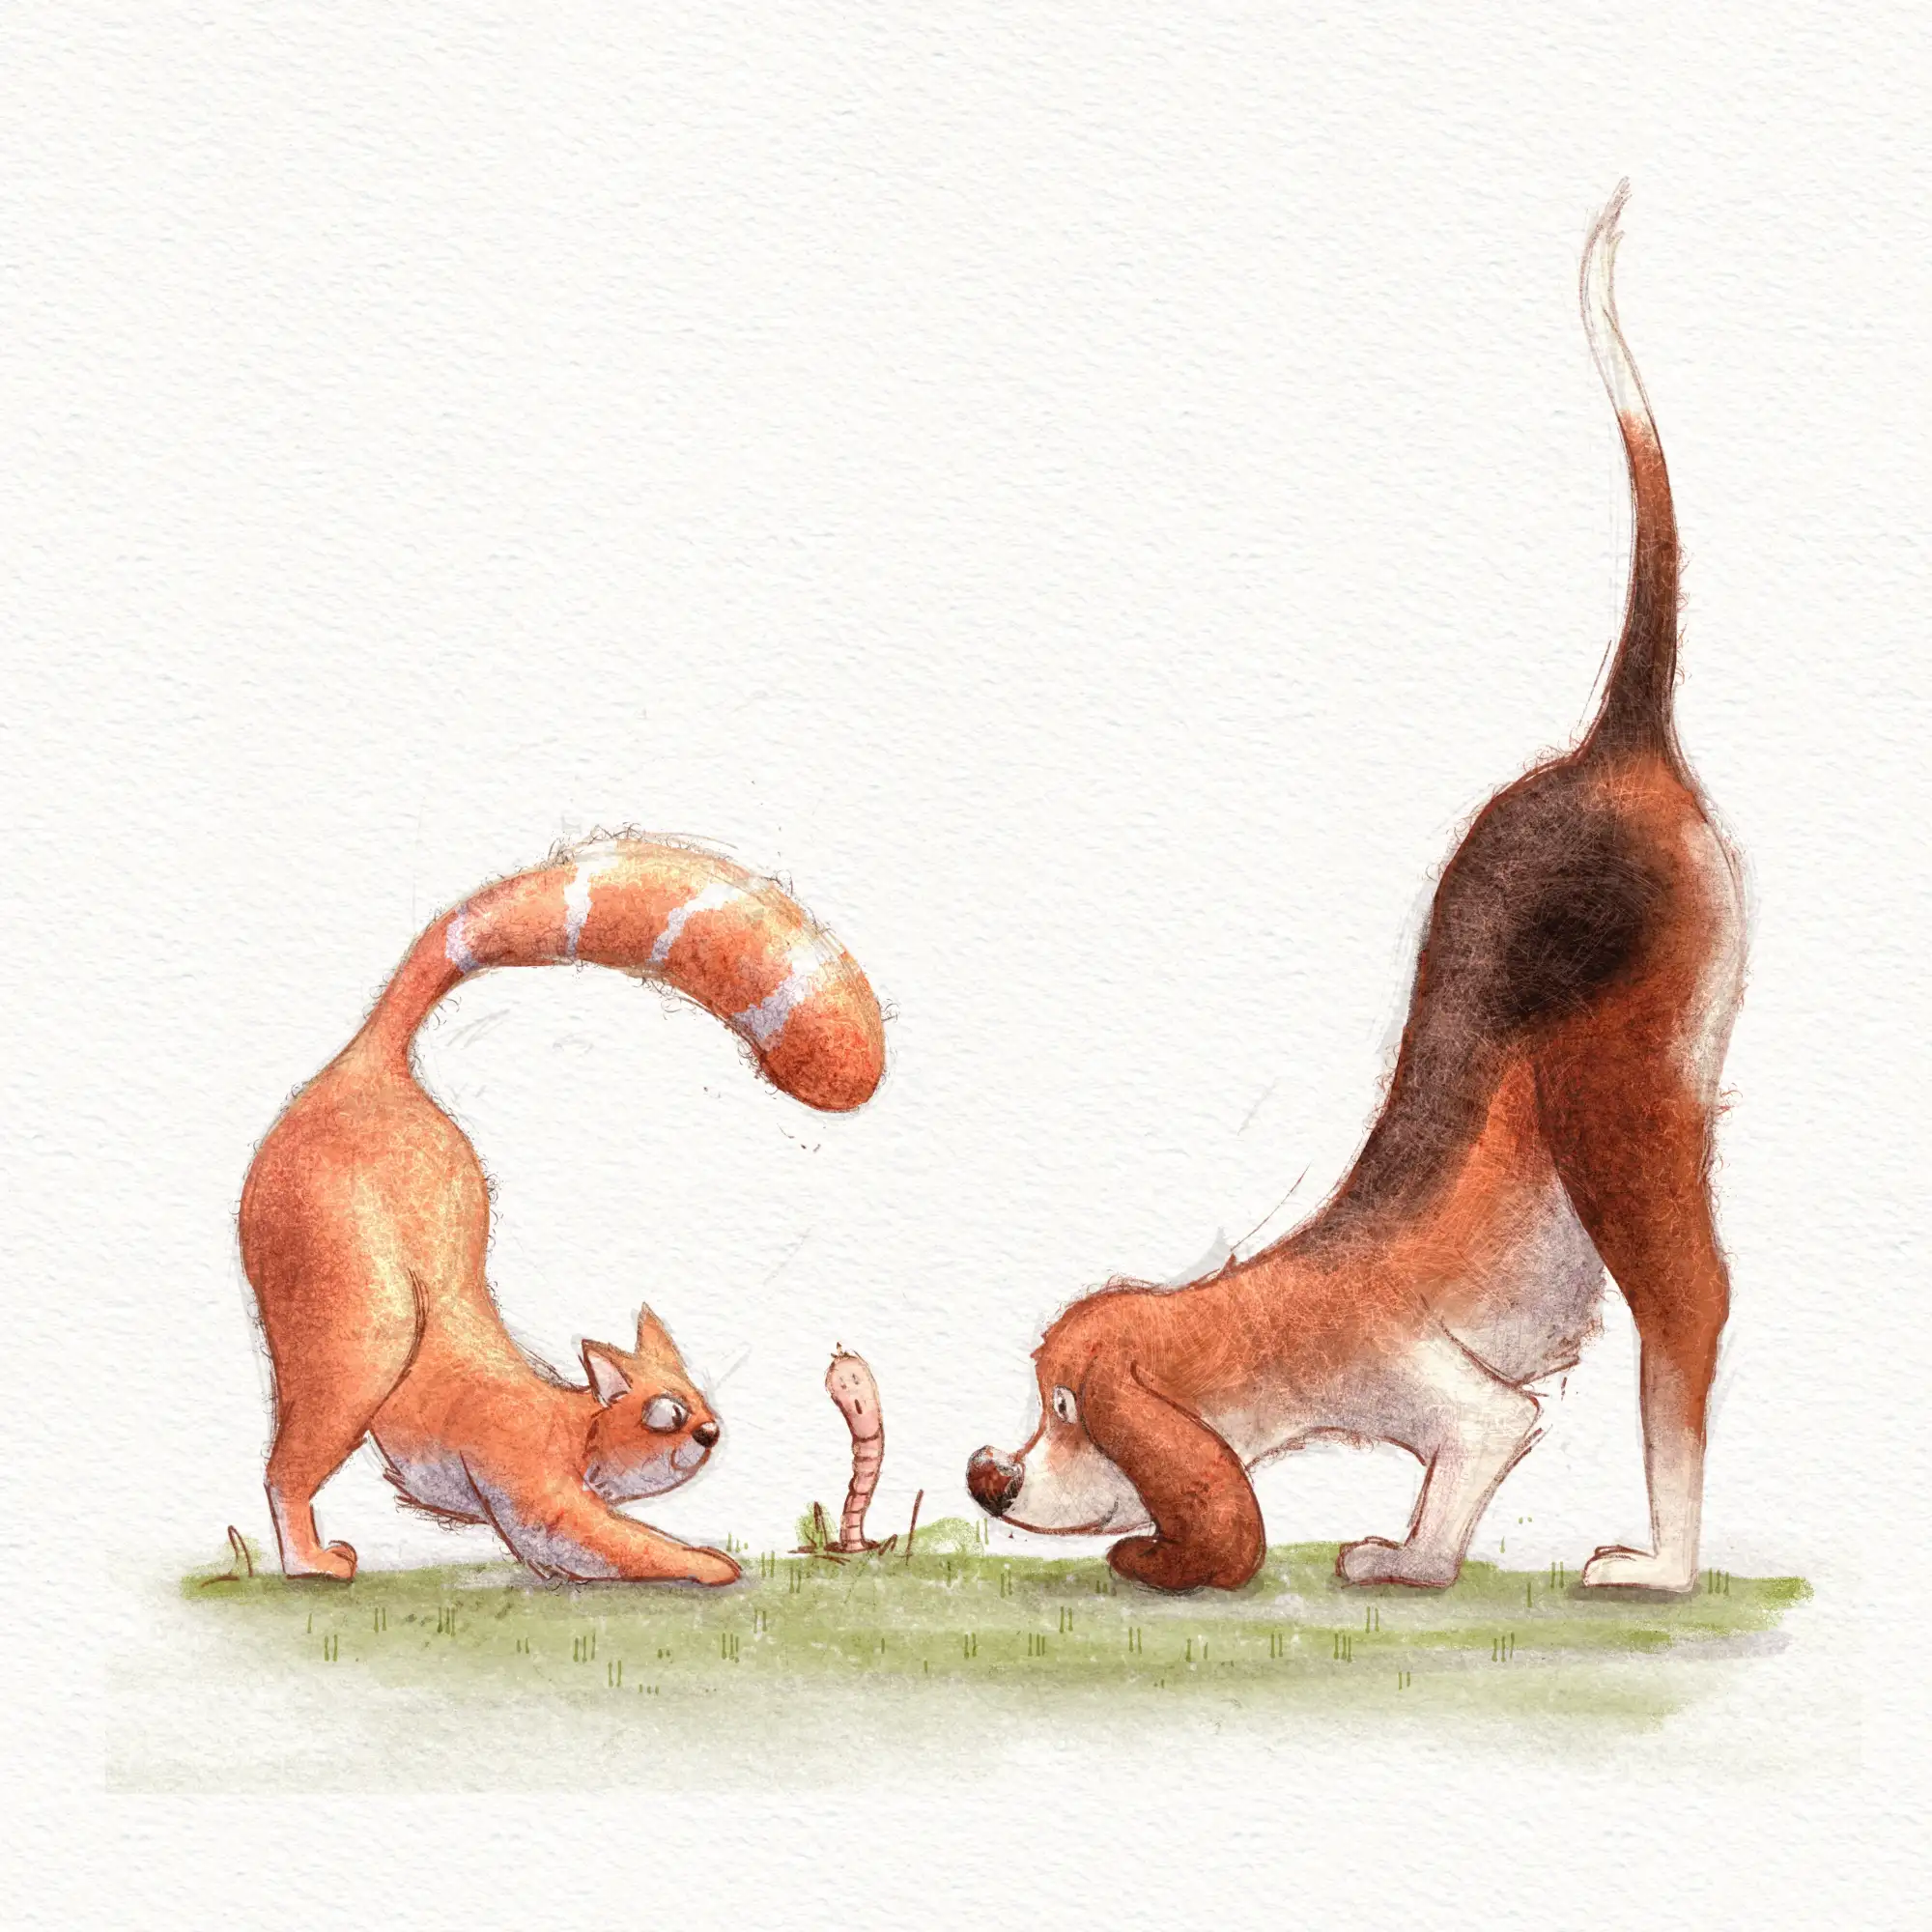
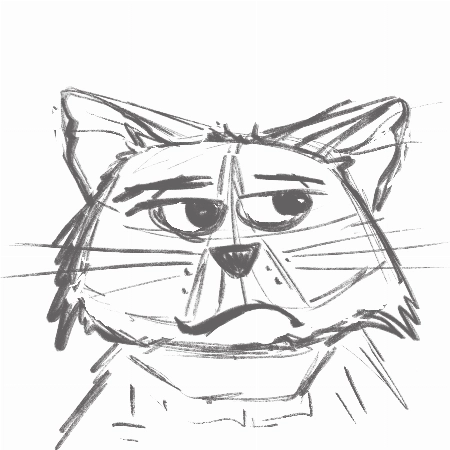
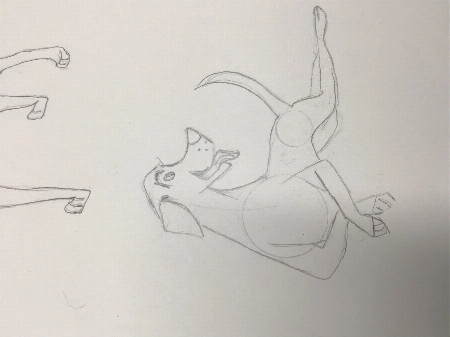
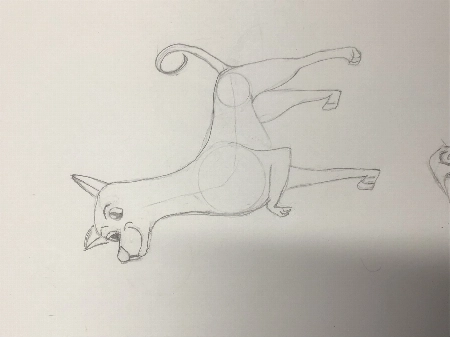
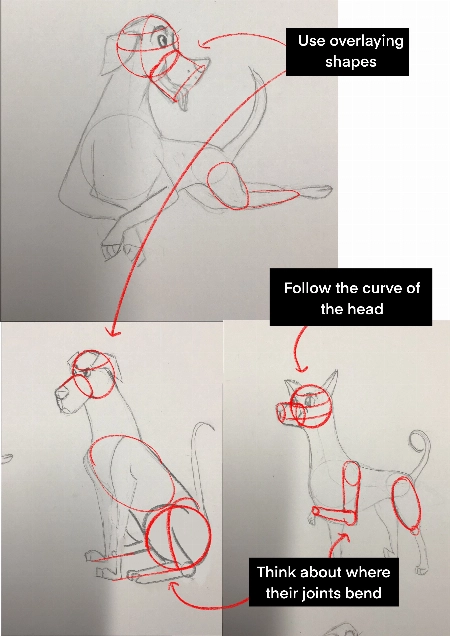
I absolutely loved this course! Very inspiring and simple :) Turned out that I'm really good at drawing dogs. Cats are harder to draw for some reason:)
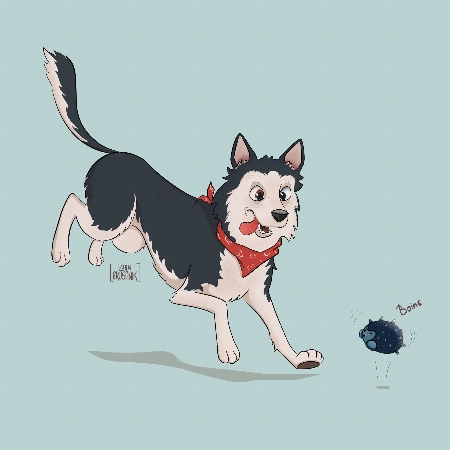
Hi Lana!
This is such a cute drawing! It's very lively and there is a great personality coming from them!
When drawing cats focus very much on the flow - lots of round fluid movements. The line of action will be very important for their poses.
For this particular drawing I just have a couple suggestions!
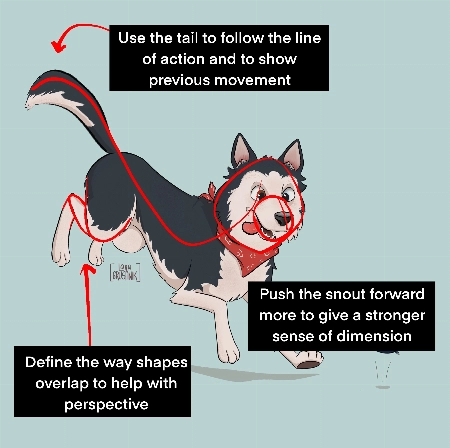
Push the snout slightly further forward. This will help make the head feel a little more round and improve the sense of dimension. Think of the base of the head not as a circle, but as a sphere!
When drawing complicated shapes like limbs, especially when they're folded up, think about how each segment is a basic shape. Using the right amount of lines, you can force a sense of perspective by overlaying some with others. In this case, you can add a couple extra lines to make the back leg seem more like it is bent away from the "camera".
Use the tail to emphasize the sense of movement! Follow the line of action you already have moving through the pose! Treat it as an extention of this. But also try to consider where the dog was in space before - the tail can have a very lovely flow to it if it is shaped as though it is coming from where the dog was just a moment ago. You were very close to this I think, but lowering it slightly makes it feel less like the dog has dropped down very suddenly.
It's great to hear that you loved the course! I hope you continue to draw more fun animals in the future!
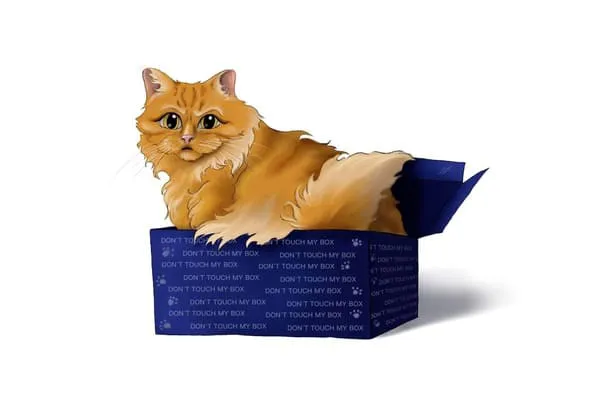
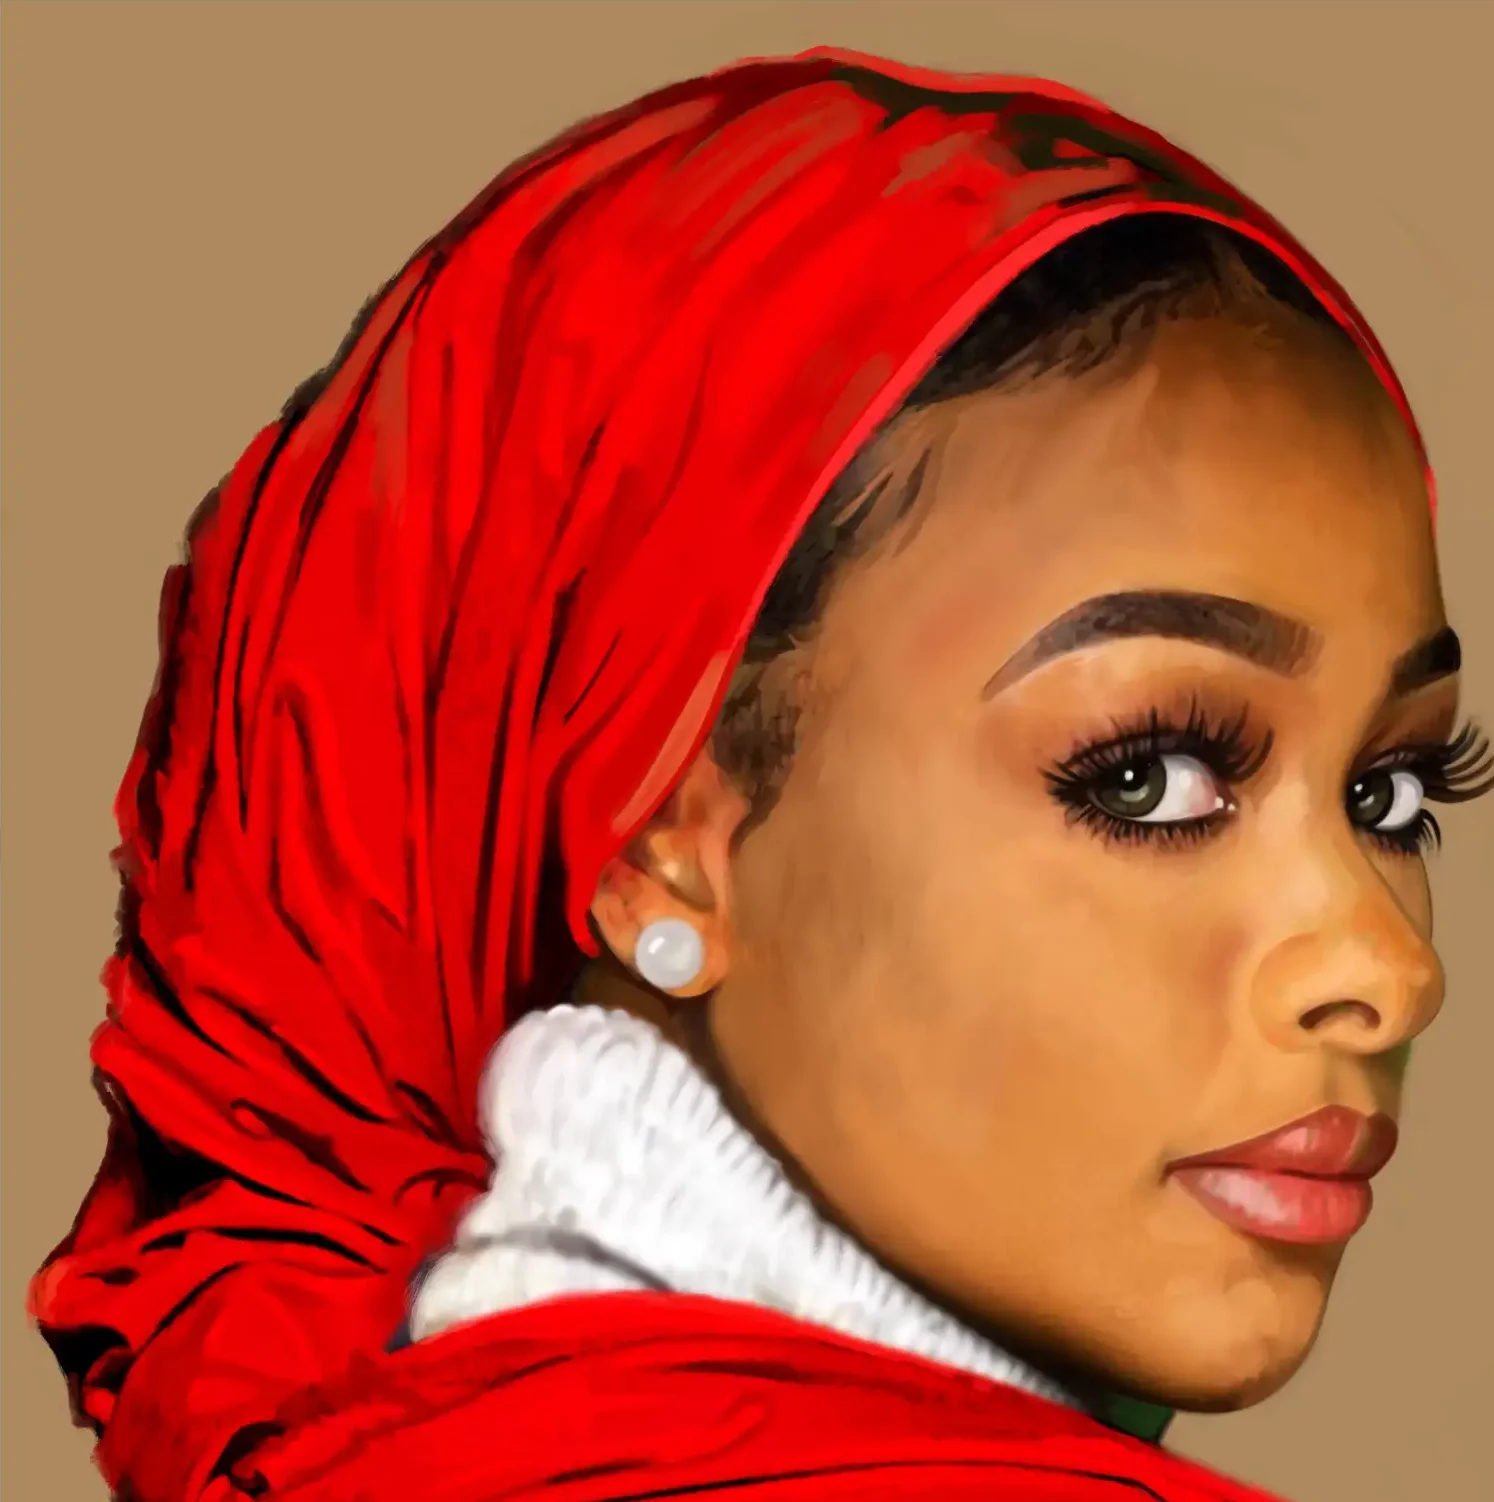
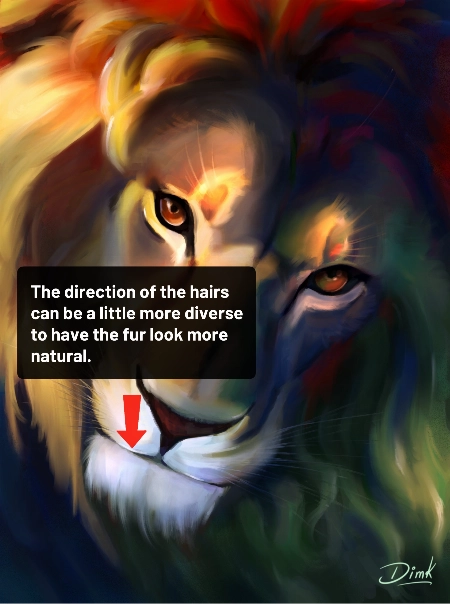
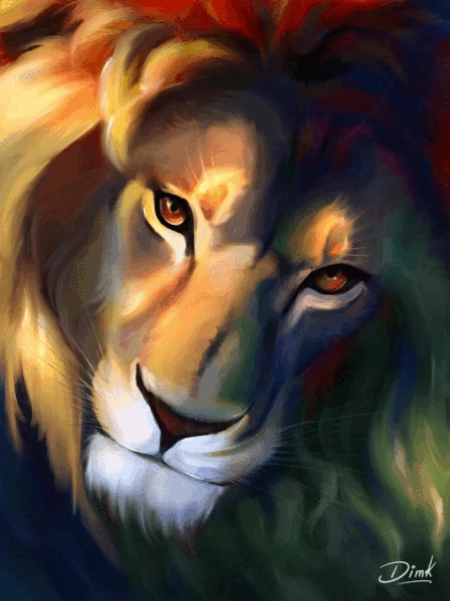
Hi recently I finished this drawing and I would like to get some feedback to improve my illustration.

Hi!
Thank you for sending in your painting! This is incredible work. The subject is beautiful and your use of color is mind-blowing!
You could maybe try to have the hair on the chin flow in more various and natural directions. Even with the head clearly in motion within the scene and the hair following in the same direction, I think there could be a little more variation.
You can check out the attachments for a more visual explanation! I hope you’ll find them helpful! Don’t hesitate to ask if you have any more questions and I wish you a beautiful day!
I really enjoyed creating the thumbnails and the final piece. I love to keep my rough sketch slightly visible and I like to add some more texture to my designs. But I loved the gloaming brus... もっと見るh and I’m going to use it more often:) Thank you very much for this fantastic class!
Hi Marjolijn!
I'm glad to hear you enjoyed the course! I'm a huge fan of the way you used the brushes and the colors! Your characters have a lot of personality and I think your final drawing looks really professional.
Keep up the great work and have a fantastic day!
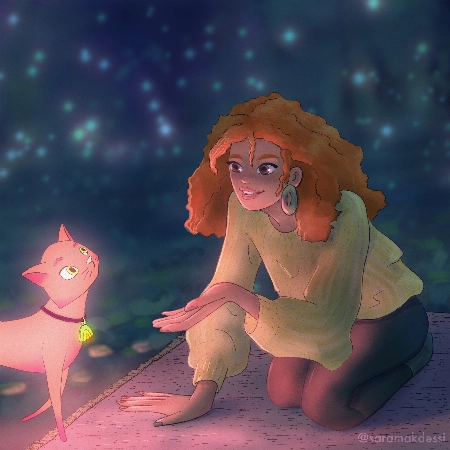
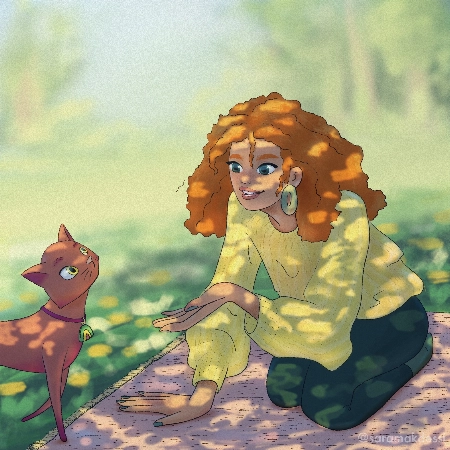
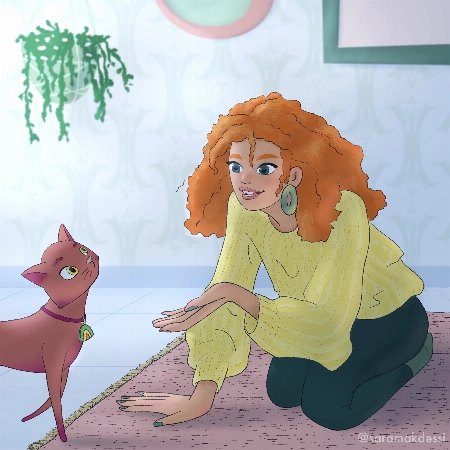
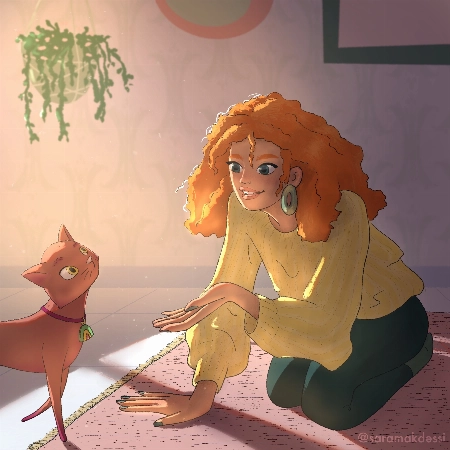
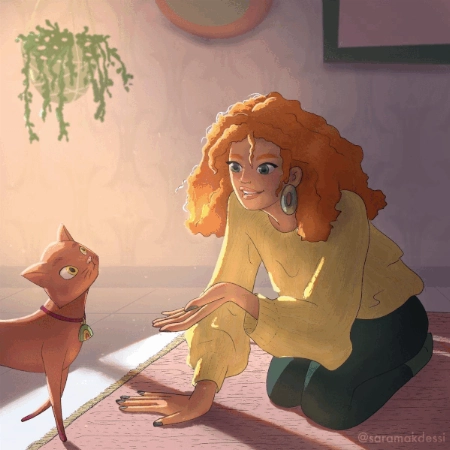
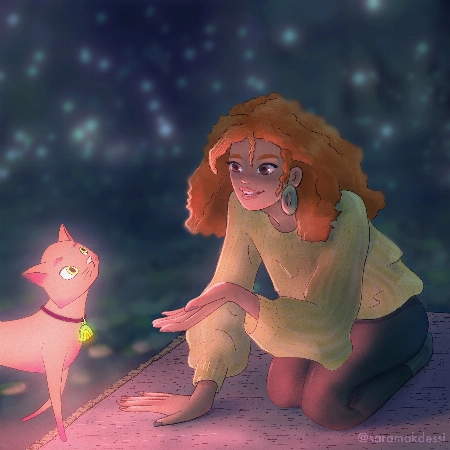
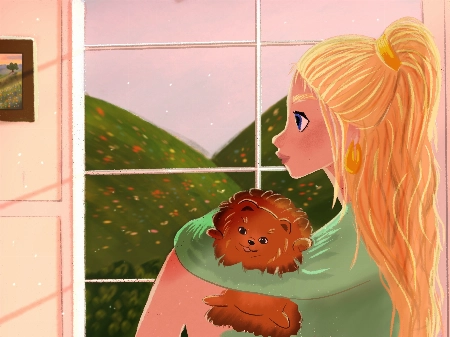
Hi Aveline, thank you so much for this fun and super informative course. I really enjoyed your lessons! Here are my interpretations of the four light scenarios with my characters. Any feedb... もっと見るack would be very appreciated. Many thanks, Sara
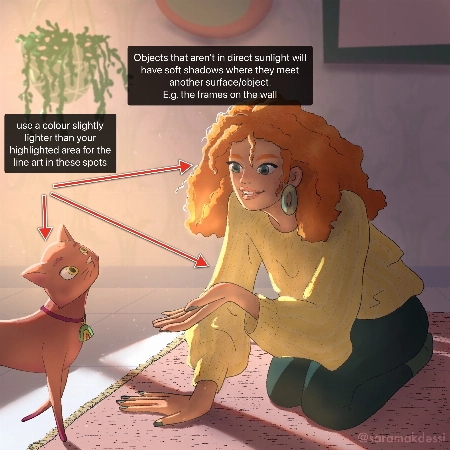
Hey Makdessi! These illustrations look amazing! You have done a great job of using the lighting and shading techniques from this course :)
Here are a few feedback suggestions that you could try in future illustrations/ to improve these:
Try these out and see what you think! Wishing you a creative week, Rhea
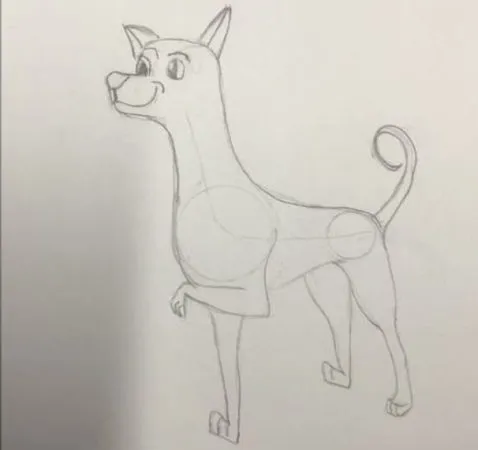
I have never used Procreate before so I did the first lessons on paper working my way through the other ones I’m not used to drawing with circles and lines of actions. I pick a body part ... もっと見るand then I draw from there that’s what I’m used to so I didn’t use the circles the way I was supposed to
Hi Louise!
This is such a great drawing so far!
I do recommend trying to start a drawing with the basic shapes before you get too far into detail to make sure that the drawing has a solid foundation.
Break things into spheres and cylinders. Spheres for the head and joints, and cylinders for the limbs and snout. Using these as a guide and it will help add dimension
Another thing that will add dimension is layering one shape of the other. Having a shape hidden behind another will instantly add a sense of 3D.
Think about their skeleton! Look at where their bones bend. This is the natural basic building of an animal. You don't have to draw every bone, but you can break it into areas - The ribcage as one oval, the pelvis as another. The forearm bone as a cylinder, the joints as spheres. It helps a lot to understand how a creature can move and bend, and how they can't.
You're well on the right track and each drawing you have done is very expressive and has lovely poses, good job!

Hello!! I love the course and tried to do all types of lighting by myself, it would be really great to hear feedback, comments and critics about my work. Thank you very much in advance!! Pa... もっと見るuline

Hello Polina! I love your drawings, they are so gorgeous! Thanks for sharing them :)
Check out my feedback below and notes I have added to your drawing! I hope you find them helpful :)
I have attached some images with tips and edits to help guide you through this process. Let me know if you have any questions :)
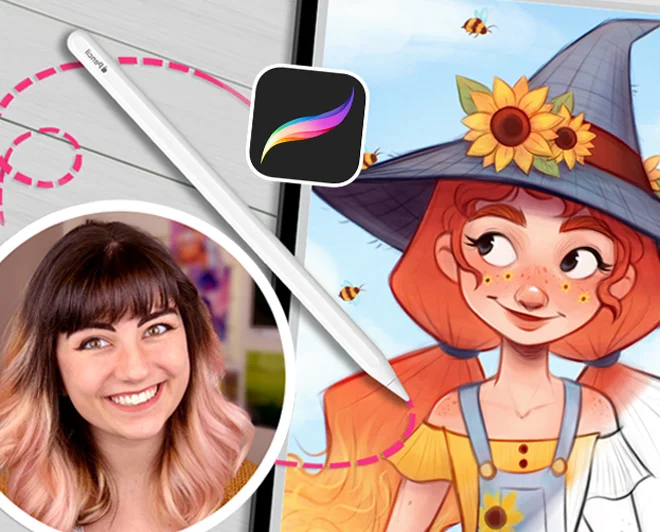
 "ペットを描く初心者ガイド"コースのレビュー
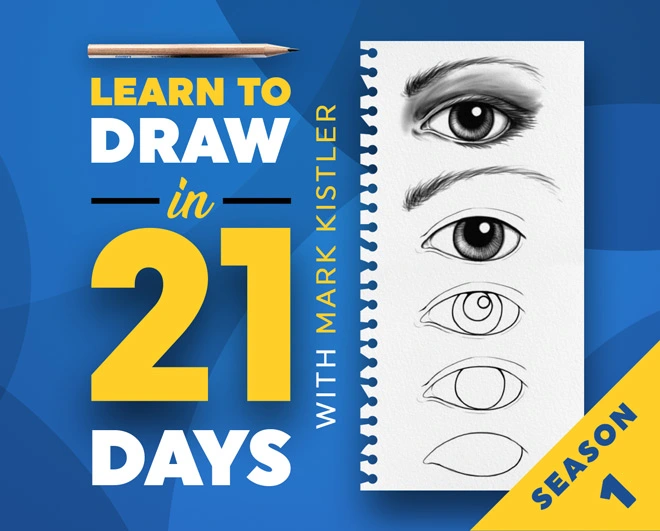
 "21日間で描くことを学ぶ(シーズン1)"コースのレビュー
 "21日間で描くことを学ぶ(シーズン2)"コースのレビュー
 "21日間で解剖学を学ぶ"コースのレビュー
 "デジタルドローイングをマスターする21日間"コースのレビュー
"21日間で描くことを学ぶ(シーズン1)"コースのレビュー
"21日間で解剖学を学ぶ"コースのレビュー
"21日間で描くことを学ぶ(シーズン2)"コースのレビュー
"21日間で解剖学を学ぶ"コースのレビュー
"ペットを描く初心者ガイド"コースのレビュー
"ペットを描く初心者ガイド"コースのレビュー
"デジタルドローイングをマスターする21日間"コースのレビュー
"デジタルドローイングをマスターする21日間"コースのレビュー
"21日間で描くことを学ぶ(シーズン1)"コースのレビュー
"デジタルドローイングをマスターする21日間"コースのレビュー
"21日間で描くことを学ぶ(シーズン1)"コースのレビュー
"21日間で解剖学を学ぶ"コースのレビュー
"21日間で描くことを学ぶ(シーズン2)"コースのレビュー
"21日間で解剖学を学ぶ"コースのレビュー
"ペットを描く初心者ガイド"コースのレビュー
"ペットを描く初心者ガイド"コースのレビュー
"デジタルドローイングをマスターする21日間"コースのレビュー
"デジタルドローイングをマスターする21日間"コースのレビュー
"21日間で描くことを学ぶ(シーズン1)"コースのレビュー
 "ライティングとシェーディングのマスター"コースのレビュー
 "21日間でキャラクターデザインを学ぶ"コースのレビュー
11のオンラインクラスの価値は合計で$595ですが、ほんの一部の価格で手に入れられます!
考えてみてください: 以前楽しんでいた趣味が今では経済的自由へのチケットになるかもしれません。
そして一番の魅力は? 新しいジーンズ👖、20杯のラテ☕、または二人分のディナー💑の価格だけで手に入ることです。


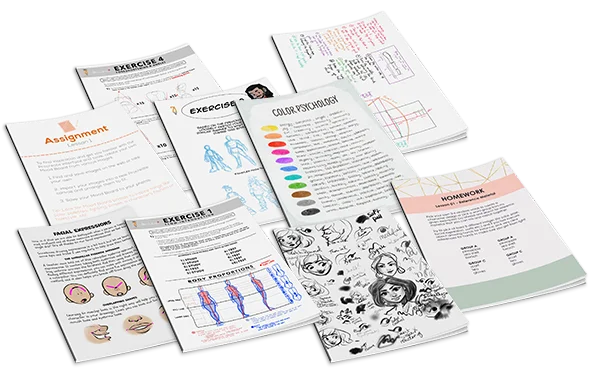
Membership includes unlimited access to all 50+ courses taught by the world’s best artists PLUS new courses as they are released.
Each class includes 10-20 video lessons that are 7 minutes long on average. Most classes include exercise sheets, assignments, and layered PSD or PNG files.
Some classes include the ability to chat with the instructor in a public forum, e.g. if you want feedback on your artwork.
All classes are pre-recorded and you can watch them online with any digital device, anytime, and for an unlimited number of times! This means you can easily watch (and rewatch) them at your own pace and convenience.
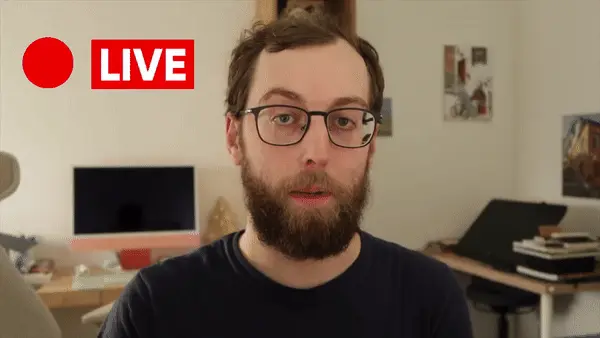
We also have bonus live sessions that are free of charge for all our students.The classes are approachable for beginners and has advanced techniques for those with more experience.
If you have no art experience whatsover or struggle to draw a basic character, we recommend starting off by taking our 'Learn to draw in 21 days' classes.
All classes are available in English (original narration) and most have dubbed narration in Spanish, French, Italian, German, & Portuguese.
Subtitles are available for all course in the following languages: English, Spanish, Japanese, French, German, Italian, Portuguese & Indonesian.
もちろんです!すべてのメンバーシップには30日間の満足保証があります。完全に満足し、啓発されなければ、30日以内にご連絡ください。質問なしで全額返金いたします!
2013年にスウェーデンで21 Drawを始めたのは、皆さんがより良いアーティストになるお手伝いをするためです!
21 Drawという名前は、始めた当初21人のアーティストを雇う予算しかなかったためです。しかし、多くのアーティストが参加に熱心だったので、さらに多くのアーティストを追加し、本からオンラインコースまで、より多くの製品を作ることができました。
私たちの目標は、世界最高のアーティストと共に働き、コミュニティとあなたの芸術的な目標を達成する手助けをすることです。素晴らしいアート教育を皆に手頃な価格で提供したいと思っています。