Risparmia il 75% sull'abbonamento.
Artisti
Corsi
Recensioni
Community

Procreate facile

Ottieni una guida passo dopo passo dagli artisti di Disney, Marvel e DreamWorks per padroneggiare il design di personaggi e ambienti!
Garanzia di rimborso di 30 giorni!
4.8
(in base a 8,303 recensioni)

Ottieni accesso a

1000+
Lezioni in pillole
55+
Lezioni di arte
34
Insegnanti di livello mondiale

Incontra i tuoi insegnanti

Selezioniamo con cura i migliori artisti e i migliori insegnanti.

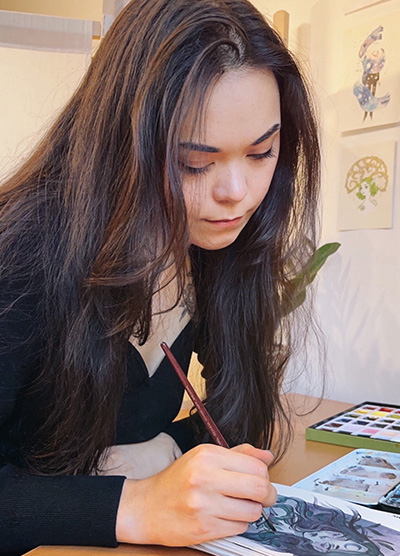
Aveline Stokart

Animation Designer per DreamWorks + Artista di fumetti

Aveline Stokart

Aveline is not just an amazing comic book artist designing characters that feel real – she’s also a fantastic teacher. And a very curious one too!

She’s explored everything from drawing to pottery, always looking to try something new and make art that hits you right in the feels.

She currently works as a freelance concept artist/character designer for various clients in the field of publishing, animation, and video games.

Her clients include Simon and Schuster and Skydance Media, HarperCollins Publisher, DreamWorks Animation…

From an early age, she showed a particular interest in drawing—a natural fit, as she is highly curious and observant, but also quite sensitive. She marvels at the beauty held within the simplest of things. 

Fascinated by character design and creating universes, she developed a unique dimension to her creations by studying 3D Animation at the Haute Ecole Albert Jacquard in Belgium, where she graduated in 2011. 

When she’s not drawing, Aveline likes to express herself musically, by singing and playing the guitar, piano and the ukulele.

I am always trying to evolve and discover new things and challenges. My goal is to create beautiful images and atmospheres that release many different emotions.

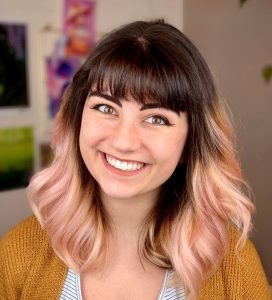
Impara a modificare gli effetti di luce con diverse modalità di fusione nel corso Capire e realizzare luci e ombre di Aveline

1/6
Vedi il portfolio dell'artista

Erika Wiseman

Illustratrice formata dalla Disney (Ravensburger). Ha lavorato per Adobe.

Erika Wiseman

This illustrator’s feed is a burst of joy with her colorful and cute creations. Starting in 2008, she’s carved out a space where creativity meets encouragement, making her an inspiration for budding artists everywhere.

Erika Wiseman (aka Erika the Goober) is a freelance illustrator and character designer who lives in the US. She loves drawing cute, colorful things and experimenting with new drawing techniques.

Erika began teaching herself to draw digitally in 2008. Since then, she has been working with a graphics tablet and Photoshop as well as Procreate to create her digital illustrations.

In 2017, she graduated from the University of Louisville with a Bachelor in Fine Arts (with a dissertation in drawing). She made a name for herself on Instagram, which is the best place to find her art! One of her goals is to help and inspire others along their creative journey to be the best artists they can be.

Inspiration

Much of my inspiration comes from the things I love, the colorful worlds of video games and animated movies.

Tools

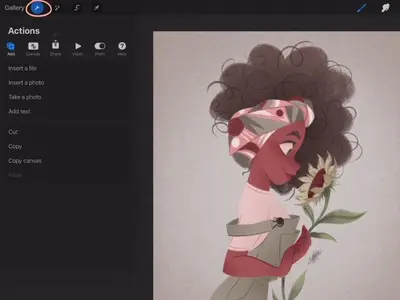
I use Photoshop CS6 and a Wacom Intuos Pro. I use an iPad Pro, Apple Pencil, and the Procreate app as well! It really just depends on how I’m feeling that day and if I want to draw at my desk or somewhere else!

Advice

My top 3 tips: Draw every day, draw from life, and study anatomy!

✏️ Crea un personaggio da zero, passo dopo passo. Scopri di più nel corso per principianti: Disegno Digitale su Procreate.

1/4
Vedi il portfolio dell'artista

Feefal (Linnea Kikuchi)

Oltre 1 milione di follower su Instagram

Feefal (Linnea Kikuchi)

Dive into Feefal’s world, where cute meets the mysterious. With a palette that ranges from digital to traditional, her art is a favorite among over a million fans. If you’re into charming yet slightly spooky visuals, she’s your artist.

Linnea is a Swedish/Japanese artist with a following of over 1 million on Instagram.

She is known for creating anthropomorphized figures and cute, spooky characters.

Linnea lives in Stockholm with her Sphynx cat called Tofu. Feefal shares her art on a regular basis on Instagram, which she creates through a variety of media, such as Procreate (digital software), graphite, and gouache. She also published an art book, ‘The Art of Feefal’.

Fans know her by her unique, charming style featuring beautiful visuals and cute characters with horror/spooky elements. In her words, ‘I put my artistic soul in a blender’!

Don’t think your work has to be perfect or be afraid of your art being ugly. Art will be ugly sometimes. That’s how you get better!

The best part of creating art for me is definitely the sense of fulfillment I get putting my creative works out into the world. It’s really rewarding to see something you’ve put your soul into getting so many positive responses from people. It’s quite the rush!

Inspiration

I mostly get inspiration from nature, death, space, and occasionally spirituality. Space is probably my main muse. It’s just way too large for any human to quite wrap their head around, and its incomprehensible size makes it so intriguing.

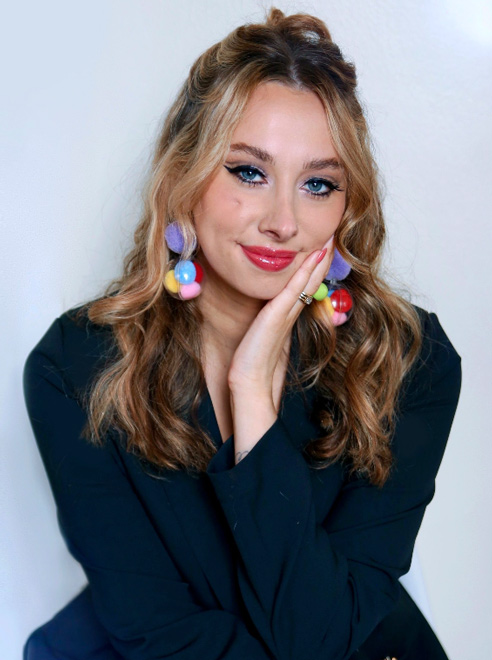
Impara a trasferire il tuo schizzo fatto a mano sull'iPad per colorarlo 🎨, con un processo facile passo dopo passo. Scopri di più in questa lezione.

1/3
Vedi il portfolio dell'artista
1.1m followers

Isabelle Staub

Ritrattista in collaborazione con Marvel

Isabelle Staub

Isabelle Staub artist photo

From viral Disney reimaginings to Marvel collabs, this Philly-based digital artist dazzles with detailed portraits and character designs. With a passion shared through art and teaching, her creations are a must-see.

Isabelle Staub is a US-based freelance artist, specializing in vibrant digital portraits and character design with incredible attention to detail.

Isabelle started creating art at a very young age and went on to receive a BFA in Illustration at Moore College of Art and Design in Philadelphia. The culmination of dedicated work and a burning passion has propelled her to become a recognized artist worldwide.

Her popular series ‘Disney animals transformed into human characters’ went viral on social media, leading to collaborations with companies such as Marvel and MGA Entertainment.

Art has always been a love of mine from before I could remember. I pour my heart, mind, and soul into every piece I create.

Isabelle’s versatility and creative talent allowed her to work with brands such as Dynamite Comics, Wacom, TikTok, Corel Painter, and more. Teaming up with CASETiFY, she created an entire line of gorgeous device cases.

Along with creating original artwork for her clients, she also uses her social media platforms to educate others, passing on her artistic knowledge and expertise. Isabelle currently lives in Philadelphia and has two adorable cats.

What advice would you give to new artists?

Be easy on yourself! Being an artist is a journey, not a destination. Try not to compare yourself to people further along in their journey. You will get there!

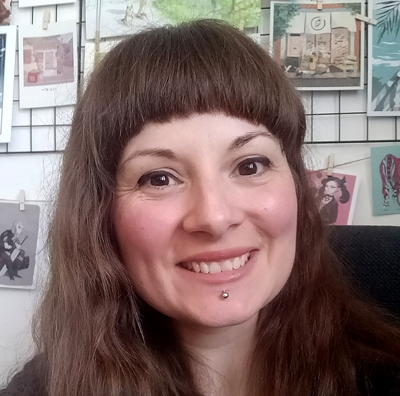
Crea opere d'arte straordinarie con un set di strumenti di Procreate di base. Scopri di più nel corso Procreate Facile di Isabelle.

1/4
Vedi il portfolio dell'artista
385k followers

Simone Grünewald

Art Director in collaborazione con DreamWorks

Simone Grünewald

Meet “Schmoe,” your go-to artist for illustrations that breathe life into the everyday with charm and wit. Her vibrant creations, filled with humor and the realness of motherhood, are a breath of fresh air, promising a smile and a new perspective with every piece.

Simone Grünewald is a Visual Development artist from Germany who worked in the gaming industry for over 10 years as an art director, character designer, and 2D animator.

In addition to her commercial work, she loves creating emotive, dynamic designs that document her life, including the experiences of motherhood. Having followed the creative path all her life, Simone has a wealth of knowledge in traditional and digital art.

She shares beautiful, entertaining artwork as well as insights and tips with her followers on social media and is known for her humorous characters and everyday themes. Simone is also the author of Draw What You Love and Sketch Every Day.

Trova idee per il tuo disegno guardando diversi esempi. 🖌️ Scopri i passaggi in Illustrazione Digitale su Procreate.

1/4
Vedi il portfolio dell'artista
606k followers

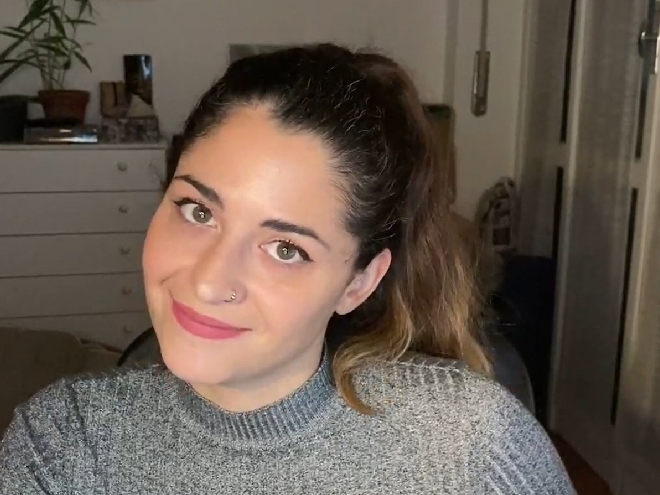
Maria Lia Malandrino

Artista dello sviluppo visivo. Ha collaborato con Disney.

Maria Lia Malandrino

Dai videogiochi ai libri di narrativa, questa artista italiana infonde vita alle storie attraverso le sue vivaci illustrazioni. I suoi numerosi progetti hanno conquistato i cuori dei lettori di tutto il mondo, mettendo in luce il suo talento nel creare un'arte coinvolgente e narrativa.

Maria è un'illustratrice e story artist di Torino, Italia. Ha conseguito una laurea in Magazine Publishing presso la University of the Arts di Londra, ha studiato Animazione tradizionale presso la Scuola Internazionale di Comics di Torino e ha frequentato una masterclass in Storyboarding presso la scuola online CGMA.

Nel 2018 ha fondato uno studio di videogiochi indie a Torino e sta attualmente lavorando al secondo gioco sviluppato internamente “Out of The Hat”, un viaggio inquietante nella mente di un cattivo.

Negli ultimi due anni Maria ha lavorato in molti progetti editoriali come illustratrice e character designer, per importanti case editrici e marchi come Oxford University Press, Hachette e Disney. I suoi lavori di illustrazione sono rappresentati dalla Illustration Agency Advocate Art.

Porta avanti anche progetti personali di illustrazione e graphic novel che puoi seguire sul suo blog e sul suo profilo Instagram.

Ispirazione

Traggo ispirazione da tutto ciò che vedo e leggo, sicuramente da libri, serie tv e film, ma anche dallo street style, dall'architettura, dalle persone nei bar... Credo che tutto ciò che incontro rimanga intrappolato da qualche parte nel mio subconscio e venga costantemente rielaborato in tutto ciò che disegno o scrivo.

Preferiti

Citazione: "Prenditi quello che vuoi e pagalo" è una citazione tratta dalla mia serie di libri preferita "La Ruota del Tempo". Mi piace l'idea che ognuno di noi possa scegliere di vivere nel modo più autentico possibile, decidendo di farlo anche quando sappiamo che potrebbero esserci delle conseguenze da pagare.

Artisti: Alessandro Barbucci, TB Choi, Otto Schmidt, Jin Kim, Patrick Osborne.

Film/Serie tv: Little Miss Sunshine, Laputa, Come Addestrare il tuo Drago, Full Metal Alchemist Brotherhood (serie).

Giochi: Bioshock Infinite, The Witcher 3, Sunless Sea, qualsiasi gioco di Civilization.

Strumenti

Per l'illustrazione e il character design uso il mio iPad Pro con Procreate, mentre per i lavori di animazione preferisco una Wacom Cintiq 22HD collegata all'iMac.

Consigli

Credo che non ci sia un consiglio che funzioni al 100% per ogni persona.

Mi sono avvicinata al mondo dei videogiochi e dell'illustrazione piuttosto tardi, senza un'educazione formale e dopo aver studiato e lavorato per anni in campi molto diversi. Il mio consiglio è che non è mai troppo tardi. Parafrasando Rainer Maria Rilke, se quando ti svegli la mattina non riesci a pensare ad altro che al disegno, probabilmente dovresti farne la tua occupazione principale! Non importa se non disegni in uno stile che sia “convenzionalmente” considerato bello o cool, se è quello che ti serve per esprimerti, vale la pena di continuare a farlo!
Impara a disegnare un personaggio dei cartoni animati dall'inizio alla fine nel corso di Maria.

1/3
Vedi il portfolio dell'artista

Meike Schneider

Artista 3D in collaborazione con Pixar

Meike Schneider

Sta trasformando la scena artistica 3D attraverso i suoi personaggi che sembrano uscire dallo schermo. Ispirandosi ai classici dell'animazione, il suo lavoro di progettazione e formazione dei personaggi sta rivoluzionando il settore, rendendola un esempio da seguire per gli aspiranti artisti.

Meike è un'artista e illustratrice 3D, specializzata nella creazione di personaggi, che vive a Colonia, in Germania. La sua fama è probabilmente legata a Instagram e a "MerMay" di Tom Bancroft. La sua attività comprende progetti come l'illustrazione di libri per bambini, il design dei personaggi, lo sviluppo visivo, la modellazione di personaggi e ambienti in 3D e lo sviluppo dei look. Attualmente lavora come collaboratrice freelance per diversi studi e aziende di animazione e insegna come docente presso la School of Games di Colonia.

Il suo percorso è stato fortemente influenzato dai classici di Walt Disney come Aladdin e Pocahontas. I film in grafica digitale come Rapunzel, Frozen o Ralph Spaccatutto alcuni dei motivi che l'hanno ispirata a intraprendere una carriera nell'animazione.

Dopo aver vinto il titolo di Artista del Mese di Maggio 2016 a RebusFarm, il suo personaggio 3D "Little Mary" è stato pubblicato nel 3D World Magazine Numero 211, la rivista più venduta al mondo per artisti CG.

Appena terminata la scuola nel 2012, ha iniziato a studiare Animazione 3D e Visual Effects all'accademia di arti multimediali PIXL VISN. Dopo essersi diplomata in Animazione, è diventata finalista ai "The Rookie Awards 2014", che le ha permesso di lavorare presso Dooblex, uno studio specializzato nella product visualization. Pur continuando a lavorare a tempo pieno, ha iniziato a ricevere incarichi e a costruire lentamente il proprio marchio come artista.

A metà del 2019 Meike ha lasciato il suo lavoro per diventare una freelance a tempo pieno, lavorando su progetti come le illustrazioni di libri per bambini per "Finni & Fredo" e "My Best Book", lavori artistici per Adobe, sviluppo visivo e design dei personaggi per la serie TV "Coral Kins", oltre al design dei personaggi per il gioco mobile di Paris Hilton.

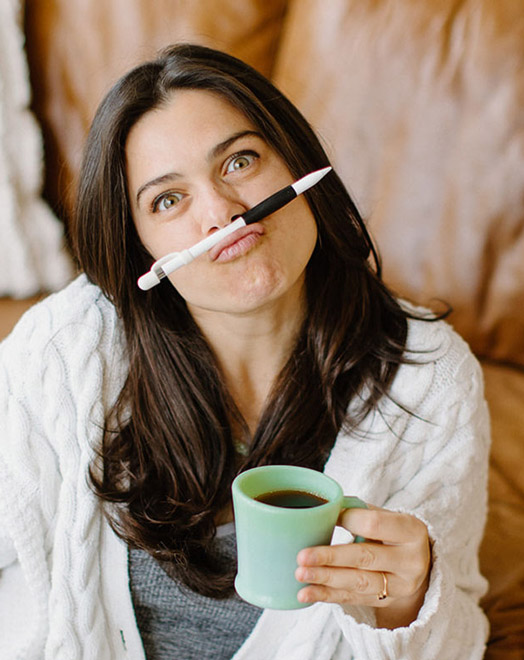
Segui semplici passaggi per colorare e aggiungere dettagli. 🖌️ Scopri di più in Disegnare un personaggio femminile di Meike

1/3
Vedi il portfolio dell'artista

Lauren Barger

Fumettista di animali che ha collaborato con Disney e Mattel

Lauren Barger

Lauren Barger profile picture

Lauren transforms pets into digital art in Procreate, enchanting with her ‘Coffeedraws’ and humorous animal cartoons. Her collaborations with Disney and Mattel, paired with co-hosting MerMay, spotlight her as a beacon of creativity and fun in character design.

Lauren is a character designer based in Charlotte, NC, known for creating ‘Coffeedraws’, being a co-host of MerMay on Instagram and for her comical cartoons of animals and people.

Lauren Barger, Character Designer & Illustrator

Lauren attended Herron School of Art and Design, where she pursued a BFA with a focus on illustration.

In 2019, she opened her company, LB Fine Art, producing mainly portrait artwork on commission both traditionally, using watercolors and colored pencils, and digitally.

She has gone on to work in visual development and character design with notable companies in the animation and toy industries, including SonyDisney, Pixelle Studioand Mattel.

Lauren is also a co-host and partner of MerMay, a social media drawing contest founded by Disney animation veteran, Tom Bancroft.

I am passionate about visual development and character design and love making my audience laugh and smile through my artwork!

Lauren is known for her engaging illustration projects, such as the ‘Animal Butt’ watercolor series, ‘Coffeedraws’ series, and ‘Pets to People’ series.

‘Coffeedraws’ is an interactive social media series that ran for 200 consecutive days, generating a strong following on Instagram. This series has been a highlight of Lauren’s artistic journey and a delightful way to interact with her followers.

I create fun art, or “F-ART” as I call it. I am a F-ART maker!

Impara l'anatomia di base per disegnare cani e gatti! 🐕 Scopri di più nel corso Disegnare animali domestici da zero.

1/3
Vedi il portfolio dell'artista

Migliora rapidamente le tue abilità su Procreate

Impara a creare arte da zero

Padroneggia la gestione dei livelli, i metodi di fusione e l'uso dei pennelli

Trasforma le tue prime creazioni artistiche in straordinari dipinti digitali da condividere con orgoglio.

Guarda queste lezioni approfondite e sali di livello!

Procreate
Animazione
Environment design
Nozioni di base sul disegno

Informazioni sull'abbonamento

Questo abbonamento ti dà accesso a 11 corsi di Procreate e 40 altri corsi di arte.

Che tu sia principiante o esperto, abbiamo lezioni per TUTTI I LIVELLI DI ABILITÀ!

I nostri insegnanti ti mostreranno come usare i pennelli 🖌️, poi ti insegneranno ombreggiatura e illuminazione per far risaltare i tuoi disegni!

Alla fine, disegnerai sul tuo iPad con maggiore sicurezza, e avrai un certificato che lo dimostra!
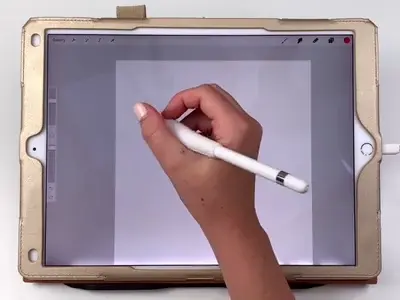
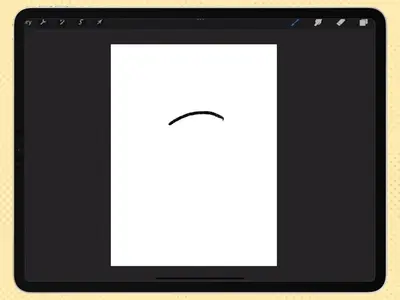
aggiornamenti mensili
Nuove Lezioni
Riceverai anche nuove lezioni aggiunte automaticamente ogni mese senza dover pagare di più! 🤩
community
Oltre 210 mila membri
Entra a far parte di una community di studenti e di assistenti all'insegnamento per ottenere un feedback e lasciarti ispirare dalle idee condivise dai tuoi colleghi.
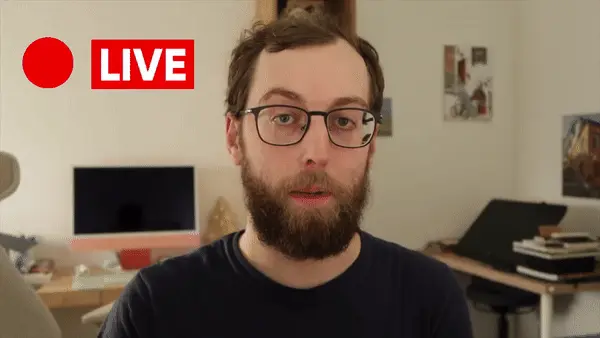
eventi dal vivo
Eventi dal Vivo
Impara in tempo reale dai tuoi artisti preferiti.

Ecco cosa imparerai in questo corso:

Digital Workspace Setup & Navigation

  • Set up your digital workspace with Erika Wiseman 🖌️
  • Navigate & utilize Procreate’s main tools & features with Isabelle Staub 🌟

Artistic Techniques & Styles

  • Select brushes that complement your style and drawings 🖌️
  • Hone your drawing technique and stroke pressure control ✍️
  • Explore concepts of light and shading with Aveline Stokart 💡

Workflow Efficiency & Productivity

  • Discover time-saving shortcuts for efficient workflow 🕒
  • Uncover hidden tips and tricks for maximizing productivity 💡
  • Learn to create captivating time-lapse videos of your artwork 🎥

File Management & Sharing

  • Master file importing and exporting processes 📤
  • And most importantly giving you the confidence to share your art! 💪

Progress Tracking & Assignments

  • Each video lecture comes with easy-to-follow assignments that you can use to track your progress 📚

Get ready for an exciting adventure and discover how amazing you can be as a digital artist! Start now! 🚀
Vuoi passare da principiante a pro? 💥

Iscriviti per SOLI USD $59/anno!
Affrettati, solo per un tempo limitato!

Molto più di semplici lezioni online...

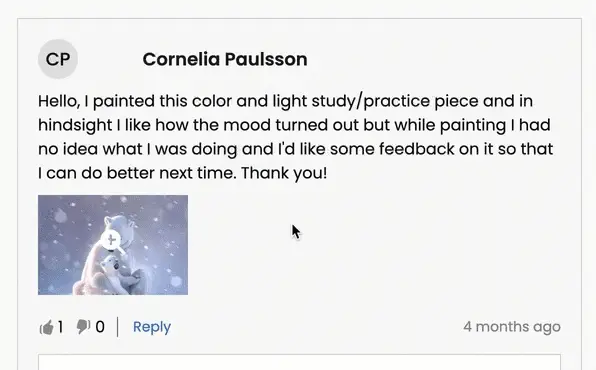
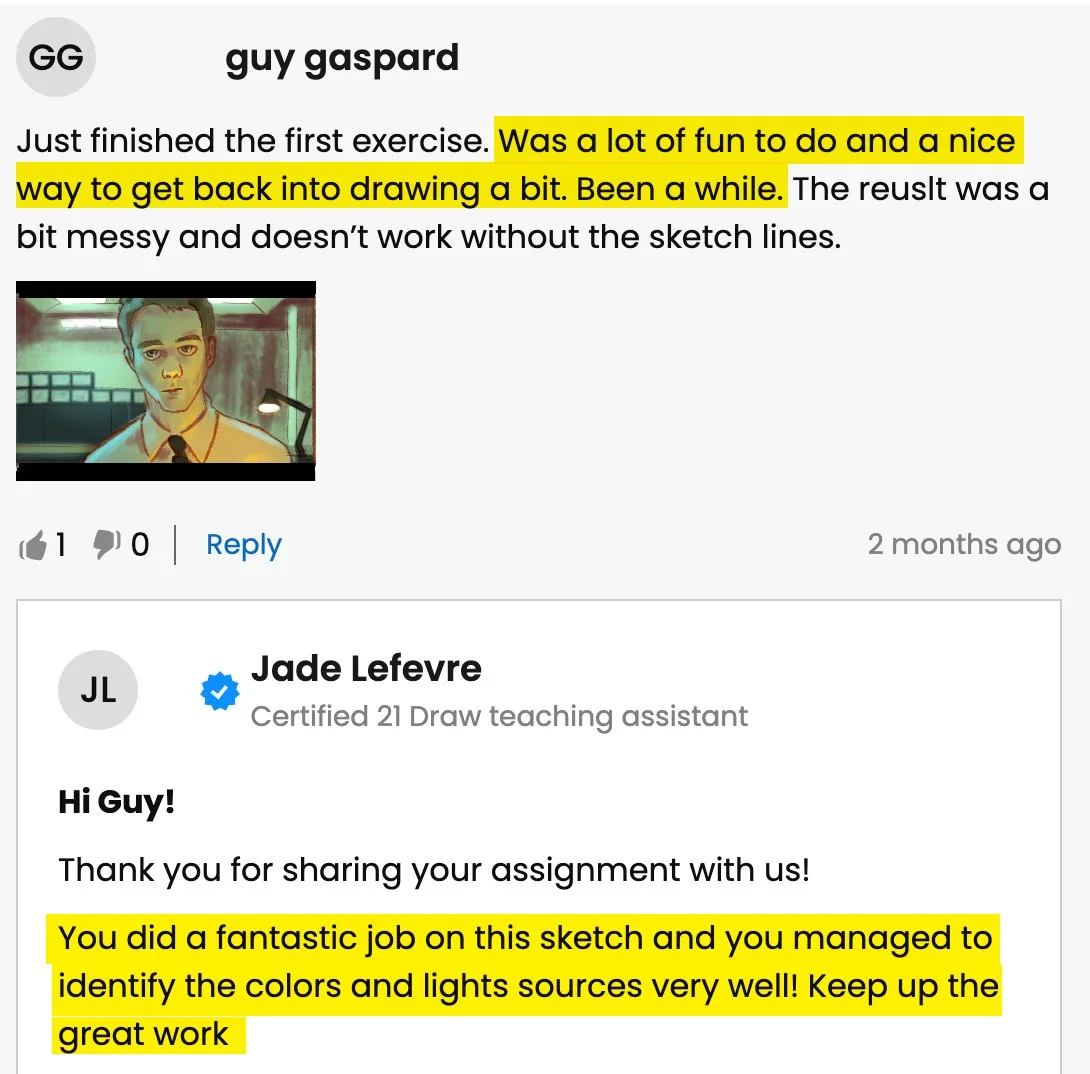
Ricevi feedback da parte di professionisti

Ricevi un feedback dettagliato da un vero insegnante quando sei in difficoltà con i tuoi compiti o i tuoi lavori.

Ricevi apprezzamenti

Condividi la tua arte (se lo desideri 😉) o gli esercizi completati e ricevi elogi dai nostri insegnanti!

Parla con i compagni di classe

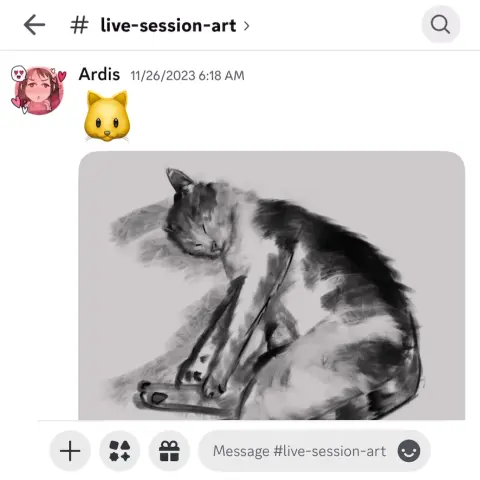
Unisciti alla nostra fantastica community su Discord dove puoi interagire, fare domande e imparare insieme agli altri membri.

Esercitati con i compiti

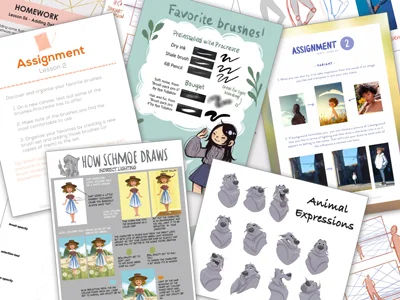
La maggior parte delle lezioni comprende dei compiti ed esempi per aiutarti a esercitarti.

Eventi dal Vivo

Impara in tempo reale dai tuoi artisti preferiti.

Lavori recenti degli studenti

I nostri studenti hanno realizzato tutte le illustrazioni che vedi qui. E puoi farlo anche tu!
1/24
Catie Ilic
Alisa
Jay Thatcher
Nida Özer
@saramakdessi
Cornelia Paulsson
Laura Davies
Prapti Bhetawal
Oksana Shvedenko
Louise Broesky
Viktoriya Storozhuk
Berna Pekustun
Simone
Nesreen Alturkistani
Gautham R
Marjolijn De
Jason K.
Gabriella Antonicelli
Sophie Mattocks
Perrine I
Melissa
Marjolijn De
Kristina Veraldi
Frank Griffen

Scopri come i nostri insegnanti stanno aiutando gli studenti...

Domanda dello studente
Q8
Quinn 88

I recently completed the course and I'm really happy with it. Helped me improve on my time and Layer management easily. would love to get some feedback to see in what parts I could improve o... Mostra di piùn.

Quek Jae Sern (Jae)
Assistente didattico certificato 21 Draw

Hello Quinn,

Congratulations on finishing the course! I’m happy that it helped you out.

Your submission is absolutely stunning! I can see that you’ve put a lot of work into it and we can appreciate all the intricate details you’ve included in the design of your character.

Overall, I think you’ve executed on all the teachings of the course well and you’re definitely ready for a more advanced course. With that said, here is some more advanced feedback that would be outside the scope of this course:

Perspective of Leaves

  • It’s subtle, but I noticed that the leaf surfaces are mostly angled towards the viewer giving a very flat look. I’d encourage you to imagine the leaves being stuck on a surface of a sphere and draw them radiating outward from the center (the shoulder joint). You can check the attached image to see what I mean.

Neck & Collarbone

  • I saw that you included a V-shaped line to denote your character’s collarbone. I realize that this is a stylized piece and that there is an urge to keep things simplified. However, I think your implementation makes it look like there is an additional layer of clothing. Look up references to see how to best simplify the neck/collarbone area.

With that said, I think you did an amazing job. I hope this was helpful and all the best with your future illustrations!

Domanda dello studente
MB
Morgan B

Thanks for the course, I learned a lot! Attached is my mood board and the final piece. For this course I decided to draw a dark elf character I’ve been coming up with. I had a lot of fun m... Mostra di piùaking this but would appreciate any feedback on how to make it better :)

Quek Jae Sern (Jae)
Assistente didattico certificato 21 Draw

Hi Morgan!

Thanks for your submission and sorry for the delayed response. I’m happy to hear that you got a lot out of the course. First of all, I think you utilized the references and the moodboard wonderfully. Your final designs of your character as well as the environment are cohesive as a result. The colors you used also go a long way in conveying the mysterious and magical feeling of your illustration.

With that said, let me point out some areas with room for improvement.

Symmetry

  • I noticed that some of the facial features and the torso of your character aren’t symmetrical. I recommend the use of guidelines during your drawing phase to help you put elements in the right place and have them be properly aligned.

  • While you’re drawing, you should also flip your canvas horizontally from time to time as it helps you spot errors more easily. Once you’ve identified something that’s asymmetrical or warped in an undesirable way, you can redraw that section or use the liquify tool to correct it.

Armor

  • The design of the armor looks great. I like its curved edges and the ornate etchings. Where I think there is room to improve is in the rendering of the material – in this case, metal. Metal can be tricky to paint. It is a reflective material, so make sure you keep it high contrast. Highlights should be bright and shadows should be dark.

  • In addition to that, try to avoid soft edges as they can make the armor appear “mushy”. Use hard and distinct edges especially where there is overlap between two or more layers of metal.

Overall, I think you did an excellent job. I forgot to point out that you also did great for the background. I hope this feedback helps and good luck for your future illustrations!

Domanda dello studente
YM
Yazmary Melendez

I'm very new to procreate, and I like drawing cute frogs. It was fun to learn so many features in procreate, I look forward to drawing more things in procreate and incorporate more of the th... Mostra di piùings included in the course. I can definitely see an improvement in how I color and the layering really helped.

Quek Jae Sern (Jae)
Assistente didattico certificato 21 Draw

Hello Yazmary,

I’m glad that you’re learning a lot from the course about using Procreate. Procreate has such powerful tools that many of us can benefit from if only we knew how to use them!

And what a lovely illustration this is. It’s giving such cozy vibes and I also really like the complementary color palette you used for this.

Best of luck with your future drawings and keep drawing!

Domanda dello studente
GA
Gabriella Antonicelli

Fantastic course! I tried to follow Simone's directions in my illustration, from blocking in to choosing brushes to handling shadows and lighting. I would be enormously pleased if I could ge... Mostra di piùt some feedback so that I can improve my next illustrations. Thank you very much Gabriella

Jade Lefevre
Assistente didattico certificato 21 Draw

Hi Gabriella!

Apologies for the delay in getting back to you!

We're delighted to know you enjoyed the course and found it useful! You did an amazing job on this illustration. I'm a huge fan of the style and your composition skills are impeccable!

Following, you can find a couple of suggestions you can look into for your next illustration, as well as an example attached to this message:

  • You can decide to have a more contrasted, darker shading in some areas of the drawing in order to help the viewer make out some of the shapes better. For example, under the yellow excavator.
  • By deciding the location of the light source, you can make sure to have a consistent direction for your shadows. In my example, I have it set in the middle.
  • The same way, some edges could use an even brighter highlight in order to help the shapes really stand out from the background.

You can find more explanations in the attached pictures. Don't hesitate to ask if you have any question!

Keep up the good work and have a great day!

Domanda dello studente
AC
Andrew Carlyon

I’m following along on this course, but I feel like I’m “stuck” and I’m not sure what to do to improve. I feel like my painting is very flat and I’m struggling with colors. Also,... Mostra di più it seems very “blocky’, and I’m struggling to get a fluid, painterly look. Can anyone provide me some guidance? Unfinished painting attached>

Jade Lefevre
Assistente didattico certificato 21 Draw

Hi Andrew!

Thank you very much for sharing your painting with us! The proportions of your portraits are on point and I can tell you've applied all of the teacher's advice very well! Here are a few suggestions to help you with your problem:

  • You can start by having these little dark areas (such as the inside of the mouth, the corners of it, the eyes and eyelids and the nostrils) be darker and stand out more, with a thicker brush.
  • You can also add some more bright and saturated colors to your color blocks. In this case, shades of orange and red! It helps bring life to your undertones!
  • Don't hesitate to either lay your color blocks with a more blurry brush, or to blend them slightly afterwards. One shouldn't make the mistake to over-blend, but a little does help a lot in making the whole thing come together. It's the variation of textures between blended and non-blended which makes the surface interesting to look at.

You can refer to the attached images for reference! Have a great day and don't hesitate to ask if you have any questions!

Domanda dello studente
A
Alisa

Hello, I finished the Aveline’s course and would like to get some feedback how I can improve my illustrations.. I am not completely satisfied with my work so hope your feedback can help.. ... Mostra di piùThank you.

Rhea Tibbey
Assistente didattico certificato 21 Draw

Hey Alisa! I love your work, you have done an amazing job of following along with Aveline's assignments :)

To keep your feedback simple, I have chosen to refer to your night-time lighting scenario. Check out the tips and images I have attached below, I hope they help :)

  • When you are illustrating an environment a good practice for adding depth is to ensure your foreground uses more saturated colors than your background. Currently they are at a similar level of saturation, this is something you can adjust using your ‘Hue, Saturation and Brightness’ tool.
  • Around the edge of your highlights and shadows you may have a soft line that is a more saturated color.
  • Folds on clothing usually follow a triangular draping pattern down from where they hang from the body. In this case her sweatshirt would mostly be draping from her shoulders. When in doubt with drawing folds in an outfit, a reference picture can make things much easier!
  • If you have warmer tones in your foreground, make the color pop even more by using an ‘Overlay Layer’ to add cooler colors to the background.

I have attached some images with tips and edits to help guide you through this process. Let me know if you have any questions :)

Domanda dello studente
BP
Berna Pekustun

Do much focus on the eyes and not enough focus a the rest of the art. Still the face is not quite right ( used a reference feature) but really learned a lot from class.

Quek Jae Sern (Jae)
Assistente didattico certificato 21 Draw

Hello Berna,

Thanks for submitting this wonderful painting. I think the loose painting style works great and the extra detail around the face compared to the rest of the body does a good job at focusing the viewer’s attention.

I do notice that the dog’s face seems a little off. Sometimes it can be hard to tell which part of the painting needs to be worked on. Two tools I can suggest for checking your painting/drawing are:

  • Guidelines down the center of the face

You can place a guideline on a separate layer to make sure the facial features you draw are symmetrical.

  • Flipping canvas horizontally

Procreate allows you to flip the canvas horizontally. By occasionally flipping the canvas, it allows you to “reset” your perception of your painting, and it will be easier to spot your errors while painting or drawing. Try it out on this one and it should be easy to see where and what needs fixing!

I know that for painterly styles like this, it can be hard to make changes without essentially re-painting a section again. Procreate has a built-in Liquify tool that is perfect for situations like this. You can use the liquify brush to push or nudge your painting around until it is correct.

I hope this helps and I’m glad that you learned a lot from this class. Good luck with your future art pieces!

Domanda dello studente
Nida Özer

Hello Aveline, I congratulate you on your art and I follow your art with enthusiasm. I would also like to thank you for meeting us on such a occasion. I am adding my works and waiting for yo... Mostra di piùur comment :)

JP
Jessica Paton
Assistente didattico certificato 21 Draw

Hi Nida!

Wow, you did such a great job of applying the techniques from this course! I love that you've put your own characters into the scenes as well! I only have a few small notes for you.

For the Night Scene:

  • Increase the glow in the night scene! Use a soft brush to lighten that part of the scene (I used a light yellow with a soft-light layer setting)

  • Add more highlights/rim lighting on the night scene as well. Make sure you have lots of contrast and really make the most of the fun lighting!

For the Day Scene:

  • Because you have made most of the background quite light, try and keep that somewhat consistent. Keep the background light, and the foreground more dark. Keeping this contrast makes it easier to see the characters as seperate from the background and makes it easier to read.

*Add a few extra shadows to reflect the size of the skirt/around the skirt to imply more 3D form

You've done such a fantastic job with these, and they're honestly great the way they are! Well done!

Domanda dello studente
Lana Grushnik

I absolutely loved this course! Very inspiring and simple :) Turned out that I'm really good at drawing dogs. Cats are harder to draw for some reason:)

JP
Jessica Paton
Assistente didattico certificato 21 Draw

Hi Lana!

This is such a cute drawing! It's very lively and there is a great personality coming from them!

When drawing cats focus very much on the flow - lots of round fluid movements. The line of action will be very important for their poses.

For this particular drawing I just have a couple suggestions!

  • Push the snout slightly further forward. This will help make the head feel a little more round and improve the sense of dimension. Think of the base of the head not as a circle, but as a sphere!

  • When drawing complicated shapes like limbs, especially when they're folded up, think about how each segment is a basic shape. Using the right amount of lines, you can force a sense of perspective by overlaying some with others. In this case, you can add a couple extra lines to make the back leg seem more like it is bent away from the "camera".

  • Use the tail to emphasize the sense of movement! Follow the line of action you already have moving through the pose! Treat it as an extention of this. But also try to consider where the dog was in space before - the tail can have a very lovely flow to it if it is shaped as though it is coming from where the dog was just a moment ago. You were very close to this I think, but lowering it slightly makes it feel less like the dog has dropped down very suddenly.

It's great to hear that you loved the course! I hope you continue to draw more fun animals in the future!

Domanda dello studente
DK
DIM K

Hi recently I finished this drawing and I would like to get some feedback to improve my illustration.

Jade Lefevre
Assistente didattico certificato 21 Draw

Hi!

Thank you for sending in your painting! This is incredible work. The subject is beautiful and your use of color is mind-blowing!

You could maybe try to have the hair on the chin flow in more various and natural directions. Even with the head clearly in motion within the scene and the hair following in the same direction, I think there could be a little more variation.

You can check out the attachments for a more visual explanation!  I hope you’ll find them helpful!  Don’t hesitate to ask if you have any more questions and I wish you a beautiful day!

Domanda dello studente
MD
Marjolijn De

I really enjoyed creating the thumbnails and the final piece. I love to keep my rough sketch slightly visible and I like to add some more texture to my designs. But I loved the gloaming brus... Mostra di piùh and I’m going to use it more often:) Thank you very much for this fantastic class!

Jade Lefevre
Assistente didattico certificato 21 Draw

Hi Marjolijn!

I'm glad to hear you enjoyed the course! I'm a huge fan of the way you used the brushes and the colors! Your characters have a lot of personality and I think your final drawing looks really professional.

Keep up the great work and have a fantastic day!

Domanda dello studente
SM
Sara Makdessi

Hi Aveline, thank you so much for this fun and super informative course. I really enjoyed your lessons! Here are my interpretations of the four light scenarios with my characters. Any feedb... Mostra di piùack would be very appreciated. Many thanks, Sara

Rhea Tibbey
Assistente didattico certificato 21 Draw

Hey Makdessi! These illustrations look amazing! You have done a great job of using the lighting and shading techniques from this course :)

Here are a few feedback suggestions that you could try in future illustrations/ to improve these:

  • In areas of your character that are highlighted, change the colour of your line-art to a colour brighter than the highlighted area.
  • Additionally, it can look nice if you set your line-art to a darkened version of an ambient colour in your image rather than black.
  • Add soft shadows to objects that aren't in direct light.
  • For your night-time scene, you could decrease the saturation of the background and perhaps add even more blur to make your character stand out even more.

Try these out and see what you think! Wishing you a creative week, Rhea

Domanda dello studente
LB
Louise Broesky

I have never used Procreate before so I did the first lessons on paper working my way through the other ones I’m not used to drawing with circles and lines of actions. I pick a body part ... Mostra di piùand then I draw from there that’s what I’m used to so I didn’t use the circles the way I was supposed to

JP
Jessica Paton
Assistente didattico certificato 21 Draw

Hi Louise!

This is such a great drawing so far!

I do recommend trying to start a drawing with the basic shapes before you get too far into detail to make sure that the drawing has a solid foundation.

  • Break things into spheres and cylinders. Spheres for the head and joints, and cylinders for the limbs and snout. Using these as a guide and it will help add dimension

  • Another thing that will add dimension is layering one shape of the other. Having a shape hidden behind another will instantly add a sense of 3D.

  • Think about their skeleton! Look at where their bones bend. This is the natural basic building of an animal. You don't have to draw every bone, but you can break it into areas - The ribcage as one oval, the pelvis as another. The forearm bone as a cylinder, the joints as spheres. It helps a lot to understand how a creature can move and bend, and how they can't.

You're well on the right track and each drawing you have done is very expressive and has lovely poses, good job!

Domanda dello studente
Polina Lutseva

Hello!! I love the course and tried to do all types of lighting by myself, it would be really great to hear feedback, comments and critics about my work. Thank you very much in advance!! Pa... Mostra di piùuline

Rhea Tibbey
Assistente didattico certificato 21 Draw

Hello Polina! I love your drawings, they are so gorgeous! Thanks for sharing them :)

Check out my feedback below and notes I have added to your drawing! I hope you find them helpful :)

  • Don’t be afraid to use ‘Overlay’ blending layers with vivid colors to help establish the time of day, especially for the sunset and daytime photos.
  • In the indoor scene: the walls and the character should be in soft shadow due to the backlighting from the window.
  • Your character has a few spots on their face that might have highlights including their: eyes, nose, lips and cheekbones.
  • Your overcast lighting scenario could be de-saturated to convey the gray-diffused light source. This is something you can adjust using the ‘Hue, Saturation and Brightness’ tool.
  • Even on an overcast day you will still have some soft shadows where clothes fold or different objects meet each other.
  • You can try and make the direction of your light source more clear by adding color variation to your sky using an overlay or multiply layer.
  • When in doubt, practice by studying photographs! This can be a great way to learn about illustrating hard shadows.

I have attached some images with tips and edits to help guide you through this process. Let me know if you have any questions :)

Vuoi passare da principiante a pro? 💥

Iscriviti per SOLI USD $59/anno!
Affrettati, solo per un tempo limitato!

Non sai da dove iniziare? Dai un'occhiata all'ordine di lezioni suggerito

Lezione 1
Procreate per principianti
Vedi di più
Principiante
Lezione 2
Procreate facile
Vedi di più
Principiante
Lezione 3
Teoria del colore
Vedi di più
Principiante
Lezione 4
Disegna un personaggio dei cartoni
Vedi di più
Principiante
Lezione 5
Colorazione digitale
Vedi di più
Principiante
Lezione 6
Disegnare Animali Domestici
Vedi di più
Intermedio
Lezione 7
Disegna un personaggio femminile
Vedi di più
Principiante
Lezione 8
Illuminazione + Ombreggiatura
Vedi di più
Intermedio
Lezione 9
Illuminazione + Ombreggiatura
Vedi di più
Intermedio
Lezione 10
Illustrazione digitale
Vedi di più
Intermedio
Lezione 11
Dipingere Ritratti
Vedi di più
Intermedio

Scopri cosa pensano i nostri studenti delle lezioni...

"Perfetto per principianti!"
"Facile da seguire!"
"Davvero divertente!"

Scopri perché i nostri studenti adorano i nostri corsi...

4.8
(in base a 8,303 recensioni dei clienti)
V0
Vivee 0.
4 settimane fa
Acquisto verificato
Sono molto grata per questo corso: nessuno meglio di te ha potuto mostrarmi cosa voglio imparare. Tuttavia, usare i livelli, le maschere, ecc., mi sembra ancora un po' complicato. Ho difficoltà a capire cosa usare, quando, come e perché. Inoltre,
+ Mostra di più
ho notato per caso che con uno dei livelli, hai detto che lo avresti impostato su Hard Light, ma in realtà hai finito per impostarlo su Add. :/ In ogni caso, sono entusiasta di continuare con il resto delle lezioni: hai già mostrato così tanti suggerimenti utili e te ne sono particolarmente grata! :)
Recensione del corso "Capire e realizzare luci e ombre
LH
Luc H.
3 settimane fa
Acquisto verificato
Questo è senza dubbio il miglior corso di tutorial online che abbia mai seguito. Rodgon è un genio che ha formulato un metodo impeccabile per il character design e questo ha risposto a molte delle domande che avevo su come disegnare in modo coerente
+ Mostra di più
i personaggi da diverse angolazioni e come valutare le proporzioni. Sono un designer e illustratore professionista, ma questo ha sbloccato tecniche in cui mi ero un po' imbattuto negli ultimi decenni, valutando tutto a occhio senza avere un framework infallibile a cui fare riferimento. Rodgon è anche un tutor premuroso, questo corso inizia proprio dall'inizio per chiunque non abbia competenze di disegno di base, ma alla fine aumenta fino al livello esperto e tornerò sicuramente ad alcuni dei moduli precedenti in modo da poter replicare in modo affidabile il contenuto così come lo ho nel mio album da disegno! Corso fantastico, non posso che consigliarlo vivamente a chiunque voglia sapere come disegnare personaggi umani e sicuramente assorbirò molte di queste tecniche nel mio lavoro da ora in poi.
Recensione del corso "Impara l'anatomia in 21 giorni
LC
Lorena C.
3 settimane fa
Acquisto verificato
Ho trovato questo corso davvero utile. Da principiante assoluto, ho imparato molto sul disegno del corpo umano e sulle diverse parti e muscoli da tenere in considerazione per disegnare un personaggio che abbia una posa e una proporzione coerenti, in
+ Mostra di più
base alla narrazione che voglio ottenere. Rodgon fornisce molte informazioni e condivide conoscenze importanti sull'anatomia umana. Sono davvero soddisfatto di ciò che ho imparato e del tempo che ho dedicato a seguire e mettere in pratica le lezioni!
Recensione del corso "Impara l'anatomia in 21 giorni
SM
Stefan M.
3 settimane fa
Acquisto verificato
È sempre un piacere imparare dal vero e unico RODGON! Grazie mille per aver reso semplici le cose complesse! Consiglio questo corso a chiunque voglia creare personaggi partendo dalla propria immaginazione, imparando ciò che conta: le basi! Grazie anc
+ Mostra di più
ora per averlo fatto!
Recensione del corso "Impara l'anatomia in 21 giorni
AT
Allison T.
1 settimana fa
Acquisto verificato
Questo corso è stato fantastico! Lauren spiega le cose in modo così chiaro e fa sembrare tutto fattibile, anche se sei alle prime armi. Il suo stile di insegnamento è divertente, amichevole e super incoraggiante. Se hai sempre sognato di disegnare i
+ Mostra di più
tuoi amici pelosi, ti consiglio vivamente di provare questo corso.
Recensione del corso "Disegnare un animale domestico da zero
RK
Rama K.
6 giorni fa
Acquisto verificato
Apprezzo sempre i tutorial che spiegano il processo passo dopo passo. Questo è il mio secondo corso su 21Draw. Il primo è "Mastering Lighting and Shading" di Aveline Stokart. Dopo aver completato quel corso, ho trovato questo corso adatto a
+ Mostra di più
l tipo di progetti che faccio. Il processo spiegato in questo corso aiuta studenti come me a demistificare un'opera d'arte/illustrazione professionale e ad avere un metodo prevedibile e chiaro per ottenere i risultati finali desiderati. Grazie Kenneth Anderson per aver spiegato con pazienza e con un esempio dettagliato!
Recensione del corso "Illustrazioni incentrate sui personaggi
LC
Lidia C.
2 mesi fa
Acquisto verificato
Penso che questo corso completi quello di Erika (so che ha 2 corsi su Photoshop, spero anche su Procreate). Consiglio vivamente di seguire questo corso dopo aver seguito quello di Erika, Isabelle scivola attraverso molte cose che sono spiegate in det
+ Mostra di più
taglio nell'altro corso e fa alcune cose in modo diverso, il che è fantastico, perché ora ho modi diversi di accedere a determinate funzionalità. Mi è piaciuto soprattutto creare i miei pennelli e ho apprezzato molto la lezione "suggerimenti, trucchi ed errori comuni"... COLPEVOLE come imputato. Potresti chiamare questo corso "Principianti Parte 2". Amo questo abbonamento sempre di più ogni giorno <3
Recensione del corso "Procreate facile
GM
Gladys M.
2 mesi fa
Acquisto verificato
Ho avuto il piacere di imparare da Aveline e non posso che consigliarla! La sua abilità nell'insegnare luci e ombre nella grafica digitale è estremamente eccezionale. Aveline si prende il tempo di spiegare come luci e ombre possano provocare emoz
+ Mostra di più
ioni, aggiungendo un livello di comprensione più profondo al processo creativo, piuttosto che concentrarsi semplicemente sulla tecnica. Ciò che mi ha colpito in modo particolare è stato il modo in cui ha collegato i colori all'espressione emotiva, il che mi ha permesso di comprendere il potenziale del mio lavoro sotto una luce completamente nuova. I consigli che ho ricevuto su come esprimere meglio le emozioni attraverso la selezione e l'ombreggiatura dei colori sono stati davvero utili. La mia lezione è stata molto divertente oltre che molto istruttiva. Ora mi sento molto più sicuro delle mie capacità e non vedo l'ora di continuare a esercitarmi e svilupparmi grazie alla sua guida. Aveline, grazie!
Recensione del corso "Capire e realizzare luci e ombre
LG
Laura G.
3 mesi fa
Acquisto verificato
Tenendo presente che ho amato tutto di questo corso, una delle cose che ho preferito di più è stata vedere Rodgon divertirsi così tanto quando una posa, un'espressione o un personaggio prendeva vita. Questo mi ha aiutato a ricordare perché sto in
+ Mostra di più
vestendo così tanto nel migliorare, perché disegnare è il mio posto felice e migliorare e imparare di più mi rende più felice. Poi, ovviamente, c'è il fatto che tutte le spiegazioni erano molto facili da seguire, gli esempi erano perfettamente pertinenti e i suggerimenti e i trucchi erano perfetti e molto facili da ricordare. Come ho detto all'inizio di questa recensione, ho amato tutto di questo corso. Grazie!
Recensione del corso "Come dare vita ai tuoi personaggi
OP
Ondřej P.
2 mesi fa
Acquisto verificato
Mi aspettavo un po' più di informazioni per ogni lezione, ma ho comunque notato qualcosa. Per gli animali domestici che disegno nello spazio, la prospettiva dovrebbe probabilmente essere discussa un po' lì. Perché è probabilmente la cosa più
+ Mostra di più
difficile che sarà necessaria per stabilire i contorni di base dell'animale domestico nello spazio.
Recensione del corso "Disegnare un animale domestico da zero
RT
Rômulo T.
2 mesi fa
Acquisto verificato
OMG questa è un'ora di ORO puro! Mi sembra che l'insegnante stia svelando alcuni segreti in questo corso, lol, perché ho appena imparato un SACCO di tecniche e trucchi incredibili che mi sono sempre chiesto "ma come fanno?" quando h
+ Mostra di più
o guardato il lavoro di più artisti incredibili. Mi piace anche Procreate, anche se il mio software preferito è CSP, ho potuto imparare un sacco di trucchi utili su Procreate. e credo di poter facilmente realizzare tutte le tecniche anche in CSP. Inoltre, l'insegnante spiega così bene e l'arte è così bella. Mi è piaciuto molto questo corso.
Recensione del corso "Come disegnare un personaggio dei cartoni animati
TS
Taylor S.
2 mesi fa
Acquisto verificato
Questo è sicuramente un corso per persone che hanno già familiarità con gli strumenti e le tecniche di Procreate. Ho imparato molto, ma ho dovuto mettere in pausa i video "let's paint" costantemente per capire i passaggi che stava esegu
+ Mostra di più
endo: istruzioni chiare e basilari (come quali pennelli usare) mi sarebbero state utili. Detto questo, la conoscenza della luce di Aveline è incredibile e il corso è stato super utile per costruire una migliore comprensione! Farò spesso riferimento alle risorse e agli esempi.
Recensione del corso "Capire e realizzare luci e ombre
LW
Lana W.
3 mesi fa
Acquisto verificato
STRAORDINARIO!!!! Mi sono divertito tantissimo e ho provato gioia e ho amato ogni singola lezione. Mark è un insegnante e un essere umano meraviglioso, così creativo e ti fa credere che puoi farcela anche tu, con alcuni blocchi d'arte che ho dovu
+ Mostra di più
to usare per illustrare il mio libro per bambini è stata una sfida e questo corso ha sbloccato la mia paura, le mie preoccupazioni e mi ha ispirato a creare di nuovo, grazie, sono così grato e ne farei un altro Mark!!
Recensione del corso "Impara a disegnare in 21 giorni (Stagione 1)
LC
Lidia C.
1 mese fa
Acquisto verificato
Non ho mai pensato di usare lo scheletro per aiutarmi con l'anatomia e i suggerimenti e i trucchi sono eccellenti... Consiglierei di seguire la lezione 8 dopo aver fatto uno dei corsi per principianti (Erika), rende tutto molto più chiaro quando
+ Mostra di più
si parla di alpha lock e sfocatura gaussiana e gli altri passaggi correlati a Procreate. Ottimo corso, lo proverò sui miei gatti :)
Recensione del corso "Disegnare un animale domestico da zero
NL
Nancy L.
1 mese fa
Acquisto verificato
Il corso di Tony è ciò che mi ha ispirato ad abbonarmi a 21 Draw. Voglio migliorare il modo in cui disegno i miei personaggi, per dargli più vita e renderli più interessanti. Tony trasmette davvero bene gli elementi essenziali su come disegnare pose
+ Mostra di più
più interessanti. Non sono un principiante, ma direi che il suo corso andrebbe bene sia per i principianti che per gli intermedi.
Recensione del corso "Disegnare pose di personaggi con personalità
AS
Ani S.
3 mesi fa
Acquisto verificato
Ottimo per i principianti nell'illustrazione digitale (Procreate), questo corso guiderà Isabelle spiega le basi, mostra come usare gli strumenti in Procreate e ti aiuta a creare la tua prima opera d'arte digitale Disegno in Procreate da molto
+ Mostra di più
tempo, ma anche per me questo corso è stato interessante e utile. È un ottimo modo per rinfrescare le basi e imparare nuovi suggerimenti per migliorare le tue competenze
Recensione del corso "Procreate facile

Nessun altro pacchetto offre questo livello di qualità...

Le 11 lezioni online avrebbero un costo di $595, ma sono tutte tue per una frazione di quel prezzo!

Immaginalo: quel passatempo che una volta hai amato può diventare il tuo passaporto verso la libertà finanziaria.

E la parte migliore? Costa SOLO quanto un paio di jeans nuovi 👖 o 20 caffè ☕ o una cena per due 💑
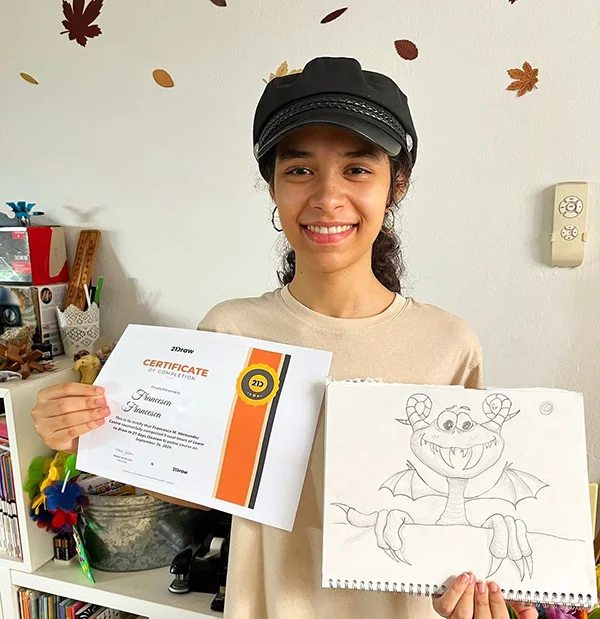
Certificati che riconoscono i tuoi risultati

Quando hai finito ogni lezione, otterrai un certificato di completamento. Condividilo sul tuo portfolio, sui social media o dove preferisci.

Perché sceglierci:

Lezioni premium
Sistema semplice e graduale
Artisti e insegnanti verificati
Curriculum strutturato
Video senza pubblicità
ZERO aria fritta
Possibilità di ottenere risposte alle tue domande
Possibilità di ricevere feedback sui disegni
Risorse del corso
Certificato di completamento del corso
Approfitta dell'offerta: solo per un tempo limitato!
Garanzia di rimborso di 30 giorni!

A chi è destinato questo pacchetto...

Hai recentemente acquistato un iPad e Procreate e vuoi iniziare

Cerchi un pacchetto TUTTO IN UNO che risolverà tutti i tuoi problemi con Procreate

Artisti principianti che vogliono migliorare le proprie competenze di character design

Principianti che vogliono imparare il disegno della figura, le pose e il disegno gestuale in Procreate

Sei alla ricerca di fantastici trucchi, consigli e segreti per Procreate che non hai visto da nessun'altra parte

Chi fa fatica a mettersi al passo con l'arte digitale dopo anni di disegno tradizionale

Vuoi migliorare le tue abilità su Procreate, anche se sei un illustratore esperto

Utilizzi già Procreate ma hai bisogno di nuovi spunti

Per chi vuole professionalizzare le proprie capacità artistiche digitali e guadagnare con la propria arte

Artisti interessati al character design e all'illustrazione digitale

Artisti che vogliono approfondire la comprensione delle funzionalità e capacità di Procreate, per ottimizzare il flusso di lavoro e migliorare la propria arte

Chi è curioso di conoscere le funzionalità specifiche di Procreate, come la gestione dei livelli, le modalità di fusione e l'uso dei pennelli.

Domande frequenti

Cosa comprende l'abbonamento?

Membership includes unlimited access to all 50+ courses taught by the world’s best artists PLUS new courses as they are released.

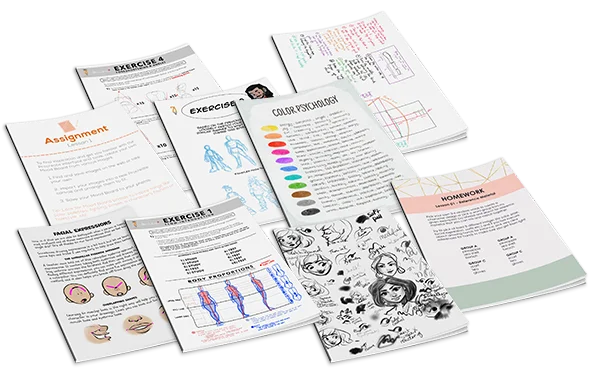
Each class includes 10-20 video lessons that are 7 minutes long on average. Most classes include exercise sheets, assignments, and layered PSD or PNG files.

Some classes include the ability to chat with the instructor in a public forum, e.g. if you want feedback on your artwork.

Si tratta di corsi online o dal vivo?

All classes are pre-recorded and you can watch them online with any digital device, anytime, and for an unlimited number of times! This means you can easily watch (and rewatch) them at your own pace and convenience.

We also have bonus live sessions that are free of charge for all our students.

Qual è il livello dei corsi?

The classes are approachable for beginners and has advanced techniques for those with more experience.

If you have no art experience whatsover or struggle to draw a basic character, we recommend starting off by taking our 'Learn to draw in 21 days' classes.

I corsi sono disponibili in altre lingue oltre all'inglese?

All classes are available in English (original narration) and most have dubbed narration in Spanish, French, Italian, German, & Portuguese.

Subtitles are available for all course in the following languages: English, Spanish, Japanese, French, German, Italian, Portuguese & Indonesian.

È prevista una garanzia?

Assolutamente sì! Tutti i nostri abbonamenti hanno una Garanzia di Soddisfazione di 30 Giorni. Se non si è pienamente SODDISFATTI e ISPIRATI, basta contattarci entro 30 giorni per ricevere un rimborso completo, senza dover fornire motivazioni!
21 Draw è presente su...

Chi è 21 Draw?

Dal 2013 in numeri:
  • grande comunità di 70k
  • 40k libri d'arte venduti
  • 10.000 sostenitori su Kickstarter
  • $632k finanziati su KS

Abbiamo iniziato 21 Draw in Svezia nel 2013 con l'obiettivo di aiutare tutti a diventare artisti migliori!

Ci chiamiamo 21 Draw perché quando abbiamo iniziato il nostro budget ci consentiva di assumere 21 artisti. Tuttavia, un gran numero di artisti erano così entusiasti di essere coinvolti, che non abbiamo potuto resistere ad aggiungerne altri e a creare ancora più prodotti, dai libri ai corsi online.

Il nostro obiettivo è lavorare al fianco dei migliori artisti del mondo per aiutare la nostra community e te a raggiungere i vostri obiettivi artistici. Vogliamo rendere un'istruzione artistica straordinaria alla portata di tutti.

Chiudi
Iscriviti per SOLI USD $59/anno! Garanzia di rimborso di 30 giorni