Zaoszczędź 75% na członkostwie.
Artyści
Kursy
Recenzje
Społeczność

Procreate Made Easy

Uzyskaj szczegółowe wskazówki od artystów Disney, Marvel i DreamWorks, aby opanować projektowanie postaci i środowiska!
30-dniowa gwarancja zwrotu pieniędzy!
4.8
(na podstawie 8,303 recenzji)

Uzyskaj dostęp do

1000+
Lekcje w małych porcjach
55+
Lekcje sztuki
34
Nauczyciele światowej klasy

Poznaj swoich instruktorów

Wybieramy najlepszych artystów i jeszcze lepszych nauczycieli.

Aveline Stokart

Projektant animacji DreamWorks + artysta komiksowy

Aveline Stokart

Aveline is not just an amazing comic book artist designing characters that feel real – she’s also a fantastic teacher. And a very curious one too!

She’s explored everything from drawing to pottery, always looking to try something new and make art that hits you right in the feels.

She currently works as a freelance concept artist/character designer for various clients in the field of publishing, animation, and video games.

Her clients include Simon and Schuster and Skydance Media, HarperCollins Publisher, DreamWorks Animation…

From an early age, she showed a particular interest in drawing—a natural fit, as she is highly curious and observant, but also quite sensitive. She marvels at the beauty held within the simplest of things. 

Fascinated by character design and creating universes, she developed a unique dimension to her creations by studying 3D Animation at the Haute Ecole Albert Jacquard in Belgium, where she graduated in 2011. 

When she’s not drawing, Aveline likes to express herself musically, by singing and playing the guitar, piano and the ukulele.

I am always trying to evolve and discover new things and challenges. My goal is to create beautiful images and atmospheres that release many different emotions.

Naucz się manipulować efektami świetlnymi za pomocą różnych trybów mieszania na kursie Aveline “Opanowanie Oświetlenia i Cieniowania”

1/6
Zobacz portfolio artysty

Erika Wiseman

Ilustrator szkolony przez Disneya (Ravensburger). Pracował dla Adobe.

Erika Wiseman

This illustrator’s feed is a burst of joy with her colorful and cute creations. Starting in 2008, she’s carved out a space where creativity meets encouragement, making her an inspiration for budding artists everywhere.

Erika Wiseman (aka Erika the Goober) is a freelance illustrator and character designer who lives in the US. She loves drawing cute, colorful things and experimenting with new drawing techniques.

Erika began teaching herself to draw digitally in 2008. Since then, she has been working with a graphics tablet and Photoshop as well as Procreate to create her digital illustrations.

In 2017, she graduated from the University of Louisville with a Bachelor in Fine Arts (with a dissertation in drawing). She made a name for herself on Instagram, which is the best place to find her art! One of her goals is to help and inspire others along their creative journey to be the best artists they can be.

Inspiration

Much of my inspiration comes from the things I love, the colorful worlds of video games and animated movies.

Tools

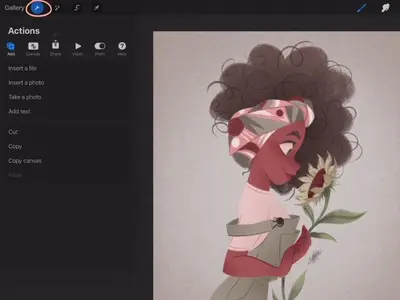
I use Photoshop CS6 and a Wacom Intuos Pro. I use an iPad Pro, Apple Pencil, and the Procreate app as well! It really just depends on how I’m feeling that day and if I want to draw at my desk or somewhere else!

Advice

My top 3 tips: Draw every day, draw from life, and study anatomy!
✏️ Create a character from scratch, step by step. Learn more in the beginner course: Digital Drawing in Procreate.

1/4
Zobacz portfolio artysty

Feefal (Linnea Kikuchi)

Ponad 1 milion obserwujących na Instagramie

Feefal (Linnea Kikuchi)

Dive into Feefal’s world, where cute meets the mysterious. With a palette that ranges from digital to traditional, her art is a favorite among over a million fans. If you’re into charming yet slightly spooky visuals, she’s your artist.

Linnea is a Swedish/Japanese artist with a following of over 1 million on Instagram.

She is known for creating anthropomorphized figures and cute, spooky characters.

Linnea lives in Stockholm with her Sphynx cat called Tofu. Feefal shares her art on a regular basis on Instagram, which she creates through a variety of media, such as Procreate (digital software), graphite, and gouache. She also published an art book, ‘The Art of Feefal’.

Fans know her by her unique, charming style featuring beautiful visuals and cute characters with horror/spooky elements. In her words, ‘I put my artistic soul in a blender’!

Don’t think your work has to be perfect or be afraid of your art being ugly. Art will be ugly sometimes. That’s how you get better!

The best part of creating art for me is definitely the sense of fulfillment I get putting my creative works out into the world. It’s really rewarding to see something you’ve put your soul into getting so many positive responses from people. It’s quite the rush!

Inspiration

I mostly get inspiration from nature, death, space, and occasionally spirituality. Space is probably my main muse. It’s just way too large for any human to quite wrap their head around, and its incomprehensible size makes it so intriguing.

Naucz się przenosić swój ręcznie rysowany szkic na iPada do kolorowania 🎨, w łatwym procesie krok po kroku. Dowiedz się więcej na zajęciach.

1/3
Zobacz portfolio artysty
1.1m obserwujących

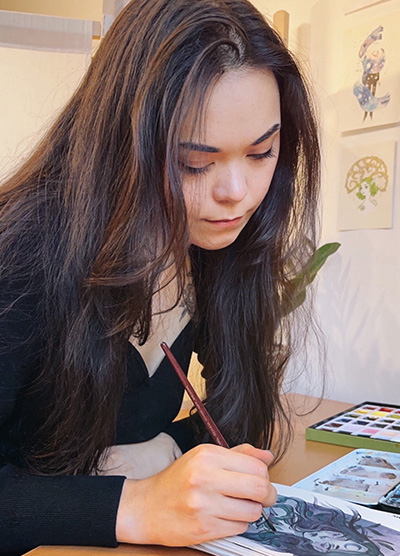
Isabelle Staub

Artysta Portretowy współpracujący z Marvel

Isabelle Staub

Isabelle Staub artist photo

From viral Disney reimaginings to Marvel collabs, this Philly-based digital artist dazzles with detailed portraits and character designs. With a passion shared through art and teaching, her creations are a must-see.

Isabelle Staub is a US-based freelance artist, specializing in vibrant digital portraits and character design with incredible attention to detail.

Isabelle started creating art at a very young age and went on to receive a BFA in Illustration at Moore College of Art and Design in Philadelphia. The culmination of dedicated work and a burning passion has propelled her to become a recognized artist worldwide.

Her popular series ‘Disney animals transformed into human characters’ went viral on social media, leading to collaborations with companies such as Marvel and MGA Entertainment.

Art has always been a love of mine from before I could remember. I pour my heart, mind, and soul into every piece I create.

Isabelle’s versatility and creative talent allowed her to work with brands such as Dynamite Comics, Wacom, TikTok, Corel Painter, and more. Teaming up with CASETiFY, she created an entire line of gorgeous device cases.

Along with creating original artwork for her clients, she also uses her social media platforms to educate others, passing on her artistic knowledge and expertise. Isabelle currently lives in Philadelphia and has two adorable cats.

What advice would you give to new artists?

Be easy on yourself! Being an artist is a journey, not a destination. Try not to compare yourself to people further along in their journey. You will get there!

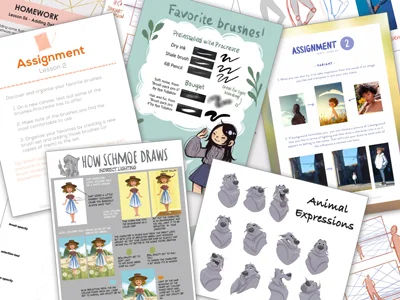
Create stunning art with a basic set of Procreate tools. Learn more in Isabelle’s Procreate Made Easy class.

1/4
Zobacz portfolio artysty
385k obserwujących

Simone Grünewald

Współpraca z DreamWorks, dyrektor artystyczny

Simone Grünewald

Meet “Schmoe,” your go-to artist for illustrations that breathe life into the everyday with charm and wit. Her vibrant creations, filled with humor and the realness of motherhood, are a breath of fresh air, promising a smile and a new perspective with every piece.

Simone Grünewald is a Visual Development artist from Germany who worked in the gaming industry for over 10 years as an art director, character designer, and 2D animator.

In addition to her commercial work, she loves creating emotive, dynamic designs that document her life, including the experiences of motherhood. Having followed the creative path all her life, Simone has a wealth of knowledge in traditional and digital art.

She shares beautiful, entertaining artwork as well as insights and tips with her followers on social media and is known for her humorous characters and everyday themes. Simone is also the author of Draw What You Love and Sketch Every Day.

Znajdź pomysły na swoje rysunki, oglądając różne przykłady. 🖌️ Poznaj kroki w Digital Illustration in Procreate.

1/4
Zobacz portfolio artysty
606k obserwujących

Maria Lia Malandrino

Współpraca z Disneyem, artysta rozwoju wizualnego

Maria Lia Malandrino

Od gier wideo po książki, ta włoska artystka ożywia opowieści swoimi barwnymi ilustracjami. Jej różnorodne projekty zdobyły serca na całym świecie, ukazując jej talent do tworzenia angażującej, narracyjnej sztuki.

Maria jest ilustratorką i artystką narracyjną z Turynu we Włoszech. Posiada licencjat z wydawnictw magazynowych na University of the Arts w Londynie, studiowała tradycyjną animację w International School of Comics w Turynie i uczestniczyła w masterclassie z tworzenia storyboardów w szkole online CGMA.

W 2018 roku założyła niezależne studio gier wideo w Turynie i obecnie pracuje nad drugą grą wewnętrzną „Out of The Hat”, niezwykłą podróżą w umyśle złoczyńcy.

W ciągu ostatnich kilku lat Maria pracowała przy wielu projektach wydawniczych jako ilustratorka i projektantka postaci, dla czołowych wydawnictw i marek, takich jak Oxford University Press, Hachette i Disney. Jej prace ilustracyjne reprezentuje agencja ilustracyjna Advocate Art.

Realizuje również osobiste projekty ilustracyjne i komiksy, które można śledzić na jej blogu i Instagramie.

Inspiracje

Czerpię inspirację z wszystkiego, co widzę i czytam, zdecydowanie z książek, seriali telewizyjnych i filmów, ale także ze stylu ulicznego, architektury, ludzi w kawiarniach… Myślę, że wszystko, co spotykam, zostaje gdzieś uwięzione w mojej podświadomości i jest nieustannie przetwarzane w to, co rysuję lub piszę.

Ulubione

Cytat: „Bierz, co chcesz i płać za to” to cytat z mojej ulubionej serii książek „Koło Czasu” – podoba mi się pomysł, że wszyscy możemy podjąć decyzję, aby żyć jak najprawdziwiej dla siebie, decydując się na to, nawet gdy wiemy, że mogą być konsekwencje, które będziemy musieli ponieść.

Artyści: Alessandro Barbucci, TB Choi, Otto Schmidt, Jin Kim, Patrick Osborne

Filmy/Seriale: Mała Miss, Laputa, Jak wytresować smoka / Full Metal Alchemist Brotherhood (jako serial)

Gry: Bioshock Infinite, Wiedźmin 3, Sunless Sea, każda gra z serii Civilization

Narzędzia

Do ilustracji i projektowania postaci używam iPada Pro i Procreate, chociaż do animacji wolę Wacom Cintiq 22HD podłączony do mojego iMaca.

Porady

Uważam, że nie ma jednego rodzaju rady, która zadziała w 100% dla każdej osoby.

Świat gier i ilustracji poznałam dość późno, bez formalnego wykształcenia, po latach nauki i pracy w zupełnie innych dziedzinach. Moja rada to, że nigdy nie jest za późno. Parafrazując Rainera Marię Rilkego, jeśli po przebudzeniu myślisz tylko o rysowaniu, prawdopodobnie powinno to stać się twoim głównym zajęciem! Nie ma znaczenia, jeśli nie rysujesz w stylu, który jest ‚konwencjonalnie’ uważany za fajny lub piękny, jeśli to jest to, czego potrzebujesz, aby wyrazić siebie, warto to kontynuować!
Naucz się rysować postać z kreskówki od początku do końca na zajęciach Marii.

1/3
Zobacz portfolio artysty

Meike Schneider

Artysta 3D współpracujący z Pixar

Meike Schneider

Przekształca scenę sztuki 3D, tworząc postacie, które wyskakują z ekranu. Czerpiąc inspirację z klasyki animacji, jej praca w projektowaniu postaci i edukacji rozświetla branżę, czyniąc ją wzorem dla aspirujących artystów.

Meike jest artystką 3D i ilustratorką, skupiającą się głównie na postaciach, mieszkającą w Kolonii, Niemcy. Prawdopodobnie jest najbardziej znana z Instagrama i „MerMay” Toma Bancrofta. Jej praca obejmuje projekty takie jak ilustracje książek dla dzieci, projektowanie postaci, rozwój wizualny, modelowanie postaci i środowisk 3D oraz rozwój wyglądu. Obecnie pracuje jako freelancerka dla różnych studiów animacji i firm, a także uczy jako instruktorka w Szkole Gier w Kolonii.

Jej praca była mocno inspirowana klasykami Walta Disneya, takimi jak Aladyn i Pocahontas. Filmy komputerowe takie jak Zaplątani, Kraina Lodu czy Ralph Demolka były jednymi z powodów, dla których postanowiła podążać ścieżką kariery w animacji.

Po wygraniu Artysta Miesiąca w maju 2016 przez RebusFarm, jej postać 3D, „Mała Mary”, została opublikowana w 3D World Magazine Issue 211, najlepiej sprzedającym się magazynie na świecie dla artystów CG.

Zaraz po ukończeniu szkoły w 2012 roku, zaczęła studiować animację 3D i VFX w akademii sztuk medialnych PIXL VISN. Po ukończeniu studiów z dyplomem z animacji, została finalistką w ‘The Rookie Awards 2014’, co doprowadziło do pracy w Dooblex, studio zajmującym się wizualizacją produktów. Pracując jeszcze na pełen etat, zaczęła przyjmować zlecenia i powoli budować swoją własną markę jako artystka.

W połowie 2019 roku, Meike zrezygnowała z pracy, aby stać się pełnoetatową freelancerką, pracując nad projektami takimi jak ilustracje książek dla dzieci „Finni & Fredo” i „My Best Book”, prace dla Adobe, rozwój wizualny i projekty postaci dla nadchodzącego programu telewizyjnego „Coral Kins”, a także projekty postaci do gry mobilnej Paris Hilton.


Podążaj za prostymi krokami, aby kolorować i dodawać szczegóły. 🖌️ Dowiedz się więcej w Drawing a Female Character autorstwa Meike

1/3
Zobacz portfolio artysty

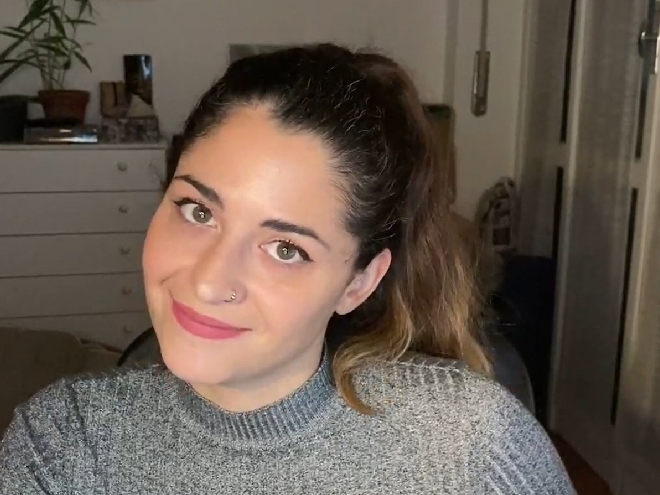
Lauren Barger

Współpraca z Disneyem i Mattelem, rysownik zwierząt

Lauren Barger

Lauren Barger profile picture

Lauren transforms pets into digital art in Procreate, enchanting with her ‘Coffeedraws’ and humorous animal cartoons. Her collaborations with Disney and Mattel, paired with co-hosting MerMay, spotlight her as a beacon of creativity and fun in character design.

Lauren is a character designer based in Charlotte, NC, known for creating ‘Coffeedraws’, being a co-host of MerMay on Instagram and for her comical cartoons of animals and people.

Lauren Barger, Character Designer & Illustrator

Lauren attended Herron School of Art and Design, where she pursued a BFA with a focus on illustration.

In 2019, she opened her company, LB Fine Art, producing mainly portrait artwork on commission both traditionally, using watercolors and colored pencils, and digitally.

She has gone on to work in visual development and character design with notable companies in the animation and toy industries, including SonyDisney, Pixelle Studioand Mattel.

Lauren is also a co-host and partner of MerMay, a social media drawing contest founded by Disney animation veteran, Tom Bancroft.

I am passionate about visual development and character design and love making my audience laugh and smile through my artwork!

Lauren is known for her engaging illustration projects, such as the ‘Animal Butt’ watercolor series, ‘Coffeedraws’ series, and ‘Pets to People’ series.

‘Coffeedraws’ is an interactive social media series that ran for 200 consecutive days, generating a strong following on Instagram. This series has been a highlight of Lauren’s artistic journey and a delightful way to interact with her followers.

I create fun art, or “F-ART” as I call it. I am a F-ART maker!

Master basic anatomy for drawing dogs and cats! 🐕  Discover more in Drawing Pets from Scratch class.

1/3
Zobacz portfolio artysty

Szybko zwiększ swoje umiejętności w Procreate

Naucz się tworzyć sztukę od podstaw

Opanuj zarządzanie warstwami, tryby mieszania i użycie pędzli

Przekształć swoje początkujące dzieła w zachwycające obrazy cyfrowe, którymi będziesz dumny się dzielić.

Obejrzyj te dogłębne zajęcia i podnieś swoje umiejętności!

Procreate
Animacja
Projektowanie środowiska
Podstawy rysunku

O członkostwie

Członkostwo daje Ci 11 kursów Procreate i 40 innych kursów artystycznych.

Niezależnie czy jesteś początkujący czy zaawansowany, mamy zajęcia dla WSZYSTKICH POZIOMÓW UMIEJĘTNOŚCI!

Nasi nauczyciele pokażą Ci jak używać pędzli 🖌️, a następnie nauczą Cię cieniowania i oświetlenia, aby Twoje rysunki się wyróżniały!

Na koniec poczujesz się pewnie rysując na iPadzie, a dodatkowo otrzymasz certyfikat potwierdzający!
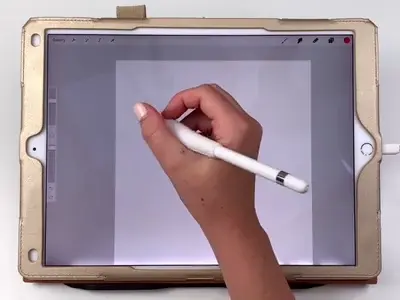
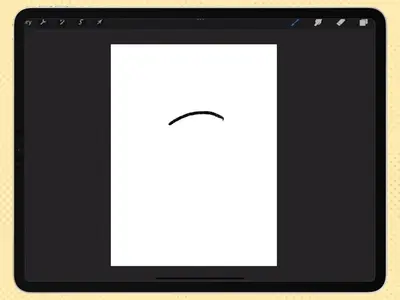
comiesięczne aktualizacje
Nowe Zajęcia
Co miesiąc otrzymasz automatycznie nowe zajęcia bez dodatkowych opłat! 🤩
społeczność
Ponad 210 tys. członków
Uzyskaj dostęp do społeczności rówieśników i asystentów nauczyciela, aby otrzymać opinie i inspirować się tym, co inni dzielą się.
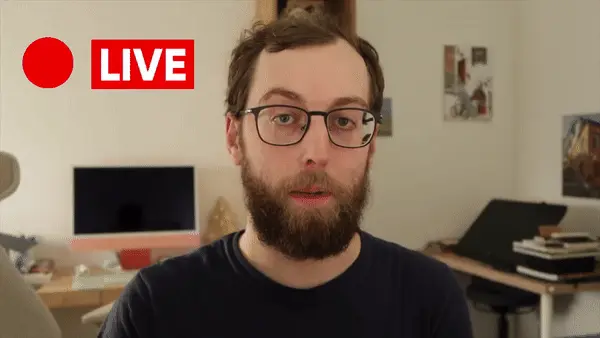
wydarzenia na żywo
Wydarzenia na żywo
Ucz się na żywo od swoich ulubionych artystów.

Czego się nauczysz

Digital Workspace Setup & Navigation

  • Set up your digital workspace with Erika Wiseman 🖌️
  • Navigate & utilize Procreate’s main tools & features with Isabelle Staub 🌟

Artistic Techniques & Styles

  • Select brushes that complement your style and drawings 🖌️
  • Hone your drawing technique and stroke pressure control ✍️
  • Explore concepts of light and shading with Aveline Stokart 💡

Workflow Efficiency & Productivity

  • Discover time-saving shortcuts for efficient workflow 🕒
  • Uncover hidden tips and tricks for maximizing productivity 💡
  • Learn to create captivating time-lapse videos of your artwork 🎥

File Management & Sharing

  • Master file importing and exporting processes 📤
  • And most importantly giving you the confidence to share your art! 💪

Progress Tracking & Assignments

  • Each video lecture comes with easy-to-follow assignments that you can use to track your progress 📚

Get ready for an exciting adventure and discover how amazing you can be as a digital artist! Start now! 🚀
Czy jesteś gotowy, aby przejść od zera do bohatera? 💥

Zarejestruj się za JEDYNIE USD $59/rok!
Pośpiesz się, tylko przez ograniczony czas!

Otrzymujesz więcej niż tylko zajęcia online…

Otrzymaj profesjonalną opinię

Otrzymaj szczegółową informację zwrotną od prawdziwego nauczyciela, kiedy zmagasz się z zadaniami lub dziełami sztuki.

Zdobądź pochwały

Podziel się swoją sztuką (jeśli chcesz 😉) lub ukończonymi zadaniami i otrzymaj pochwały od naszych nauczycieli!

Rozmawiaj z kolegami z klasy

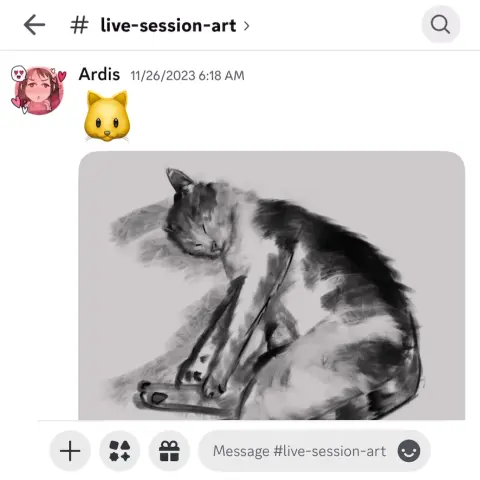
Dołącz do naszej fantastycznej społeczności na Discordzie, gdzie możesz interaktywnie zadawać pytania i uczyć się od siebie nawzajem.

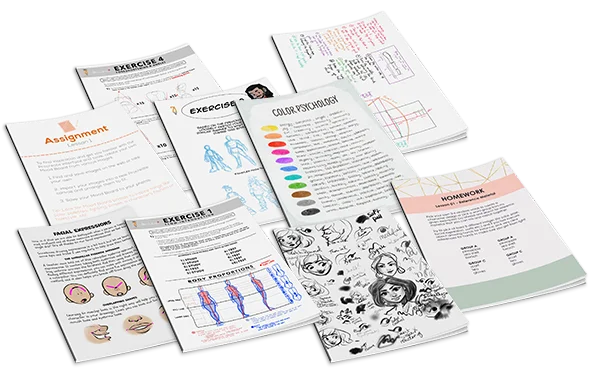
Ćwicz z zadaniami

Większość lekcji zawiera proponowane zadania i przykłady, aby pomóc w praktyce.

Wydarzenia na żywo

Ucz się na żywo od swoich ulubionych artystów.

Ostatnie prace studentów

Nasi uczniowie stworzyli wszystkie ilustracje, które tutaj widzisz. Ty też możesz to zrobić!
1/24
Catie Ilic
Alisa
Jay Thatcher
Nida Özer
@saramakdessi
Cornelia Paulsson
Laura Davies
Prapti Bhetawal
Oksana Shvedenko
Louise Broesky
Viktoriya Storozhuk
Berna Pekustun
Simone
Nesreen Alturkistani
Gautham R
Marjolijn De
Jason K.
Gabriella Antonicelli
Sophie Mattocks
Perrine I
Melissa
Marjolijn De
Kristina Veraldi
Frank Griffen

Zobacz, jak nasi nauczyciele pomagają studentom...

Pytanie studenta
Q8
Quinn 88

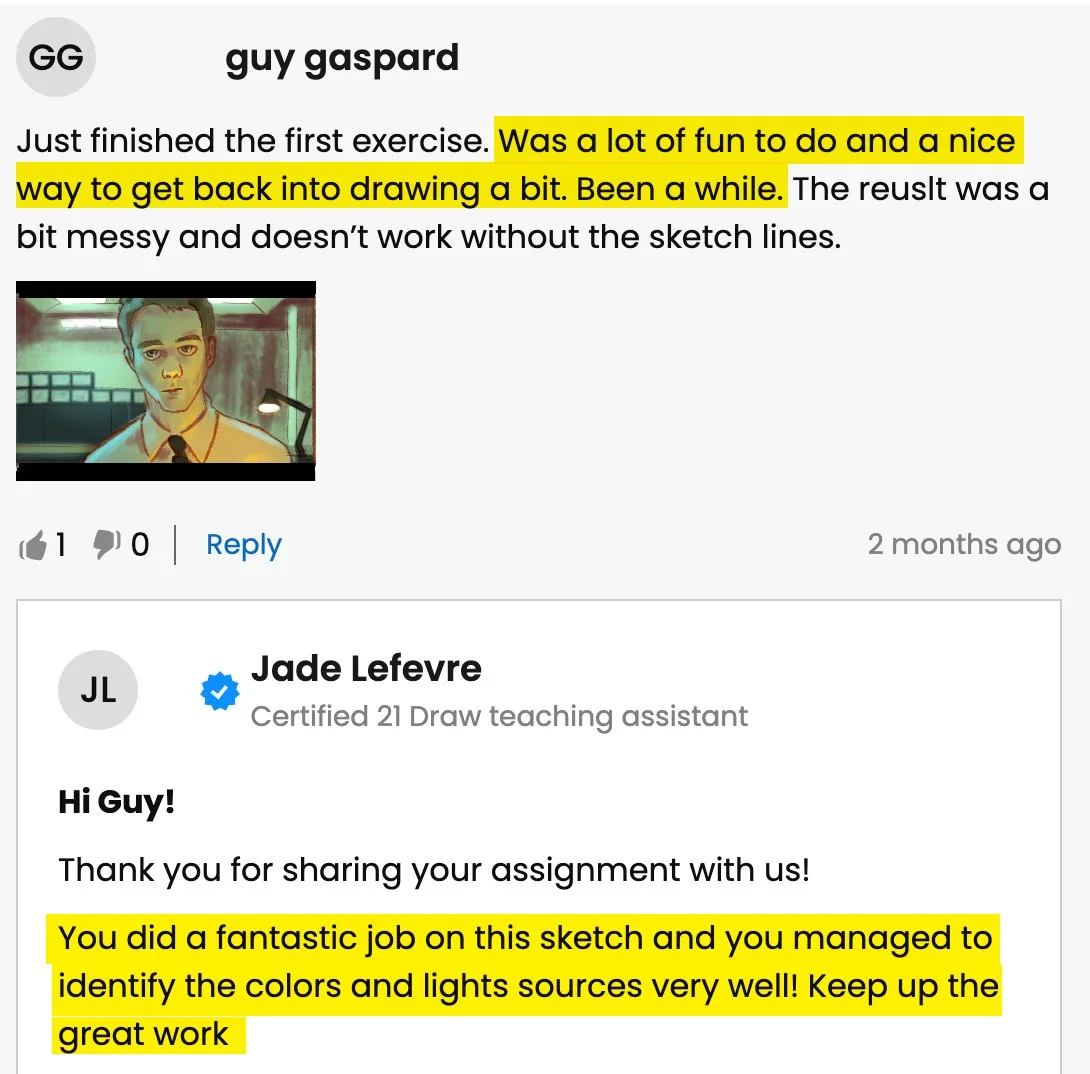
I recently completed the course and I'm really happy with it. Helped me improve on my time and Layer management easily. would love to get some feedback to see in what parts I could improve o... Pokaż więcejn.

Quek Jae Sern (Jae)
Certyfikowany asystent nauczyciela 21 Draw

Hello Quinn,

Congratulations on finishing the course! I’m happy that it helped you out.

Your submission is absolutely stunning! I can see that you’ve put a lot of work into it and we can appreciate all the intricate details you’ve included in the design of your character.

Overall, I think you’ve executed on all the teachings of the course well and you’re definitely ready for a more advanced course. With that said, here is some more advanced feedback that would be outside the scope of this course:

Perspective of Leaves

  • It’s subtle, but I noticed that the leaf surfaces are mostly angled towards the viewer giving a very flat look. I’d encourage you to imagine the leaves being stuck on a surface of a sphere and draw them radiating outward from the center (the shoulder joint). You can check the attached image to see what I mean.

Neck & Collarbone

  • I saw that you included a V-shaped line to denote your character’s collarbone. I realize that this is a stylized piece and that there is an urge to keep things simplified. However, I think your implementation makes it look like there is an additional layer of clothing. Look up references to see how to best simplify the neck/collarbone area.

With that said, I think you did an amazing job. I hope this was helpful and all the best with your future illustrations!

Pytanie studenta
MB
Morgan B

Thanks for the course, I learned a lot! Attached is my mood board and the final piece. For this course I decided to draw a dark elf character I’ve been coming up with. I had a lot of fun m... Pokaż więcejaking this but would appreciate any feedback on how to make it better :)

Quek Jae Sern (Jae)
Certyfikowany asystent nauczyciela 21 Draw

Hi Morgan!

Thanks for your submission and sorry for the delayed response. I’m happy to hear that you got a lot out of the course. First of all, I think you utilized the references and the moodboard wonderfully. Your final designs of your character as well as the environment are cohesive as a result. The colors you used also go a long way in conveying the mysterious and magical feeling of your illustration.

With that said, let me point out some areas with room for improvement.

Symmetry

  • I noticed that some of the facial features and the torso of your character aren’t symmetrical. I recommend the use of guidelines during your drawing phase to help you put elements in the right place and have them be properly aligned.

  • While you’re drawing, you should also flip your canvas horizontally from time to time as it helps you spot errors more easily. Once you’ve identified something that’s asymmetrical or warped in an undesirable way, you can redraw that section or use the liquify tool to correct it.

Armor

  • The design of the armor looks great. I like its curved edges and the ornate etchings. Where I think there is room to improve is in the rendering of the material – in this case, metal. Metal can be tricky to paint. It is a reflective material, so make sure you keep it high contrast. Highlights should be bright and shadows should be dark.

  • In addition to that, try to avoid soft edges as they can make the armor appear “mushy”. Use hard and distinct edges especially where there is overlap between two or more layers of metal.

Overall, I think you did an excellent job. I forgot to point out that you also did great for the background. I hope this feedback helps and good luck for your future illustrations!

Pytanie studenta
YM
Yazmary Melendez

I'm very new to procreate, and I like drawing cute frogs. It was fun to learn so many features in procreate, I look forward to drawing more things in procreate and incorporate more of the th... Pokaż więcejings included in the course. I can definitely see an improvement in how I color and the layering really helped.

Quek Jae Sern (Jae)
Certyfikowany asystent nauczyciela 21 Draw

Hello Yazmary,

I’m glad that you’re learning a lot from the course about using Procreate. Procreate has such powerful tools that many of us can benefit from if only we knew how to use them!

And what a lovely illustration this is. It’s giving such cozy vibes and I also really like the complementary color palette you used for this.

Best of luck with your future drawings and keep drawing!

Pytanie studenta
GA
Gabriella Antonicelli

Fantastic course! I tried to follow Simone's directions in my illustration, from blocking in to choosing brushes to handling shadows and lighting. I would be enormously pleased if I could ge... Pokaż więcejt some feedback so that I can improve my next illustrations. Thank you very much Gabriella

Jade Lefevre
Certyfikowany asystent nauczyciela 21 Draw

Hi Gabriella!

Apologies for the delay in getting back to you!

We're delighted to know you enjoyed the course and found it useful! You did an amazing job on this illustration. I'm a huge fan of the style and your composition skills are impeccable!

Following, you can find a couple of suggestions you can look into for your next illustration, as well as an example attached to this message:

  • You can decide to have a more contrasted, darker shading in some areas of the drawing in order to help the viewer make out some of the shapes better. For example, under the yellow excavator.
  • By deciding the location of the light source, you can make sure to have a consistent direction for your shadows. In my example, I have it set in the middle.
  • The same way, some edges could use an even brighter highlight in order to help the shapes really stand out from the background.

You can find more explanations in the attached pictures. Don't hesitate to ask if you have any question!

Keep up the good work and have a great day!

Pytanie studenta
AC
Andrew Carlyon

I’m following along on this course, but I feel like I’m “stuck” and I’m not sure what to do to improve. I feel like my painting is very flat and I’m struggling with colors. Also,... Pokaż więcej it seems very “blocky’, and I’m struggling to get a fluid, painterly look. Can anyone provide me some guidance? Unfinished painting attached>

Jade Lefevre
Certyfikowany asystent nauczyciela 21 Draw

Hi Andrew!

Thank you very much for sharing your painting with us! The proportions of your portraits are on point and I can tell you've applied all of the teacher's advice very well! Here are a few suggestions to help you with your problem:

  • You can start by having these little dark areas (such as the inside of the mouth, the corners of it, the eyes and eyelids and the nostrils) be darker and stand out more, with a thicker brush.
  • You can also add some more bright and saturated colors to your color blocks. In this case, shades of orange and red! It helps bring life to your undertones!
  • Don't hesitate to either lay your color blocks with a more blurry brush, or to blend them slightly afterwards. One shouldn't make the mistake to over-blend, but a little does help a lot in making the whole thing come together. It's the variation of textures between blended and non-blended which makes the surface interesting to look at.

You can refer to the attached images for reference! Have a great day and don't hesitate to ask if you have any questions!

Pytanie studenta
A
Alisa

Hello, I finished the Aveline’s course and would like to get some feedback how I can improve my illustrations.. I am not completely satisfied with my work so hope your feedback can help.. ... Pokaż więcejThank you.

Rhea Tibbey
Certyfikowany asystent nauczyciela 21 Draw

Hey Alisa! I love your work, you have done an amazing job of following along with Aveline's assignments :)

To keep your feedback simple, I have chosen to refer to your night-time lighting scenario. Check out the tips and images I have attached below, I hope they help :)

  • When you are illustrating an environment a good practice for adding depth is to ensure your foreground uses more saturated colors than your background. Currently they are at a similar level of saturation, this is something you can adjust using your ‘Hue, Saturation and Brightness’ tool.
  • Around the edge of your highlights and shadows you may have a soft line that is a more saturated color.
  • Folds on clothing usually follow a triangular draping pattern down from where they hang from the body. In this case her sweatshirt would mostly be draping from her shoulders. When in doubt with drawing folds in an outfit, a reference picture can make things much easier!
  • If you have warmer tones in your foreground, make the color pop even more by using an ‘Overlay Layer’ to add cooler colors to the background.

I have attached some images with tips and edits to help guide you through this process. Let me know if you have any questions :)

Pytanie studenta
BP
Berna Pekustun

Do much focus on the eyes and not enough focus a the rest of the art. Still the face is not quite right ( used a reference feature) but really learned a lot from class.

Quek Jae Sern (Jae)
Certyfikowany asystent nauczyciela 21 Draw

Hello Berna,

Thanks for submitting this wonderful painting. I think the loose painting style works great and the extra detail around the face compared to the rest of the body does a good job at focusing the viewer’s attention.

I do notice that the dog’s face seems a little off. Sometimes it can be hard to tell which part of the painting needs to be worked on. Two tools I can suggest for checking your painting/drawing are:

  • Guidelines down the center of the face

You can place a guideline on a separate layer to make sure the facial features you draw are symmetrical.

  • Flipping canvas horizontally

Procreate allows you to flip the canvas horizontally. By occasionally flipping the canvas, it allows you to “reset” your perception of your painting, and it will be easier to spot your errors while painting or drawing. Try it out on this one and it should be easy to see where and what needs fixing!

I know that for painterly styles like this, it can be hard to make changes without essentially re-painting a section again. Procreate has a built-in Liquify tool that is perfect for situations like this. You can use the liquify brush to push or nudge your painting around until it is correct.

I hope this helps and I’m glad that you learned a lot from this class. Good luck with your future art pieces!

Pytanie studenta
Nida Özer

Hello Aveline, I congratulate you on your art and I follow your art with enthusiasm. I would also like to thank you for meeting us on such a occasion. I am adding my works and waiting for yo... Pokaż więcejur comment :)

JP
Jessica Paton
Certyfikowany asystent nauczyciela 21 Draw

Hi Nida!

Wow, you did such a great job of applying the techniques from this course! I love that you've put your own characters into the scenes as well! I only have a few small notes for you.

For the Night Scene:

  • Increase the glow in the night scene! Use a soft brush to lighten that part of the scene (I used a light yellow with a soft-light layer setting)

  • Add more highlights/rim lighting on the night scene as well. Make sure you have lots of contrast and really make the most of the fun lighting!

For the Day Scene:

  • Because you have made most of the background quite light, try and keep that somewhat consistent. Keep the background light, and the foreground more dark. Keeping this contrast makes it easier to see the characters as seperate from the background and makes it easier to read.

*Add a few extra shadows to reflect the size of the skirt/around the skirt to imply more 3D form

You've done such a fantastic job with these, and they're honestly great the way they are! Well done!

Pytanie studenta
Lana Grushnik

I absolutely loved this course! Very inspiring and simple :) Turned out that I'm really good at drawing dogs. Cats are harder to draw for some reason:)

JP
Jessica Paton
Certyfikowany asystent nauczyciela 21 Draw

Hi Lana!

This is such a cute drawing! It's very lively and there is a great personality coming from them!

When drawing cats focus very much on the flow - lots of round fluid movements. The line of action will be very important for their poses.

For this particular drawing I just have a couple suggestions!

  • Push the snout slightly further forward. This will help make the head feel a little more round and improve the sense of dimension. Think of the base of the head not as a circle, but as a sphere!

  • When drawing complicated shapes like limbs, especially when they're folded up, think about how each segment is a basic shape. Using the right amount of lines, you can force a sense of perspective by overlaying some with others. In this case, you can add a couple extra lines to make the back leg seem more like it is bent away from the "camera".

  • Use the tail to emphasize the sense of movement! Follow the line of action you already have moving through the pose! Treat it as an extention of this. But also try to consider where the dog was in space before - the tail can have a very lovely flow to it if it is shaped as though it is coming from where the dog was just a moment ago. You were very close to this I think, but lowering it slightly makes it feel less like the dog has dropped down very suddenly.

It's great to hear that you loved the course! I hope you continue to draw more fun animals in the future!

Pytanie studenta
DK
DIM K

Hi recently I finished this drawing and I would like to get some feedback to improve my illustration.

Jade Lefevre
Certyfikowany asystent nauczyciela 21 Draw

Hi!

Thank you for sending in your painting! This is incredible work. The subject is beautiful and your use of color is mind-blowing!

You could maybe try to have the hair on the chin flow in more various and natural directions. Even with the head clearly in motion within the scene and the hair following in the same direction, I think there could be a little more variation.

You can check out the attachments for a more visual explanation!  I hope you’ll find them helpful!  Don’t hesitate to ask if you have any more questions and I wish you a beautiful day!

Pytanie studenta
MD
Marjolijn De

I really enjoyed creating the thumbnails and the final piece. I love to keep my rough sketch slightly visible and I like to add some more texture to my designs. But I loved the gloaming brus... Pokaż więcejh and I’m going to use it more often:) Thank you very much for this fantastic class!

Jade Lefevre
Certyfikowany asystent nauczyciela 21 Draw

Hi Marjolijn!

I'm glad to hear you enjoyed the course! I'm a huge fan of the way you used the brushes and the colors! Your characters have a lot of personality and I think your final drawing looks really professional.

Keep up the great work and have a fantastic day!

Pytanie studenta
SM
Sara Makdessi

Hi Aveline, thank you so much for this fun and super informative course. I really enjoyed your lessons! Here are my interpretations of the four light scenarios with my characters. Any feedb... Pokaż więcejack would be very appreciated. Many thanks, Sara

Rhea Tibbey
Certyfikowany asystent nauczyciela 21 Draw

Hey Makdessi! These illustrations look amazing! You have done a great job of using the lighting and shading techniques from this course :)

Here are a few feedback suggestions that you could try in future illustrations/ to improve these:

  • In areas of your character that are highlighted, change the colour of your line-art to a colour brighter than the highlighted area.
  • Additionally, it can look nice if you set your line-art to a darkened version of an ambient colour in your image rather than black.
  • Add soft shadows to objects that aren't in direct light.
  • For your night-time scene, you could decrease the saturation of the background and perhaps add even more blur to make your character stand out even more.

Try these out and see what you think! Wishing you a creative week, Rhea

Pytanie studenta
LB
Louise Broesky

I have never used Procreate before so I did the first lessons on paper working my way through the other ones I’m not used to drawing with circles and lines of actions. I pick a body part ... Pokaż więcejand then I draw from there that’s what I’m used to so I didn’t use the circles the way I was supposed to

JP
Jessica Paton
Certyfikowany asystent nauczyciela 21 Draw

Hi Louise!

This is such a great drawing so far!

I do recommend trying to start a drawing with the basic shapes before you get too far into detail to make sure that the drawing has a solid foundation.

  • Break things into spheres and cylinders. Spheres for the head and joints, and cylinders for the limbs and snout. Using these as a guide and it will help add dimension

  • Another thing that will add dimension is layering one shape of the other. Having a shape hidden behind another will instantly add a sense of 3D.

  • Think about their skeleton! Look at where their bones bend. This is the natural basic building of an animal. You don't have to draw every bone, but you can break it into areas - The ribcage as one oval, the pelvis as another. The forearm bone as a cylinder, the joints as spheres. It helps a lot to understand how a creature can move and bend, and how they can't.

You're well on the right track and each drawing you have done is very expressive and has lovely poses, good job!

Pytanie studenta
Polina Lutseva

Hello!! I love the course and tried to do all types of lighting by myself, it would be really great to hear feedback, comments and critics about my work. Thank you very much in advance!! Pa... Pokaż więcejuline

Rhea Tibbey
Certyfikowany asystent nauczyciela 21 Draw

Hello Polina! I love your drawings, they are so gorgeous! Thanks for sharing them :)

Check out my feedback below and notes I have added to your drawing! I hope you find them helpful :)

  • Don’t be afraid to use ‘Overlay’ blending layers with vivid colors to help establish the time of day, especially for the sunset and daytime photos.
  • In the indoor scene: the walls and the character should be in soft shadow due to the backlighting from the window.
  • Your character has a few spots on their face that might have highlights including their: eyes, nose, lips and cheekbones.
  • Your overcast lighting scenario could be de-saturated to convey the gray-diffused light source. This is something you can adjust using the ‘Hue, Saturation and Brightness’ tool.
  • Even on an overcast day you will still have some soft shadows where clothes fold or different objects meet each other.
  • You can try and make the direction of your light source more clear by adding color variation to your sky using an overlay or multiply layer.
  • When in doubt, practice by studying photographs! This can be a great way to learn about illustrating hard shadows.

I have attached some images with tips and edits to help guide you through this process. Let me know if you have any questions :)

Czy jesteś gotowy, aby przejść od zera do bohatera? 💥

Zarejestruj się za JEDYNIE USD $59/rok!
Pośpiesz się, tylko przez ograniczony czas!

Nie wiesz, od czego zacząć? Sprawdź naszą sugerowaną kolejność zajęć

Klasa 1
Procreate dla początkujących
Zobacz więcej
Początkujący
Klasa 2
Procreate Made Easy
Zobacz więcej
Początkujący
Klasa 3
Teoria Kolorów
Zobacz więcej
Początkujący
Klasa 4
Rysuj postać z kreskówki
Zobacz więcej
Początkujący
Klasa 5
Kolorowanie cyfrowe
Zobacz więcej
Początkujący
Klasa 6
Rysowanie zwierząt domowych
Zobacz więcej
Średnio zaawansowany
Klasa 7
Rysuj postać kobiecą
Zobacz więcej
Początkujący
Klasa 8
Oświetlenie + Cieniowanie
Zobacz więcej
Średnio zaawansowany
Klasa 9
Oświetlenie + Cieniowanie
Zobacz więcej
Średnio zaawansowany
Klasa 10
Ilustracja cyfrowa
Zobacz więcej
Średnio zaawansowany
Klasa 11
Malowanie Portretów
Zobacz więcej
Średnio zaawansowany

Zobacz, co nasi studenci myślą o zajęciach...

"Przyjazne dla początkujących!"
"Łatwe do śledzenia!"
"Naprawdę zabawne!"

Zobacz, dlaczego inni są zachwyceni naszymi kursami...

4.8
(na podstawie 8,303 recenzji klientów)
LH
Luc H.
3 tygodni temu
Zweryfikowany zakup
To zdecydowanie najlepszy internetowy kurs instruktażowy, w jakim kiedykolwiek brałem udział. Rodgon to geniusz, który opracował nieskazitelną metodę projektowania postaci, a to odpowiedziało na wiele pytań, które miałem o to, jak konsekwentnie rysow
+ Pokaż więcej
ać postacie z różnych kątów i jak oceniać proporcje. Jestem profesjonalnym projektantem i ilustratorem, ale to odblokowało techniki, w których trochę się potykałem przez ostatnie kilka dekad, oceniając wszystko na oko, bez konieczności korzystania z niezawodnego schematu, do którego można się odwołać. Rodgon jest również uważnym nauczycielem, ten kurs zaczyna się od samego początku dla każdego, kto nie ma podstawowych umiejętności rysowania, ale pod koniec przechodzi do poziomu eksperckiego i z pewnością wrócę do niektórych wcześniejszych modułów, abym mógł niezawodnie odtworzyć treść, którą mam w swoim szkicowniku! Niesamowity kurs, nie mogę go wystarczająco polecić każdemu, kto chce wiedzieć, jak rysować postacie ludzkie, i z pewnością wchłonę wiele z tych technik w swojej pracy od teraz.
Recenzja kursu "Naucz się anatomii w 21 dni"
LC
Lorena C.
3 tygodni temu
Zweryfikowany zakup
Uważam, że ten kurs jest naprawdę przydatny. Jako absolutny nowicjusz nauczyłem się wiele o rysowaniu ludzkiego ciała i różnych częściach ciała i mięśniach, które należy wziąć pod uwagę, aby narysować postać o spójnej pozie i proporcjach, w oparciu o
+ Pokaż więcej
narrację, którą chcę osiągnąć. Rodgon podaje wiele informacji i dzieli się ważną wiedzą na temat anatomii człowieka. Jestem naprawdę zadowolony z tego, czego się nauczyłem i czasu, który poświęciłem na śledzenie i praktykowanie lekcji!
Recenzja kursu "Naucz się anatomii w 21 dni"
SM
Stefan M.
3 tygodni temu
Zweryfikowany zakup
Zawsze przyjemnie uczyć się od prawdziwego i jedynego RODGONA! Wielkie dzięki za uczynienie skomplikowanych rzeczy łatwymi do przyswojenia! Polecam ten kurs każdemu, kto chce tworzyć postacie z wyobraźni, ucząc się tego, co ważne: podstaw! Jeszcze ra
+ Pokaż więcej
z dziękuję za to!
Recenzja kursu "Naucz się anatomii w 21 dni"
AT
Allison T.
tydzień temu
Zweryfikowany zakup
Ten kurs był fantastyczny! Lauren rozkłada wszystko na czynniki pierwsze tak jasno i sprawia, że ​​wszystko wydaje się całkowicie wykonalne, nawet jeśli dopiero zaczynasz. Jej styl nauczania jest zabawny, przyjazny i super zachęcający. Jeśli kiedykol
+ Pokaż więcej
wiek marzyłeś o szkicowaniu swoich futrzanych przyjaciół, gorąco polecam wypróbowanie tego kursu.
Recenzja kursu "Rysowanie zwierząt od podstaw"
RK
Rama K.
tydzień temu
Zweryfikowany zakup
Zawsze cenię sobie samouczki z objaśnieniami procesu krok po kroku. To mój drugi kurs na 21Draw. Pierwszy to „Mastering Lighting and Shading” autorstwa Aveline Stokart. Po ukończeniu tego kursu znalazłem ten, który pasuje do mojego rodzaju projektów.
+ Pokaż więcej
Proces wyjaśniony w tym kursie pomaga uczniom takim jak ja demistyfikować profesjonalne dzieło sztuki/ilustrację i mieć przewidywalny, jasny sposób na osiągnięcie pożądanych rezultatów końcowych. Dziękuję Kenneth Anderson za cierpliwe wyjaśnianie przy użyciu szczegółowego przykładu!
Recenzja kursu "Ilustracje opierające się na postaciach"
NC
Nicole C.
3 miesięcy temu
Zweryfikowany zakup
Podobało mi się, jak ten kurs rozbijał oświetlenie na bardzo łatwe do naśladowania kroki i był ukierunkowany na Procreate. Nauczyłem się tak wielu szybkich wskazówek i trików dla aplikacji, nawet poza oświetleniem, o których nigdy nie wiedziałem, jak
+ Pokaż więcej
maskowanie warstw i używanie narzędzia do zaznaczania, aby wyczyścić/usunąć części warstwy, używając sylwetki innego kształtu. To było kluczowe dla mojej sztuki, dziękuję za tak niesamowity kurs! Oznaczyłem Cię na Instagramie :)
Recenzja kursu "Opanowanie oświetlenia i cieniowania"
TS
Taylor S.
2 miesięcy temu
Zweryfikowany zakup
To zdecydowanie kurs dla osób, które już znają narzędzia i techniki Procreate. Nauczyłam się wiele, ale musiałam ciągle zatrzymywać filmy „let's paint”, aby zrozumieć kroki, które ona wykonywała — jasne, podstawowe instrukcje (np. na jakie pędzle
+ Pokaż więcej
się przełączyć) by mi pomogły. To powiedziawszy, wiedza Aveline na temat światła jest niesamowita, a kurs był super przydatny do budowania lepszego zrozumienia! Będę często wracać do zasobów i przykładów.
Recenzja kursu "Opanowanie oświetlenia i cieniowania"
RT
Rômulo T.
2 miesięcy temu
Zweryfikowany zakup
O mój Boże, to jest 1 godzina czystego ZŁOTA! Czuję, że nauczyciel zdradza kilka sekretów na tym kursie, lol, ponieważ właśnie nauczyłem się WIELU niesamowitych technik i sztuczek, nad którymi zawsze się zastanawiałem „ale jak oni to robią?”, patrząc
+ Pokaż więcej
na prace wielu niesamowitych artystów. Lubię też Procreate, nawet jeśli moim ulubionym oprogramowaniem jest CSP, mogłem nauczyć się wielu przydatnych sztuczek na Procreate. i wierzę, że mogę z łatwością wykonać wszystkie techniki również w CSP. Ponadto nauczyciel tak dobrze tłumaczy, a sztuka jest tak piękna. Naprawdę podobał mi się ten kurs.
Recenzja kursu "Jak narysować postać z kreskówki"
OP
Ondřej P.
2 miesięcy temu
Zweryfikowany zakup
Spodziewałem się nieco więcej informacji na każdej lekcji, ale i tak zauważyłem coś. W przypadku zwierząt, które rysuję w kosmosie, perspektywa prawdopodobnie powinna być tam trochę omówiona. Ponieważ to prawdopodobnie najtrudniejsza rzecz, która będ
+ Pokaż więcej
zie potrzebna do ustalenia podstawowych zarysów zwierzęcia w kosmosie.
Recenzja kursu "Rysowanie zwierząt od podstaw"
LC
Lidia C.
2 miesięcy temu
Zweryfikowany zakup
Myślę, że ten kurs uzupełnia kurs Eriki (wiem, że ma 2 kursy dotyczące Photoshopa, chciałabym też o Procreate). Bardzo polecam wzięcie udziału w tym kursie po ukończeniu kursu Eriki, Isabelle przechodzi przez wiele rzeczy, które są szczegółowo wyjaśn
+ Pokaż więcej
ione w innym kursie i robi kilka rzeczy inaczej, co jest świetne, ponieważ teraz mam inne sposoby dostępu do niektórych funkcji. Najbardziej podobało mi się tworzenie własnych pędzli i bardzo doceniłam lekcję „wskazówki, triki i typowe błędy”... WINNA jak oskarżona. Możesz nazwać ten kurs „Początkujący część 2”. Uwielbiam tę subskrypcję coraz bardziej każdego dnia <3
Recenzja kursu "Procreate Made Easy"
LC
Lidia C.
2 miesięcy temu
Zweryfikowany zakup
Podobał mi się kurs Eriki; był bardzo łatwy do naśladowania. To nie jest koncepcja „rób-to-co-ja-robię”, ale nauka i stosowanie jej w Twojej pracy było bardzo przyjemne. Robiłam notatki, gdzie skoczyć, jeśli będę musiała ponownie sprawdzić kroki, o k
+ Pokaż więcej
tórych zapomniałam. Dziękuję za filmy :) Uwielbiam wszystkie kursy, które do tej pory zrobiłam. Nie mogę się doczekać, aby dowiedzieć się więcej. Najlepsza subskrypcja WSZECH CZASÓW!
Recenzja kursu "Cyfrowe rysowanie w Procreate dla początkujących"
GM
Gladys M.
2 miesięcy temu
Zweryfikowany zakup
Miałem przyjemność uczyć się od Aveline i nie mogę jej wystarczająco polecić! Jej umiejętność nauczania światła i cienia w grafice cyfrowej jest niezwykle wyjątkowa. Aveline poświęca czas, aby wyjaśnić, w jaki sposób światło i cień mogą wywoływać emo
+ Pokaż więcej
cje, dodając głębszy poziom zrozumienia do procesu twórczego, zamiast skupiać się tylko na technice. Szczególnie rzuciło mi się w oczy, jak powiązała kolory z ekspresją emocjonalną, co pozwoliło mi zrozumieć potencjał mojej pracy w zupełnie nowym świetle. Porada, którą otrzymałem na temat tego, jak lepiej wyrażać emocje poprzez dobór kolorów i cieniowanie, była naprawdę pomocna. Mój wykład był dość zabawny, a także bardzo edukacyjny. Teraz czuję się o wiele pewniej w swoich umiejętnościach i nie mogę się doczekać, aby kontynuować praktykę i rozwój dzięki jej wskazówkom. Aveline, dziękuję!
Recenzja kursu "Opanowanie oświetlenia i cieniowania"
LG
Laura G.
3 miesięcy temu
Zweryfikowany zakup
Mając na uwadze, że uwielbiałam wszystko w tym kursie, jedną z moich ulubionych rzeczy było obserwowanie, jak Rodgon świetnie się bawił, gdy poza, wyraz twarzy lub postać ożywały. To pomogło mi przypomnieć sobie, dlaczego tak dużo inwestuję w doskona
+ Pokaż więcej
lenie się, ponieważ rysowanie jest moim szczęśliwym miejscem, a doskonalenie się i uczenie się sprawia, że ​​jestem szczęśliwsza. Potem oczywiście jest fakt, że wszystkie wyjaśnienia były bardzo łatwe do zrozumienia, przykłady były idealnie na miejscu, a wskazówki i triki były idealne i bardzo łatwe do zapamiętania. Jak powiedziałam na początku tej recenzji, uwielbiałam wszystko w tym kursie. Dziękuję!
Recenzja kursu "Jak ożywić swoje postacie"
FP
Falon P.
3 miesięcy temu
Zweryfikowany zakup
Uwielbiam prace Simone, zawsze są tak jasne i podnoszące na duchu. Naprawdę podobało mi się oglądanie jej procesu i słuchanie, jak o nim mówi. Wyjaśnia rzeczy jasno i wchodzi w szczegóły, dlaczego podejmuje takie, a nie inne decyzje lub używa narzędz
+ Pokaż więcej
i, których używa, a także w to, jak ich używa. Myślę, że słuchanie jej procesów myślowych stojących za jej decyzjami jest super pomocne.
Recenzja kursu "Ilustracja cyfrowa w Procreate"
NL
Nancy L.
miesiąc temu
Zweryfikowany zakup
Kurs Tony'ego zainspirował mnie do zapisania się na 21 Draw. Chcę poprawić sposób rysowania moich postaci, nadać im więcej życia i uczynić je bardziej interesującymi. Tony naprawdę dobrze przekazuje podstawy rysowania ciekawszych póz. Nie jestem
+ Pokaż więcej
początkującym, ale powiedziałbym, że jego kurs byłby dobry zarówno dla początkujących, jak i średniozaawansowanych.
Recenzja kursu "Rysowanie poz postaci z osobowością"
FR
Farsak R.
miesiąc temu
Zweryfikowany zakup
**Recenzja: Doskonały kurs Procreate dla początkujących** Ten kurs Procreate dla początkujących był znakomity! Od początku do końca instruktorka prowadziła nas przez każdy krok, udzielając jasnych, szczegółowych wyjaśnień, dzięki czemu proces nauki b
+ Pokaż więcej
ył niezwykle płynny. Jej podejście do ilustracji krok po kroku było łatwe do naśladowania, dzięki czemu nawet osoby bez wcześniejszego doświadczenia mogły pewnie tworzyć własne dzieła sztuki. Lekcje były dobrze ustrukturyzowane, angażujące i pełne cennych technik. Gorąco polecam ten kurs każdemu, kto chce zacząć korzystać z Procreate!
Recenzja kursu "Cyfrowe rysowanie w Procreate dla początkujących"

Żaden inny zestaw nie oferuje takiego poziomu jakości...

The 11 online classes are worth alone $595, but it’s all yours for a fraction of that!

Just picture it: That hobby you once enjoyed can now be your ticket to financial freedom.

And the best part? It costs ONLY the price of a new pair of jeans 👖 or 20 lattes ☕ or a dinner for two 💑 

Certyfikaty do świętowania twoich osiągnięć

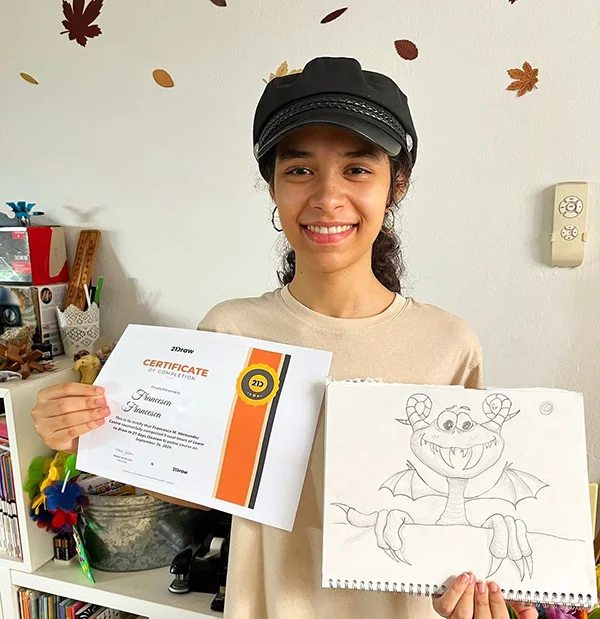
Po ukończeniu każdego kursu otrzymasz certyfikat ukończenia. Podziel się nim w swoim portfolio, mediach społecznościowych lub gdziekolwiek chcesz.

Jak się porównujemy

Kursy premium
Prosty, krok po kroku system
Zweryfikowani artyści i nauczyciele
Ustrukturyzowany program
Filmy bez reklam
ZERO nadmiaru lub wypełniaczy
Uzyskaj odpowiedzi na swoje pytania
Prześlij rysunki do oceny
Zasoby kursu
Certyfikat ukończenia kursu
Zdobądź moją ofertę teraz! Tylko przez ograniczony czas!
30-dniowa gwarancja zwrotu pieniędzy!

Dla kogo jest ten pakiet...

Niedawno kupiłeś iPada i Procreate i chcesz zacząć

Szukasz zestawu ALL in ONE, który rozwiąże wszystkie twoje problemy z Procreate

Początkujący, którzy chcą polepszyć umiejętności projektowania postaci

Początkujący, którzy chcą nauczyć się rysunku postaci, pozowania i rysunku gestów w Procreate

Szukasz świetnych trików, wskazówek i porad do Procreate, których nie widziałeś nigdzie indziej

Trudności z nadążaniem za sztuką cyfrową po latach tradycyjnego rysowania

Chcesz podnieść swoje umiejętności w Procreate na wyższy poziom, nawet jeśli jesteś doświadczonym ilustratorem

Używasz Procreate, ale potrzebujesz nowej perspektywy

Dla osób dążących do profesjonalizacji swoich umiejętności w sztuce cyfrowej i zarabiania na swojej sztuce

Artyści zainteresowani projektowaniem postaci i ilustracją cyfrową

Artyści, którzy chcą pogłębić zrozumienie funkcji i możliwości Procreate, aby zoptymalizować swój przepływ pracy i podnieść poziom swojej sztuki

Dla ciekawych konkretnych funkcji w Procreate, takich jak zarządzanie warstwami, tryby mieszania i użycie pędzli

Najczęściej zadawane pytania

Co obejmuje członkostwo?

Membership includes unlimited access to all 50+ courses taught by the world’s best artists PLUS new courses as they are released.

Each class includes 10-20 video lessons that are 7 minutes long on average. Most classes include exercise sheets, assignments, and layered PSD or PNG files.

Some classes include the ability to chat with the instructor in a public forum, e.g. if you want feedback on your artwork.

Czy to są kursy online czy na żywo?

All classes are pre-recorded and you can watch them online with any digital device, anytime, and for an unlimited number of times! This means you can easily watch (and rewatch) them at your own pace and convenience.

We also have bonus live sessions that are free of charge for all our students.

Jaki poziom umiejętności mają kursy?

The classes are approachable for beginners and has advanced techniques for those with more experience.

If you have no art experience whatsover or struggle to draw a basic character, we recommend starting off by taking our 'Learn to draw in 21 days' classes.

Czy kursy są dostępne w innych językach niż angielski?

All classes are available in English (original narration) and most have dubbed narration in Spanish, French, Italian, German, & Portuguese.

Subtitles are available for all course in the following languages: English, Spanish, Japanese, French, German, Italian, Portuguese & Indonesian.

Czy jest gwarancja?

Oczywiście! Wszystkie nasze członkostwa mają 30-dniową gwarancję satysfakcji. Jeśli nie jesteś całkowicie ZADOWOLONY i OŚWIECONY, skontaktuj się z nami w ciągu 30 dni, aby otrzymać pełny zwrot pieniędzy, bez zadawania pytań!
21 Draw widziany na...

Kim jest 21 Draw?

Od 2013 w liczbach:
  • 70k społeczność
  • 40k sprzedanych artbooków
  • 10k wspierających na Kickstarterze
  • $632k zebrane na KS

21 Draw miało swój początek w Szwecji w 2013 roku, a jego celem było pomaganie każdemu, kto tego pragnie stać się lepszym artystą!

Nazywamy się 21 Draw, ponieważ kiedy zaczynaliśmy, mieliśmy budżet tylko na zatrudnienie 21 artystów. Jednak ogromna liczba artystów była tak entuzjastyczna, że nie mogliśmy się oprzeć dodaniu więcej i stworzeniu jeszcze więcej produktów, od książek po kursy online.

Naszym celem jest współpraca z najlepszymi artystami na świecie, aby pomóc naszej społeczności i Tobie osiągnąć artystyczne cele. Chcemy uczynić niesamowitą edukację artystyczną dostępną dla każdego.

Zamknij
Zarejestruj się za JEDYNIE USD $59/rok! 30-dniowa gwarancja zwrotu pieniędzy