Économisez 75 % sur l'abonnement.
Artistes
Cours
Avis
Forum

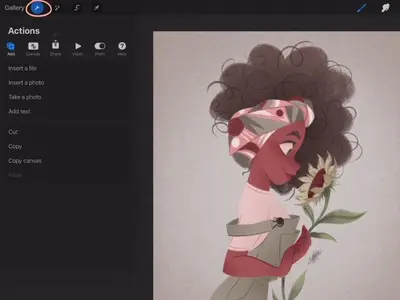
Procreate en toute simplicité

Suivez des conseils étape par étape d'artistes de Disney, Marvel et DreamWorks pour maîtriser le design de personnages et d'environnements !
Garantie de remboursement de 30 jours !
4.8
(sur la base de 8,303 avis)

Accédez à

1000+
Leçons courtes
55+
Cours d'art
34
Professeurs de renom

Rencontrez vos professeurs

Nous sélectionnons les meilleurs artistes et, encore mieux, d'excellents enseignants.

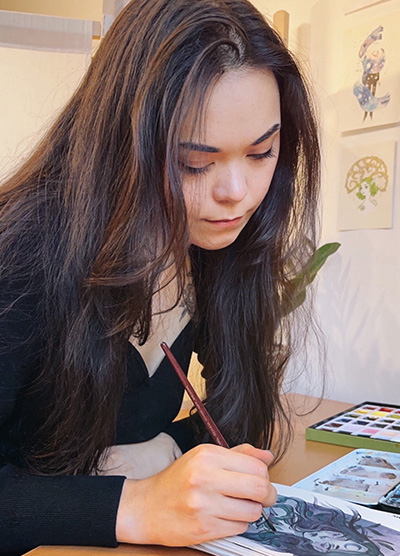
Aveline Stokart

Designer chez DreamWorks Animation + Dessinateur de BD

Aveline Stokart

Aveline is not just an amazing comic book artist designing characters that feel real – she’s also a fantastic teacher. And a very curious one too!

She’s explored everything from drawing to pottery, always looking to try something new and make art that hits you right in the feels.

She currently works as a freelance concept artist/character designer for various clients in the field of publishing, animation, and video games.

Her clients include Simon and Schuster and Skydance Media, HarperCollins Publisher, DreamWorks Animation…

From an early age, she showed a particular interest in drawing—a natural fit, as she is highly curious and observant, but also quite sensitive. She marvels at the beauty held within the simplest of things. 

Fascinated by character design and creating universes, she developed a unique dimension to her creations by studying 3D Animation at the Haute Ecole Albert Jacquard in Belgium, where she graduated in 2011. 

When she’s not drawing, Aveline likes to express herself musically, by singing and playing the guitar, piano and the ukulele.

I am always trying to evolve and discover new things and challenges. My goal is to create beautiful images and atmospheres that release many different emotions.

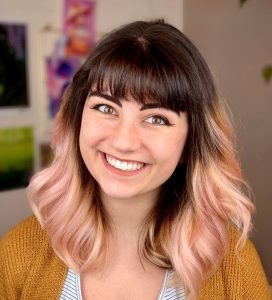
Apprenez à manipuler les effets de lumière avec différents modes de fusion dans le cours Maîtriser l'éclairage et l'ombrage d'Aveline.

1/6
Voir le portfolio de l'artiste

Erika Wiseman

Illustrateur formé par Disney (Ravensburger). A travaillé pour Adobe.

Erika Wiseman

This illustrator’s feed is a burst of joy with her colorful and cute creations. Starting in 2008, she’s carved out a space where creativity meets encouragement, making her an inspiration for budding artists everywhere.

Erika Wiseman (aka Erika the Goober) is a freelance illustrator and character designer who lives in the US. She loves drawing cute, colorful things and experimenting with new drawing techniques.

Erika began teaching herself to draw digitally in 2008. Since then, she has been working with a graphics tablet and Photoshop as well as Procreate to create her digital illustrations.

In 2017, she graduated from the University of Louisville with a Bachelor in Fine Arts (with a dissertation in drawing). She made a name for herself on Instagram, which is the best place to find her art! One of her goals is to help and inspire others along their creative journey to be the best artists they can be.

Inspiration

Much of my inspiration comes from the things I love, the colorful worlds of video games and animated movies.

Tools

I use Photoshop CS6 and a Wacom Intuos Pro. I use an iPad Pro, Apple Pencil, and the Procreate app as well! It really just depends on how I’m feeling that day and if I want to draw at my desk or somewhere else!

Advice

My top 3 tips: Draw every day, draw from life, and study anatomy!

✏️ Créez un personnage de A à Z, étape par étape. En savoir plus dans le cours pour débutants : Dessin Numérique sur Procreate.

1/4
Voir le portfolio de l'artiste

Feefal (Linnea Kikuchi)

1M+ de followers sur Instagram

Feefal (Linnea Kikuchi)

Dive into Feefal’s world, where cute meets the mysterious. With a palette that ranges from digital to traditional, her art is a favorite among over a million fans. If you’re into charming yet slightly spooky visuals, she’s your artist.

Linnea is a Swedish/Japanese artist with a following of over 1 million on Instagram.

She is known for creating anthropomorphized figures and cute, spooky characters.

Linnea lives in Stockholm with her Sphynx cat called Tofu. Feefal shares her art on a regular basis on Instagram, which she creates through a variety of media, such as Procreate (digital software), graphite, and gouache. She also published an art book, ‘The Art of Feefal’.

Fans know her by her unique, charming style featuring beautiful visuals and cute characters with horror/spooky elements. In her words, ‘I put my artistic soul in a blender’!

Don’t think your work has to be perfect or be afraid of your art being ugly. Art will be ugly sometimes. That’s how you get better!

The best part of creating art for me is definitely the sense of fulfillment I get putting my creative works out into the world. It’s really rewarding to see something you’ve put your soul into getting so many positive responses from people. It’s quite the rush!

Inspiration

I mostly get inspiration from nature, death, space, and occasionally spirituality. Space is probably my main muse. It’s just way too large for any human to quite wrap their head around, and its incomprehensible size makes it so intriguing.

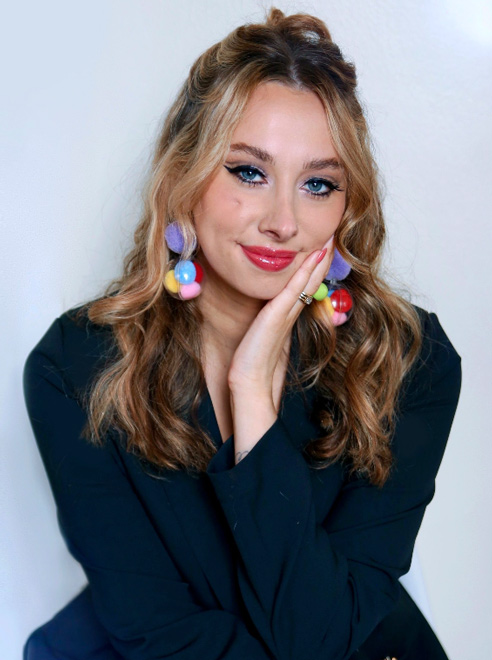
Apprenez à transférer votre croquis fait main sur votre iPad pour la mise en couleur 🎨, grâce à un processus simple étape par étape. Découvrez-en plus dans ce cours.

1/3
Voir le portfolio de l'artiste
1.1m abonnés

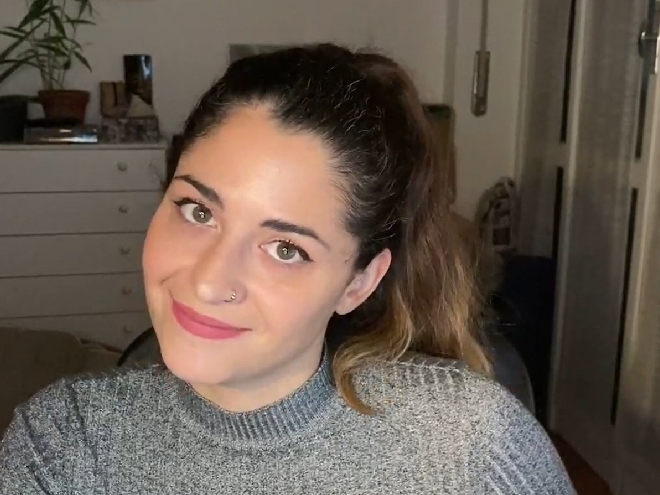
Isabelle Staub

Portraitiste en collaboration avec Marvel

Isabelle Staub

Isabelle Staub artist photo

From viral Disney reimaginings to Marvel collabs, this Philly-based digital artist dazzles with detailed portraits and character designs. With a passion shared through art and teaching, her creations are a must-see.

Isabelle Staub is a US-based freelance artist, specializing in vibrant digital portraits and character design with incredible attention to detail.

Isabelle started creating art at a very young age and went on to receive a BFA in Illustration at Moore College of Art and Design in Philadelphia. The culmination of dedicated work and a burning passion has propelled her to become a recognized artist worldwide.

Her popular series ‘Disney animals transformed into human characters’ went viral on social media, leading to collaborations with companies such as Marvel and MGA Entertainment.

Art has always been a love of mine from before I could remember. I pour my heart, mind, and soul into every piece I create.

Isabelle’s versatility and creative talent allowed her to work with brands such as Dynamite Comics, Wacom, TikTok, Corel Painter, and more. Teaming up with CASETiFY, she created an entire line of gorgeous device cases.

Along with creating original artwork for her clients, she also uses her social media platforms to educate others, passing on her artistic knowledge and expertise. Isabelle currently lives in Philadelphia and has two adorable cats.

What advice would you give to new artists?

Be easy on yourself! Being an artist is a journey, not a destination. Try not to compare yourself to people further along in their journey. You will get there!

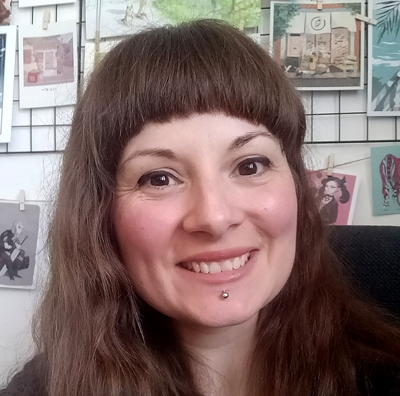
Créez des œuvres éblouissantes avec un ensemble d'outils de base sur Procreate. En savoir plus dans le cours Procreate Facile d'Isabelle.

1/4
Voir le portfolio de l'artiste
385k abonnés

Simone Grünewald

Directeur artistique chez DreamWorks

Simone Grünewald

Meet “Schmoe,” your go-to artist for illustrations that breathe life into the everyday with charm and wit. Her vibrant creations, filled with humor and the realness of motherhood, are a breath of fresh air, promising a smile and a new perspective with every piece.

Simone Grünewald is a Visual Development artist from Germany who worked in the gaming industry for over 10 years as an art director, character designer, and 2D animator.

In addition to her commercial work, she loves creating emotive, dynamic designs that document her life, including the experiences of motherhood. Having followed the creative path all her life, Simone has a wealth of knowledge in traditional and digital art.

She shares beautiful, entertaining artwork as well as insights and tips with her followers on social media and is known for her humorous characters and everyday themes. Simone is also the author of Draw What You Love and Sketch Every Day.

Trouvez des idées pour vos dessins en regardant différents exemples. 🖌️ Découvrez les étapes dans Illustration Numérique sur Procreate.

1/4
Voir le portfolio de l'artiste
606k abonnés

Maria Lia Malandrino

Artiste en développement visuel pour Disney

Maria Lia Malandrino

Des jeux vidéo aux livres d’histoires, cette artiste italienne donne vie aux récits avec ses illustrations vibrantes. Ses projets variés ont conquis des cœurs partout dans le monde, montrant son talent pour créer un art narratif et captivant.

Maria est une illustratrice et artiste de narration de Turin, Italie. Elle possède un BA en Édition de Magazines de l’Université des Arts de Londres, a étudié l’animation traditionnelle à l’École Internationale de Comics de Turin et suivi une masterclass en Storyboarding à l’école en ligne CGMA.

En 2018, elle a fondé un studio de jeux vidéo indépendant à Turin et travaille actuellement sur leur deuxième jeu, "Out of The Hat", une exploration étrange de l’esprit d’un méchant.

Ces dernières années, Maria a travaillé sur de nombreux projets éditoriaux en tant qu’illustratrice et designer de personnages pour des maisons d’édition et des marques renommées telles que Oxford University Press, Hachette et Disney. Son travail est représenté par l’agence Advocate Art.

Elle poursuit également des projets d’illustration personnelle et de roman graphique que vous pouvez suivre sur son blog et son compte Instagram.

Inspiration

Je puise mon inspiration dans tout ce que je vois et lis : des livres, des séries télé et des films, mais aussi l’architecture, les gens dans les cafés… Tout ce que je rencontre reste quelque part dans mon subconscient et se transforme dans mes dessins.

Coups de coeur

Citation : « Prends ce que tu veux et paie le prix », une citation de ma série de livres préférée "La Roue du Temps" – j’aime l’idée que nous pouvons tous choisir de vivre en accord avec nous-mêmes, même si cela implique parfois des conséquences.

Artistes : Alessandro Barbucci, TB Choi, Otto Schmidt, Jin Kim, Patrick Osborne

Films/Séries : Little Miss Sunshine, Laputa, Dragons / Full Metal Alchemist Brotherhood (en série)

Jeux : Bioshock Infinite, The Witcher 3, Sunless Sea, n’importe quel jeu Civilization

Outils

Pour l’illustration et le design de personnages, j’utilise mon iPad Pro et Procreate. Pour les travaux d’animation, je préfère une Wacom Cintiq 22HD connectée à mon iMac.

Conseils

Je pense qu’il n’y a pas de conseil universel qui fonctionne pour tout le monde.

J’ai découvert le monde du jeu vidéo et de l’illustration assez tard, sans formation et après des études et un travail dans des domaines très différents pendant des années. Mon conseil serait qu’il n’est jamais trop tard. Pour paraphraser Rainer Maria Rilke, si, en vous réveillant le matin, vous ne pensez qu’à dessiner, vous devriez en faire votre activité principale ! Peu importe si votre style n’est pas considéré comme cool ou beau, si c’est ce dont vous avez besoin pour vous exprimer, cela vaut la peine de persévérer !
Apprenez à dessiner un personnage de cartoon de A à Z dans le cours de Maria.

1/3
Voir le portfolio de l'artiste

Meike Schneider

Artiste 3D en collaboration avec Pixar

Meike Schneider

Elle transforme le monde de l’art 3D avec des personnages qui sautent littéralement de l’écran. Inspirée par les classiques de l’animation, son travail en design de personnages et en enseignement illumine l’industrie, faisant d’elle une source d’inspiration pour les artistes en herbe.

Meike est artiste 3D et illustratrice, spécialisée dans les personnages, basée à Cologne, en Allemagne. Elle est surtout connue sur Instagram et à travers le challenge de Tom Bancroft, MerMay. Son travail inclut l’illustration de livres pour enfants, le design de personnages, le développement visuel, la modélisation 3D de personnages et d’environnements ainsi que le look development. Elle travaille actuellement en freelance pour divers studios d’animation et entreprises et enseigne à la School of Games de Cologne.

Son travail a été fortement influencé par les classiques de Disney, comme Aladdin et Pocahontas. Les films d’animation en images de synthèse comme Raiponce, La Reine des Neiges ou Les Mondes de Ralph l’ont inspirée à poursuivre une carrière dans l’animation.

Après avoir remporté le titre d’Artiste du mois de mai 2016 décerné par RebusFarm, son personnage 3D, Little Mary a été publié dans le 3D World Magazine Issue 211, le magazine le plus vendu au monde pour les artistes CG.

Juste après avoir terminé ses études en 2012, elle a commencé des études en animation 3D et VFX à la PIXL VISN media arts academy. Après l’obtention de son diplôme en animation, elle a été finaliste aux Rookie Awards 2014, ce qui l’a menée à décrocher un emploi chez Dooblex, un studio spécialisé en visualisation de produits. Tout en travaillant à temps plein, elle a commencé à accepter des commandes et à bâtir peu à peu sa propre marque en tant qu’artiste.

À la mi-2019, Meike a quitté son emploi pour devenir freelance à plein temps, travaillant sur des projets tels que des illustrations pour enfants pour Finni & Fredo et My Best Book, des œuvres pour Adobe, le développement visuel et le design de personnages pour la série TV à venir "Coral Kins", ainsi que des designs de personnages pour le jeu mobile de Paris Hilton.

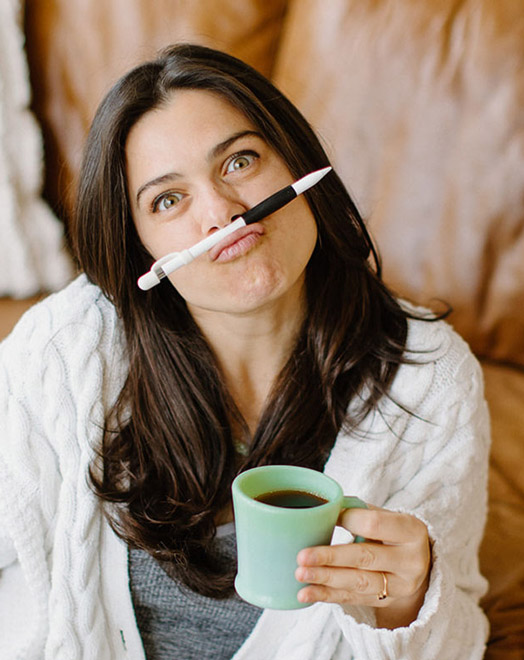
Suivez des étapes simples pour colorier et ajouter des détails. 🖌️ Découvrez-en plus dans Dessiner un Personnage Féminin par Meike

1/3
Voir le portfolio de l'artiste

Lauren Barger

Collaboration Disney & Mattel : Cartooniste animalier

Lauren Barger

Lauren Barger profile picture

Lauren transforms pets into digital art in Procreate, enchanting with her ‘Coffeedraws’ and humorous animal cartoons. Her collaborations with Disney and Mattel, paired with co-hosting MerMay, spotlight her as a beacon of creativity and fun in character design.

Lauren is a character designer based in Charlotte, NC, known for creating ‘Coffeedraws’, being a co-host of MerMay on Instagram and for her comical cartoons of animals and people.

Lauren Barger, Character Designer & Illustrator

Lauren attended Herron School of Art and Design, where she pursued a BFA with a focus on illustration.

In 2019, she opened her company, LB Fine Art, producing mainly portrait artwork on commission both traditionally, using watercolors and colored pencils, and digitally.

She has gone on to work in visual development and character design with notable companies in the animation and toy industries, including SonyDisney, Pixelle Studioand Mattel.

Lauren is also a co-host and partner of MerMay, a social media drawing contest founded by Disney animation veteran, Tom Bancroft.

I am passionate about visual development and character design and love making my audience laugh and smile through my artwork!

Lauren is known for her engaging illustration projects, such as the ‘Animal Butt’ watercolor series, ‘Coffeedraws’ series, and ‘Pets to People’ series.

‘Coffeedraws’ is an interactive social media series that ran for 200 consecutive days, generating a strong following on Instagram. This series has been a highlight of Lauren’s artistic journey and a delightful way to interact with her followers.

I create fun art, or “F-ART” as I call it. I am a F-ART maker!

Maîtrisez les bases de l'anatomie pour dessiner des chiens et des chats ! 🐕 Découvrez-en plus dans le cours Dessiner des Animaux de A à Z.

1/3
Voir le portfolio de l'artiste

Améliorez rapidement vos compétences sur Procreate

Apprenez à créer une œuvre d'art de A à Z

Maîtrisez la gestion des calques, les modes de fusion et l’utilisation des pinceaux

Transformez vos œuvres de débutant en superbes peintures numériques que vous serez fier de partager.

Regardez ces cours approfondis et passez au niveau supérieur !

Procreate
Animation
Décors
Les bases du dessin

À propos de l'abonnement

Cette adhésion vous donne accès à 11 cours sur Procreate et 40 autres cours.

Que vous soyez débutant ou expérimenté, nous avons des cours pour TOUS LES NIVEAUX !

Nos professeurs vous montreront comment utiliser les pinceaux 🖌️, puis vous apprendront les techniques d’ombrage et d'éclairage pour donner vie à vos dessins !

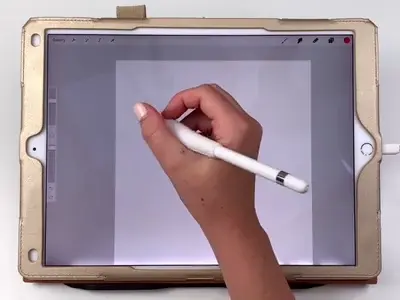
À la fin, vous serez à l’aise pour dessiner sur votre iPad, et vous obtiendrez un certificat !
mises à jour mensuelles
Nouveaux cours
Vous recevrez aussi de nouveaux cours ajoutés automatiquement chaque mois, sans frais en plus ! 🤩
communauté
210k+ membres
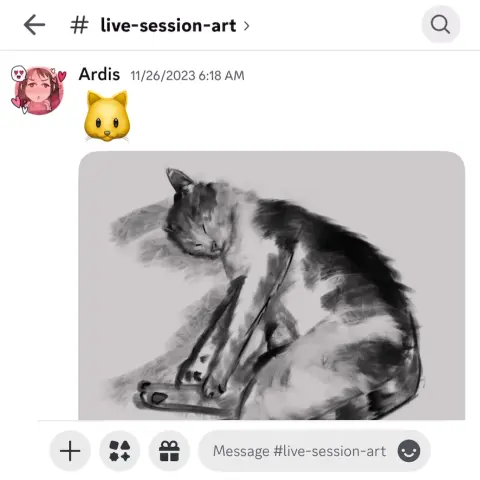
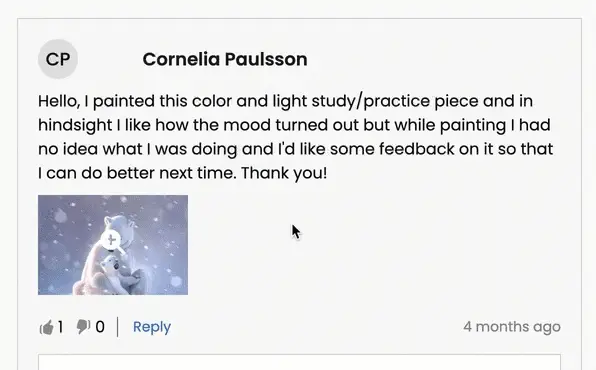
Rejoignez une communauté et des assistants pédagogiques pour obtenir des retours et vous inspirer des autres.
événements live
Événements live
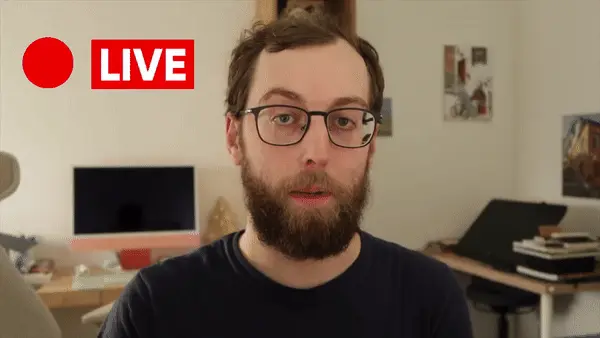
Apprenez en direct avec vos artistes préférés.

Dans ce cours, vous allez :

Digital Workspace Setup & Navigation

  • Set up your digital workspace with Erika Wiseman 🖌️
  • Navigate & utilize Procreate’s main tools & features with Isabelle Staub 🌟

Artistic Techniques & Styles

  • Select brushes that complement your style and drawings 🖌️
  • Hone your drawing technique and stroke pressure control ✍️
  • Explore concepts of light and shading with Aveline Stokart 💡

Workflow Efficiency & Productivity

  • Discover time-saving shortcuts for efficient workflow 🕒
  • Uncover hidden tips and tricks for maximizing productivity 💡
  • Learn to create captivating time-lapse videos of your artwork 🎥

File Management & Sharing

  • Master file importing and exporting processes 📤
  • And most importantly giving you the confidence to share your art! 💪

Progress Tracking & Assignments

  • Each video lecture comes with easy-to-follow assignments that you can use to track your progress 📚

Get ready for an exciting adventure and discover how amazing you can be as a digital artist! Start now! 🚀
Prêt à passer de zéro à héros ? 💥

Souscription à SEULEMENT USD $59/an !
Dépêchez-vous, offre limitée !

Bien plus que de simples cours en ligne...

Recevez des retours professionnels

Recevez des retours détaillés d’un vrai professeur lorsque vous avez des difficultés avec vos devoirs ou vos œuvres.

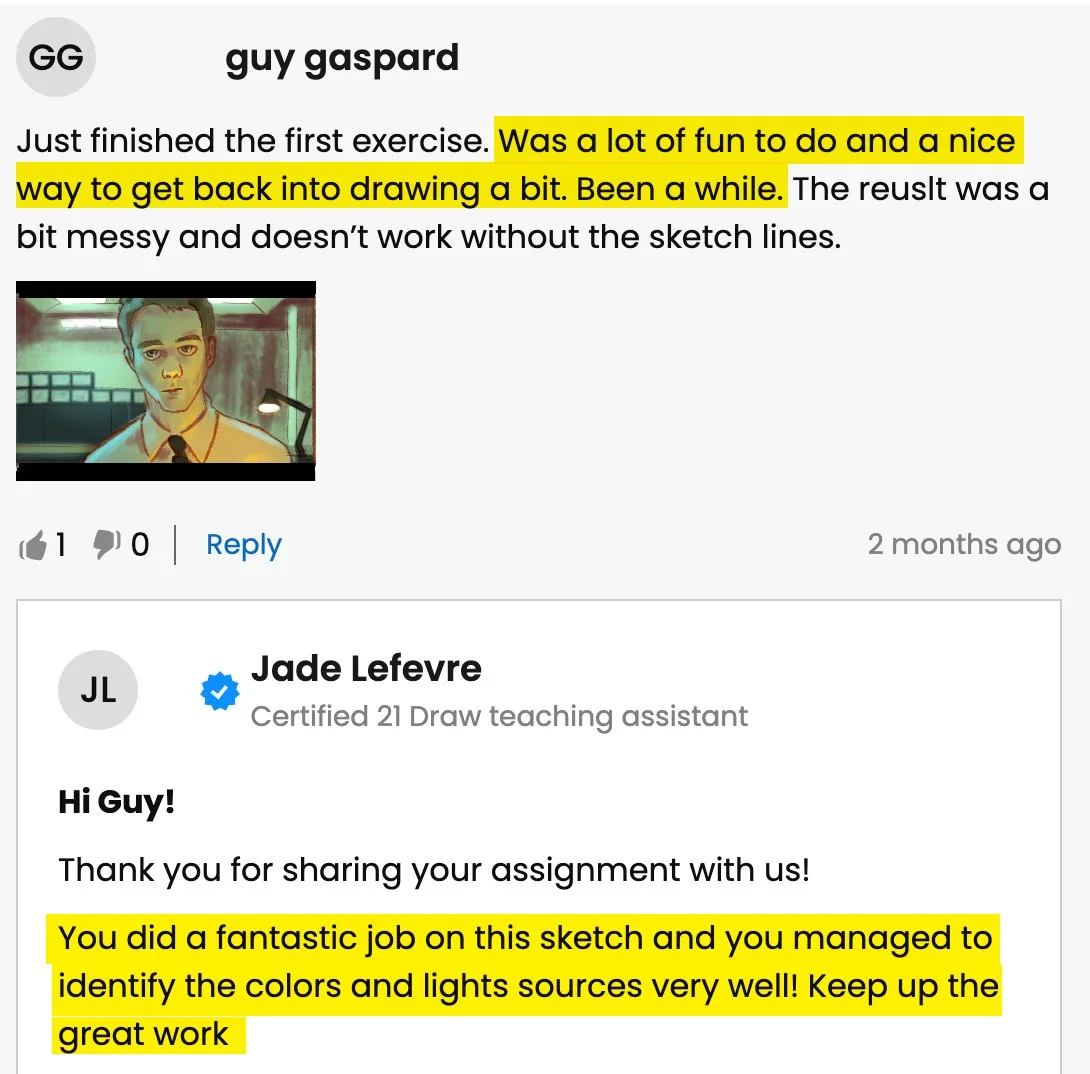
Recevez des compliments

Partagez vos créations (si ça vous dit 😉) ou vos devoirs complétés et recevez les encouragements de nos enseignants !

Discuter avec les camarades

Rejoignez notre super communauté Discord où vous pouvez échanger, poser des questions et apprendre les uns des autres.

Pratiquez avec des exercices

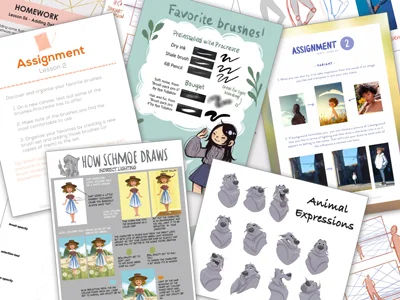
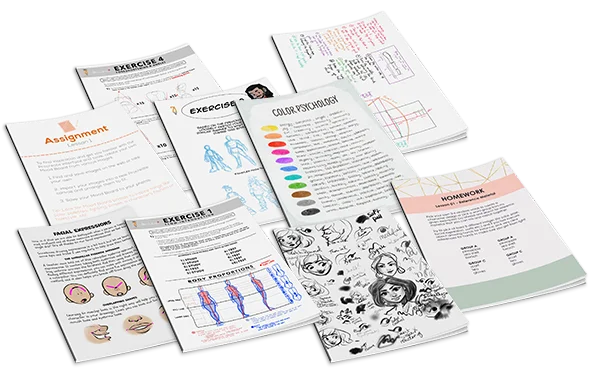
La plupart des leçons proposent des exercices et des exemples pour vous aider à pratiquer.

Événements live

Apprenez en direct avec vos artistes préférés.

Travaux d'élèves récents

Toutes les illustrations que vous voyez ici ont été réalisées par nos étudiants. Et vous pouvez y arriver aussi !
1/24
Catie Ilic
Alisa
Jay Thatcher
Nida Özer
@saramakdessi
Cornelia Paulsson
Laura Davies
Prapti Bhetawal
Oksana Shvedenko
Louise Broesky
Viktoriya Storozhuk
Berna Pekustun
Simone
Nesreen Alturkistani
Gautham R
Marjolijn De
Jason K.
Gabriella Antonicelli
Sophie Mattocks
Perrine I
Melissa
Marjolijn De
Kristina Veraldi
Frank Griffen

Découvrez comment nos enseignants aident les étudiants...

Question d'élève
Q8
Quinn 88

I recently completed the course and I'm really happy with it. Helped me improve on my time and Layer management easily. would love to get some feedback to see in what parts I could improve o... Afficher plusn.

Quek Jae Sern (Jae)
Assistant d'enseignement certifié 21 Draw

Hello Quinn,

Congratulations on finishing the course! I’m happy that it helped you out.

Your submission is absolutely stunning! I can see that you’ve put a lot of work into it and we can appreciate all the intricate details you’ve included in the design of your character.

Overall, I think you’ve executed on all the teachings of the course well and you’re definitely ready for a more advanced course. With that said, here is some more advanced feedback that would be outside the scope of this course:

Perspective of Leaves

  • It’s subtle, but I noticed that the leaf surfaces are mostly angled towards the viewer giving a very flat look. I’d encourage you to imagine the leaves being stuck on a surface of a sphere and draw them radiating outward from the center (the shoulder joint). You can check the attached image to see what I mean.

Neck & Collarbone

  • I saw that you included a V-shaped line to denote your character’s collarbone. I realize that this is a stylized piece and that there is an urge to keep things simplified. However, I think your implementation makes it look like there is an additional layer of clothing. Look up references to see how to best simplify the neck/collarbone area.

With that said, I think you did an amazing job. I hope this was helpful and all the best with your future illustrations!

Question d'élève
MB
Morgan B

Thanks for the course, I learned a lot! Attached is my mood board and the final piece. For this course I decided to draw a dark elf character I’ve been coming up with. I had a lot of fun m... Afficher plusaking this but would appreciate any feedback on how to make it better :)

Quek Jae Sern (Jae)
Assistant d'enseignement certifié 21 Draw

Hi Morgan!

Thanks for your submission and sorry for the delayed response. I’m happy to hear that you got a lot out of the course. First of all, I think you utilized the references and the moodboard wonderfully. Your final designs of your character as well as the environment are cohesive as a result. The colors you used also go a long way in conveying the mysterious and magical feeling of your illustration.

With that said, let me point out some areas with room for improvement.

Symmetry

  • I noticed that some of the facial features and the torso of your character aren’t symmetrical. I recommend the use of guidelines during your drawing phase to help you put elements in the right place and have them be properly aligned.

  • While you’re drawing, you should also flip your canvas horizontally from time to time as it helps you spot errors more easily. Once you’ve identified something that’s asymmetrical or warped in an undesirable way, you can redraw that section or use the liquify tool to correct it.

Armor

  • The design of the armor looks great. I like its curved edges and the ornate etchings. Where I think there is room to improve is in the rendering of the material – in this case, metal. Metal can be tricky to paint. It is a reflective material, so make sure you keep it high contrast. Highlights should be bright and shadows should be dark.

  • In addition to that, try to avoid soft edges as they can make the armor appear “mushy”. Use hard and distinct edges especially where there is overlap between two or more layers of metal.

Overall, I think you did an excellent job. I forgot to point out that you also did great for the background. I hope this feedback helps and good luck for your future illustrations!

Question d'élève
YM
Yazmary Melendez

I'm very new to procreate, and I like drawing cute frogs. It was fun to learn so many features in procreate, I look forward to drawing more things in procreate and incorporate more of the th... Afficher plusings included in the course. I can definitely see an improvement in how I color and the layering really helped.

Quek Jae Sern (Jae)
Assistant d'enseignement certifié 21 Draw

Hello Yazmary,

I’m glad that you’re learning a lot from the course about using Procreate. Procreate has such powerful tools that many of us can benefit from if only we knew how to use them!

And what a lovely illustration this is. It’s giving such cozy vibes and I also really like the complementary color palette you used for this.

Best of luck with your future drawings and keep drawing!

Question d'élève
GA
Gabriella Antonicelli

Fantastic course! I tried to follow Simone's directions in my illustration, from blocking in to choosing brushes to handling shadows and lighting. I would be enormously pleased if I could ge... Afficher plust some feedback so that I can improve my next illustrations. Thank you very much Gabriella

Jade Lefevre
Assistant d'enseignement certifié 21 Draw

Hi Gabriella!

Apologies for the delay in getting back to you!

We're delighted to know you enjoyed the course and found it useful! You did an amazing job on this illustration. I'm a huge fan of the style and your composition skills are impeccable!

Following, you can find a couple of suggestions you can look into for your next illustration, as well as an example attached to this message:

  • You can decide to have a more contrasted, darker shading in some areas of the drawing in order to help the viewer make out some of the shapes better. For example, under the yellow excavator.
  • By deciding the location of the light source, you can make sure to have a consistent direction for your shadows. In my example, I have it set in the middle.
  • The same way, some edges could use an even brighter highlight in order to help the shapes really stand out from the background.

You can find more explanations in the attached pictures. Don't hesitate to ask if you have any question!

Keep up the good work and have a great day!

Question d'élève
AC
Andrew Carlyon

I’m following along on this course, but I feel like I’m “stuck” and I’m not sure what to do to improve. I feel like my painting is very flat and I’m struggling with colors. Also,... Afficher plus it seems very “blocky’, and I’m struggling to get a fluid, painterly look. Can anyone provide me some guidance? Unfinished painting attached>

Jade Lefevre
Assistant d'enseignement certifié 21 Draw

Hi Andrew!

Thank you very much for sharing your painting with us! The proportions of your portraits are on point and I can tell you've applied all of the teacher's advice very well! Here are a few suggestions to help you with your problem:

  • You can start by having these little dark areas (such as the inside of the mouth, the corners of it, the eyes and eyelids and the nostrils) be darker and stand out more, with a thicker brush.
  • You can also add some more bright and saturated colors to your color blocks. In this case, shades of orange and red! It helps bring life to your undertones!
  • Don't hesitate to either lay your color blocks with a more blurry brush, or to blend them slightly afterwards. One shouldn't make the mistake to over-blend, but a little does help a lot in making the whole thing come together. It's the variation of textures between blended and non-blended which makes the surface interesting to look at.

You can refer to the attached images for reference! Have a great day and don't hesitate to ask if you have any questions!

Question d'élève
A
Alisa

Hello, I finished the Aveline’s course and would like to get some feedback how I can improve my illustrations.. I am not completely satisfied with my work so hope your feedback can help.. ... Afficher plusThank you.

Rhea Tibbey
Assistant d'enseignement certifié 21 Draw

Hey Alisa! I love your work, you have done an amazing job of following along with Aveline's assignments :)

To keep your feedback simple, I have chosen to refer to your night-time lighting scenario. Check out the tips and images I have attached below, I hope they help :)

  • When you are illustrating an environment a good practice for adding depth is to ensure your foreground uses more saturated colors than your background. Currently they are at a similar level of saturation, this is something you can adjust using your ‘Hue, Saturation and Brightness’ tool.
  • Around the edge of your highlights and shadows you may have a soft line that is a more saturated color.
  • Folds on clothing usually follow a triangular draping pattern down from where they hang from the body. In this case her sweatshirt would mostly be draping from her shoulders. When in doubt with drawing folds in an outfit, a reference picture can make things much easier!
  • If you have warmer tones in your foreground, make the color pop even more by using an ‘Overlay Layer’ to add cooler colors to the background.

I have attached some images with tips and edits to help guide you through this process. Let me know if you have any questions :)

Question d'élève
BP
Berna Pekustun

Do much focus on the eyes and not enough focus a the rest of the art. Still the face is not quite right ( used a reference feature) but really learned a lot from class.

Quek Jae Sern (Jae)
Assistant d'enseignement certifié 21 Draw

Hello Berna,

Thanks for submitting this wonderful painting. I think the loose painting style works great and the extra detail around the face compared to the rest of the body does a good job at focusing the viewer’s attention.

I do notice that the dog’s face seems a little off. Sometimes it can be hard to tell which part of the painting needs to be worked on. Two tools I can suggest for checking your painting/drawing are:

  • Guidelines down the center of the face

You can place a guideline on a separate layer to make sure the facial features you draw are symmetrical.

  • Flipping canvas horizontally

Procreate allows you to flip the canvas horizontally. By occasionally flipping the canvas, it allows you to “reset” your perception of your painting, and it will be easier to spot your errors while painting or drawing. Try it out on this one and it should be easy to see where and what needs fixing!

I know that for painterly styles like this, it can be hard to make changes without essentially re-painting a section again. Procreate has a built-in Liquify tool that is perfect for situations like this. You can use the liquify brush to push or nudge your painting around until it is correct.

I hope this helps and I’m glad that you learned a lot from this class. Good luck with your future art pieces!

Question d'élève
Nida Özer

Hello Aveline, I congratulate you on your art and I follow your art with enthusiasm. I would also like to thank you for meeting us on such a occasion. I am adding my works and waiting for yo... Afficher plusur comment :)

JP
Jessica Paton
Assistant d'enseignement certifié 21 Draw

Hi Nida!

Wow, you did such a great job of applying the techniques from this course! I love that you've put your own characters into the scenes as well! I only have a few small notes for you.

For the Night Scene:

  • Increase the glow in the night scene! Use a soft brush to lighten that part of the scene (I used a light yellow with a soft-light layer setting)

  • Add more highlights/rim lighting on the night scene as well. Make sure you have lots of contrast and really make the most of the fun lighting!

For the Day Scene:

  • Because you have made most of the background quite light, try and keep that somewhat consistent. Keep the background light, and the foreground more dark. Keeping this contrast makes it easier to see the characters as seperate from the background and makes it easier to read.

*Add a few extra shadows to reflect the size of the skirt/around the skirt to imply more 3D form

You've done such a fantastic job with these, and they're honestly great the way they are! Well done!

Question d'élève
Lana Grushnik

I absolutely loved this course! Very inspiring and simple :) Turned out that I'm really good at drawing dogs. Cats are harder to draw for some reason:)

JP
Jessica Paton
Assistant d'enseignement certifié 21 Draw

Hi Lana!

This is such a cute drawing! It's very lively and there is a great personality coming from them!

When drawing cats focus very much on the flow - lots of round fluid movements. The line of action will be very important for their poses.

For this particular drawing I just have a couple suggestions!

  • Push the snout slightly further forward. This will help make the head feel a little more round and improve the sense of dimension. Think of the base of the head not as a circle, but as a sphere!

  • When drawing complicated shapes like limbs, especially when they're folded up, think about how each segment is a basic shape. Using the right amount of lines, you can force a sense of perspective by overlaying some with others. In this case, you can add a couple extra lines to make the back leg seem more like it is bent away from the "camera".

  • Use the tail to emphasize the sense of movement! Follow the line of action you already have moving through the pose! Treat it as an extention of this. But also try to consider where the dog was in space before - the tail can have a very lovely flow to it if it is shaped as though it is coming from where the dog was just a moment ago. You were very close to this I think, but lowering it slightly makes it feel less like the dog has dropped down very suddenly.

It's great to hear that you loved the course! I hope you continue to draw more fun animals in the future!

Question d'élève
DK
DIM K

Hi recently I finished this drawing and I would like to get some feedback to improve my illustration.

Jade Lefevre
Assistant d'enseignement certifié 21 Draw

Hi!

Thank you for sending in your painting! This is incredible work. The subject is beautiful and your use of color is mind-blowing!

You could maybe try to have the hair on the chin flow in more various and natural directions. Even with the head clearly in motion within the scene and the hair following in the same direction, I think there could be a little more variation.

You can check out the attachments for a more visual explanation!  I hope you’ll find them helpful!  Don’t hesitate to ask if you have any more questions and I wish you a beautiful day!

Question d'élève
MD
Marjolijn De

I really enjoyed creating the thumbnails and the final piece. I love to keep my rough sketch slightly visible and I like to add some more texture to my designs. But I loved the gloaming brus... Afficher plush and I’m going to use it more often:) Thank you very much for this fantastic class!

Jade Lefevre
Assistant d'enseignement certifié 21 Draw

Hi Marjolijn!

I'm glad to hear you enjoyed the course! I'm a huge fan of the way you used the brushes and the colors! Your characters have a lot of personality and I think your final drawing looks really professional.

Keep up the great work and have a fantastic day!

Question d'élève
SM
Sara Makdessi

Hi Aveline, thank you so much for this fun and super informative course. I really enjoyed your lessons! Here are my interpretations of the four light scenarios with my characters. Any feedb... Afficher plusack would be very appreciated. Many thanks, Sara

Rhea Tibbey
Assistant d'enseignement certifié 21 Draw

Hey Makdessi! These illustrations look amazing! You have done a great job of using the lighting and shading techniques from this course :)

Here are a few feedback suggestions that you could try in future illustrations/ to improve these:

  • In areas of your character that are highlighted, change the colour of your line-art to a colour brighter than the highlighted area.
  • Additionally, it can look nice if you set your line-art to a darkened version of an ambient colour in your image rather than black.
  • Add soft shadows to objects that aren't in direct light.
  • For your night-time scene, you could decrease the saturation of the background and perhaps add even more blur to make your character stand out even more.

Try these out and see what you think! Wishing you a creative week, Rhea

Question d'élève
LB
Louise Broesky

I have never used Procreate before so I did the first lessons on paper working my way through the other ones I’m not used to drawing with circles and lines of actions. I pick a body part ... Afficher plusand then I draw from there that’s what I’m used to so I didn’t use the circles the way I was supposed to

JP
Jessica Paton
Assistant d'enseignement certifié 21 Draw

Hi Louise!

This is such a great drawing so far!

I do recommend trying to start a drawing with the basic shapes before you get too far into detail to make sure that the drawing has a solid foundation.

  • Break things into spheres and cylinders. Spheres for the head and joints, and cylinders for the limbs and snout. Using these as a guide and it will help add dimension

  • Another thing that will add dimension is layering one shape of the other. Having a shape hidden behind another will instantly add a sense of 3D.

  • Think about their skeleton! Look at where their bones bend. This is the natural basic building of an animal. You don't have to draw every bone, but you can break it into areas - The ribcage as one oval, the pelvis as another. The forearm bone as a cylinder, the joints as spheres. It helps a lot to understand how a creature can move and bend, and how they can't.

You're well on the right track and each drawing you have done is very expressive and has lovely poses, good job!

Question d'élève
Polina Lutseva

Hello!! I love the course and tried to do all types of lighting by myself, it would be really great to hear feedback, comments and critics about my work. Thank you very much in advance!! Pa... Afficher plusuline

Rhea Tibbey
Assistant d'enseignement certifié 21 Draw

Hello Polina! I love your drawings, they are so gorgeous! Thanks for sharing them :)

Check out my feedback below and notes I have added to your drawing! I hope you find them helpful :)

  • Don’t be afraid to use ‘Overlay’ blending layers with vivid colors to help establish the time of day, especially for the sunset and daytime photos.
  • In the indoor scene: the walls and the character should be in soft shadow due to the backlighting from the window.
  • Your character has a few spots on their face that might have highlights including their: eyes, nose, lips and cheekbones.
  • Your overcast lighting scenario could be de-saturated to convey the gray-diffused light source. This is something you can adjust using the ‘Hue, Saturation and Brightness’ tool.
  • Even on an overcast day you will still have some soft shadows where clothes fold or different objects meet each other.
  • You can try and make the direction of your light source more clear by adding color variation to your sky using an overlay or multiply layer.
  • When in doubt, practice by studying photographs! This can be a great way to learn about illustrating hard shadows.

I have attached some images with tips and edits to help guide you through this process. Let me know if you have any questions :)

Prêt à passer de zéro à héros ? 💥

Souscription à SEULEMENT USD $59/an !
Dépêchez-vous, offre limitée !

Vous ne savez pas par où commencer ? Consultez notre ordre de cours suggéré.

Classe 1
Procreate pour débutants
Voir plus
Débutant
Classe 2
Procreate en toute simplicité
Voir plus
Débutant
Classe 3
La théorie des couleurs
Voir plus
Débutant
Classe 4
Dessiner un personnage de dessin animé
Voir plus
Débutant
Classe 5
Colorisation numérique
Voir plus
Débutant
Classe 6
Dessiner des animaux
Voir plus
Intermédiaire
Classe 7
Dessiner un personnage féminin
Voir plus
Débutant
Classe 8
Lumière et ombrage
Voir plus
Intermédiaire
Classe 9
Lumière et ombrage
Voir plus
Intermédiaire
Classe 10
Illustration numérique
Voir plus
Intermédiaire
Classe 11
Peindre des portraits
Voir plus
Intermédiaire

Découvrez l’avis de nos étudiants sur les cours...

"Idéal pour les débutants !"
"Facile à suivre !"
"Super marrant !"

Découvrez pourquoi nos cours font l'unanimité...

4.8
(d’après les avis de 8,303 clients)
V0
Vivee 0.
il y a 4 semaines
Achat vérifié
Je suis très reconnaissant pour ce cours ; personne ne pouvait mieux me montrer ce que je voulais apprendre que vous. Cependant, l'utilisation des calques, des masques, etc., me semble encore un peu compliquée. J'ai du mal à comprendre quoi u
+ Afficher plus
tiliser, quand, comment et pourquoi. De plus, j'ai remarqué par hasard que pour l'un des calques, vous aviez indiqué le régler sur Lumière dure, mais vous l'avez finalement réglé sur Lumière forte. :/ Quoi qu'il en soit, j'ai hâte de poursuivre les autres leçons ; vous avez déjà montré tellement de conseils utiles, et je vous en suis particulièrement reconnaissant ! :)
Commentaire du cours "Maîtriser l'éclairage et l'ombrage
LH
Luc H.
il y a 3 semaines
Achat vérifié
C'est sans conteste le meilleur cours en ligne que j'aie jamais suivi. Rodgon est un génie qui a élaboré une méthode impeccable pour la conception de personnages. Ce cours a répondu à de nombreuses questions que je me posais sur la façon de d
+ Afficher plus
essiner des personnages sous différents angles et d'évaluer les proportions. Je suis designer et illustrateur professionnel, mais ce cours m'a permis de découvrir des techniques que j'avais un peu explorées ces dernières décennies, me permettant de tout évaluer à l'œil nu sans avoir de référentiel fiable. Rodgon est également un tuteur attentionné. Ce cours commence dès le début pour ceux qui n'ont pas les bases du dessin, mais il progresse progressivement jusqu'au niveau expert à la fin. Je reviendrai certainement sur certains des modules précédents pour pouvoir reproduire fidèlement le contenu tel que je l'ai dans mon carnet de croquis ! C'est un cours formidable, que je recommande vivement à tous ceux qui souhaitent apprendre à dessiner des personnages humains. Je vais certainement intégrer beaucoup de ces techniques dans mon travail à partir de maintenant.
Commentaire du cours "Apprendre l'anatomie en 21 jours
LC
Lorena C.
il y a 3 semaines
Achat vérifié
J'ai trouvé ce cours vraiment utile. En tant que débutant absolu, j'ai beaucoup appris sur le dessin du corps humain et sur les différentes parties et muscles à prendre en compte pour dessiner un personnage avec une pose et des proportions co
+ Afficher plus
hérentes, en accord avec le récit que je souhaite créer. Rodgon fournit de nombreuses informations et partage des connaissances importantes sur l'anatomie humaine. Je suis vraiment satisfait de ce que j'ai appris et du temps que j'ai consacré à suivre et à mettre en pratique les leçons !
Commentaire du cours "Apprendre l'anatomie en 21 jours
SM
Stefan M.
il y a 3 semaines
Achat vérifié
C'est toujours un plaisir d'apprendre avec le véritable et unique RODGON ! Merci beaucoup de rendre les choses complexes faciles à assimiler ! Je recommande ce cours à tous ceux qui souhaitent créer des personnages à partir de leur imaginatio
+ Afficher plus
n en apprenant l'essentiel : les bases ! Merci encore pour ce cours !
Commentaire du cours "Apprendre l'anatomie en 21 jours
AT
Allison T.
il y a une semaine
Achat vérifié
Ce cours était fantastique ! Lauren explique les choses très clairement et rend tout parfaitement réalisable, même pour les débutants. Son enseignement est amusant, convivial et très encourageant. Si vous avez toujours rêvé de dessiner vos amis à qua
+ Afficher plus
tre pattes, je vous recommande vivement ce cours.
Commentaire du cours "Dessiner des Animaux de Compagnie de A à Z
RK
Rama K.
il y a 6 jours
Achat vérifié
J'apprécie toujours les tutoriels expliquant le processus étape par étape. Ceci est mon deuxième cours sur 21Draw. Le premier s'intitule « Maîtriser l'éclairage et l'ombrage » d'Aveline Stokart. Après l'avoir suivi, j'ai t
+ Afficher plus
rouvé celui-ci qui convient parfaitement à mes projets. Le processus expliqué ici aide les apprenants comme moi à démystifier une œuvre d'art ou une illustration professionnelle et à obtenir le résultat souhaité de manière claire et prévisible. Merci à Kenneth Anderson pour ses explications patientes et détaillées !
Commentaire du cours "Illustrations axées sur les personnages
LC
Lidia C.
Il y a 2 mois
Achat vérifié
Je pense que ce cours complète celui d'Erika (je sais qu'elle a 2 cours sur Photoshop, je souhaite aussi sur Procreate) Je conseille vivement de suivre ce cours après avoir suivi celui d'Erika, Isabelle survole beaucoup de choses qui sont
+ Afficher plus
expliquées en détail dans l'autre cours et fait quelques choses différemment, ce qui est génial, car j'ai maintenant différentes façons d'accéder à certaines fonctionnalités. J'ai surtout aimé créer mes propres pinceaux et j'ai beaucoup apprécié la leçon "trucs, astuces et erreurs courantes"... COUPABLE comme accusé. Vous pourriez appeler ce cours "Débutants Partie 2". J'aime de plus en plus cet abonnement chaque jour <3
Commentaire du cours "Procreate en toute simplicité
GM
Gladys M.
Il y a 2 mois
Achat vérifié
J'ai eu le plaisir d'apprendre avec Aveline et je ne peux que la recommander ! Ses compétences en matière d'enseignement de la lumière et de l'ombre dans les graphiques numériques sont extrêmement remarquables. Aveline prend le temps
+ Afficher plus
d'expliquer comment la lumière et l'ombre peuvent provoquer des émotions, ajoutant un niveau de compréhension plus profond au processus créatif, plutôt que de se concentrer uniquement sur la technique. Ce qui m'a particulièrement frappé, c'est la façon dont elle a lié les couleurs à l'expression émotionnelle, ce qui m'a permis de comprendre le potentiel de mon travail sous un tout autre jour. Les conseils que j'ai reçus sur la façon de mieux exprimer les émotions grâce au choix des couleurs et aux nuances ont été vraiment bénéfiques. Ma conférence était très divertissante en plus d'être très instructive. Je me sens tellement plus confiante dans mes compétences maintenant, et j'ai hâte de continuer à pratiquer et à me développer grâce à ses conseils. Aveline, merci !
Commentaire du cours "Maîtriser l'éclairage et l'ombrage
LG
Laura G.
Il y a 3 mois
Achat vérifié
En gardant à l'esprit que j'ai adoré tout ce qui concerne ce cours, l'une de mes choses préférées a été de voir Rodgon s'amuser autant lorsqu'une pose, une expression ou un personnage prenait vie. Cela m'a aidé à me rappeler p
+ Afficher plus
ourquoi j'investis autant pour m'améliorer, car le dessin est mon lieu de bonheur et m'améliorer et en apprendre davantage me rend plus heureux. Ensuite, bien sûr, il y a le fait que toutes les explications étaient très faciles à suivre, les exemples étaient parfaitement pertinents et les trucs et astuces étaient parfaits et très faciles à retenir. Comme je l'ai dit au début de cette critique, j'ai adoré tout ce qui concerne ce cours. Merci !
Commentaire du cours "Comment donner vie à vos personnages
OP
Ondřej P.
Il y a 2 mois
Achat vérifié
Je m'attendais à un peu plus d'informations pour chaque leçon, mais j'ai quand même remarqué quelque chose. Pour les animaux que je dessine dans l'espace, la perspective devrait probablement être un peu abordée à ce stade. Car c'e
+ Afficher plus
st probablement la chose la plus difficile qui sera nécessaire pour établir les contours de base de l'animal dans l'espace.
Commentaire du cours "Dessiner des Animaux de Compagnie de A à Z
RT
Rômulo T.
Il y a 2 mois
Achat vérifié
Oh mon Dieu, c'est 1 heure d'OR pur ! J'ai l'impression que le professeur révèle quelques secrets dans ce cours, mdr, parce que je viens d'apprendre BEAUCOUP de techniques et d'astuces incroyables dont je me suis toujours dema
+ Afficher plus
ndé "mais comment font-ils ça ?" en regardant le travail de plusieurs artistes incroyables. J'aime aussi Procreate, même si mon logiciel de prédilection est CSP, je pourrais apprendre un tas d'astuces utiles sur Procreate. et je crois que je peux facilement réaliser toutes les techniques dans CSP également. De plus, le professeur explique très bien et l'art est si beau. J'ai vraiment aimé ce cours.
Commentaire du cours "Dessiner un personnage de dessin animé
TS
Taylor S.
Il y a 2 mois
Achat vérifié
Ce cours est définitivement destiné aux personnes déjà familiarisées avec les outils et techniques de Procreate. J'ai beaucoup appris, mais j'ai dû mettre en pause les vidéos « Let's Paint » en permanence pour comprendre les étapes qu&#39
+ Afficher plus
;elle suivait - des instructions claires et basiques (comme les pinceaux à utiliser) m'auraient aidé. Cela dit, les connaissances d'Aveline sur la lumière sont incroyables et le cours a été très utile pour développer une meilleure compréhension ! Je me référerai souvent aux ressources et aux exemples.
Commentaire du cours "Maîtriser l'éclairage et l'ombrage
LW
Lana W.
Il y a 3 mois
Achat vérifié
INCROYABLE!!!! Je me suis tellement amusée et j'ai ressenti de la joie et j'ai adoré chaque leçon. Mark est un professeur et un être humain merveilleux, si créatif et vous fait croire que vous pouvez le faire aussi, avec quelques blocs d'
+ Afficher plus
art, j'ai dû illustrer mon propre livre pour enfants, cela a été un défi et ce cours a débloqué ma peur, mes inquiétudes et m'a inspiré à créer à nouveau, merci, je suis tellement reconnaissante et j'en referais un autre Mark !!
Commentaire du cours "Apprendre à dessiner en 21 jours (Saison 1)
LC
Lidia C.
il y a un mois
Achat vérifié
Je n'avais jamais pensé à utiliser le squelette pour m'aider avec l'anatomie et les trucs et astuces sont excellents... Je conseillerais de m'attaquer à la leçon 8 après avoir fait l'un des cours pour débutants (Erika), cela rend
+ Afficher plus
les choses beaucoup plus claires lorsque l'on parle du verrouillage alpha et du flou gaussien et des autres étapes liées à Procreate. Super cours, je vais l'essayer sur mes chats :)
Commentaire du cours "Dessiner des Animaux de Compagnie de A à Z
NL
Nancy L.
il y a un mois
Achat vérifié
C'est le cours de Tony qui m'a donné envie de m'abonner à 21 Draw. Je souhaite améliorer la façon dont je dessine mes personnages, leur donner plus de vie et les rendre plus intéressants. Tony transmet vraiment bien les bases pour dessine
+ Afficher plus
r des poses plus intéressantes. Je ne suis pas débutant mais je dirais que son cours conviendrait aussi bien aux débutants qu'aux intermédiaires.
Commentaire du cours "Dessiner des poses qui ont de la personnalité
AS
Ani S.
Il y a 3 mois
Achat vérifié
Idéal pour les débutants en illustration numérique (Procreate), ce cours vous guidera, vous expliquera les bases, vous montrera comment utiliser les outils de Procreate et vous aidera à créer votre première œuvre d'art numérique. Je dessine dans
+ Afficher plus
Procreate depuis longtemps, mais même pour moi, ce cours était intéressant et utile. C'est un excellent moyen de rafraîchir les bases et d'apprendre de nouvelles astuces pour améliorer vos compétences
Commentaire du cours "Procreate en toute simplicité

Aucun autre pack n'offre un tel niveau de qualité...

Les 11 cours en ligne, d’une valeur totale de 595 $, sont à vous pour une fraction de ce prix !

Imaginez : ce passe-temps que vous adorez pourrait devenir votre clé vers la liberté financière.

Et le plus beau ? Cela ne coûte pas plus cher qu’un nouveau jean 👖, 20 lattes ☕ ou un dîner en amoureux 💑
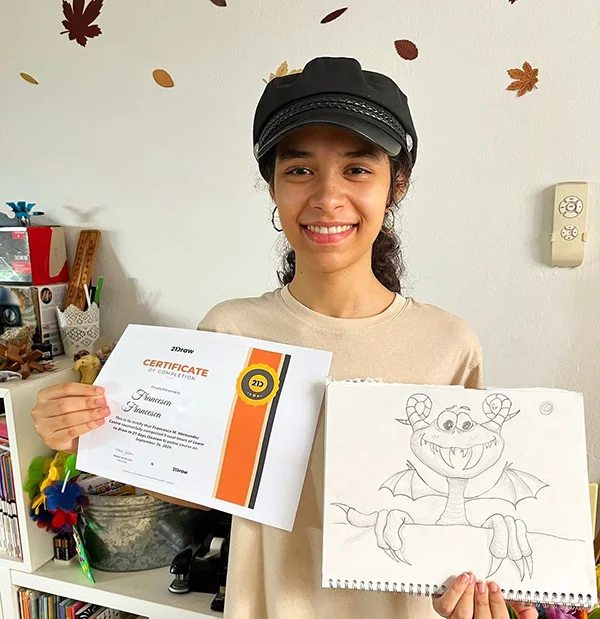
Certificats pour fêter vos réussites

À la fin de chaque cours, vous recevrez un certificat de réussite. Partagez-le dans votre portfolio, sur les réseaux sociaux, ou où vous voulez.

Comment Nous Comparons

Cours Premium
Système simple, étape par étape
Artistes et enseignants certifiés
Programme structuré
Vidéos sans pubs
ZÉRO blabla
Obtenir des réponses à vos questions
Envoyer vos dessins pour un feedback
Ressources du cours
Certificat de fin de cours
Profitez de l'offre maintenant ! Temps limité !
Garantie de remboursement de 30 jours !

Ce pack est pour...

Vous avez acheté un iPad et Procreate et vous voulez commencer

Vous cherchez un pack pour résoudre tous vos problèmes sur Procreate ?

Débutants souhaitant améliorer leurs compétences en design de personnages

Débutants qui veulent apprendre à dessiner des figures, des poses et des gestes dans Procreate

Vous cherchez des astuces, conseils et techniques pour Procreate que vous n'avez encore jamais vues ?

Difficile de se mettre à jour en art numérique après des années de dessin traditionnel

Envie de faire passer vos compétences sur Procreate au niveau supérieur, même si vous êtes déjà illustrateur accompli ?

Vous utilisez Procreate depuis un moment, mais voulez une nouvelle approche

Pour ceux qui souhaitent professionnaliser leurs compétences en art digital et gagner de l'argent avec leur art

Artistes intéressés par le design de personnages et l'illustration numérique

Artistes qui souhaitent approfondir leur compréhension des fonctionnalités et des capacités de Procreate, afin d'optimiser leur flux de travail et d'élever leur art.

Pour ceux qui souhaitent en savoir plus sur les fonctionnalités spécifiques de Procreate, comme la gestion des calques, les modes de fusion et l’utilisation des pinceaux

Questions fréquemment posées

Qu'est-ce qui est inclus dans l'abonnement ?

Membership includes unlimited access to all 50+ courses taught by the world’s best artists PLUS new courses as they are released.

Each class includes 10-20 video lessons that are 7 minutes long on average. Most classes include exercise sheets, assignments, and layered PSD or PNG files.

Some classes include the ability to chat with the instructor in a public forum, e.g. if you want feedback on your artwork.

Ce sont des cours en ligne ou en live ?

All classes are pre-recorded and you can watch them online with any digital device, anytime, and for an unlimited number of times! This means you can easily watch (and rewatch) them at your own pace and convenience.

We also have bonus live sessions that are free of charge for all our students.

Quel est le niveau requis pour les cours ?

The classes are approachable for beginners and has advanced techniques for those with more experience.

If you have no art experience whatsover or struggle to draw a basic character, we recommend starting off by taking our 'Learn to draw in 21 days' classes.

Les cours sont-ils disponibles dans d'autres langues que l'anglais ?

All classes are available in English (original narration) and most have dubbed narration in Spanish, French, Italian, German, & Portuguese.

Subtitles are available for all course in the following languages: English, Spanish, Japanese, French, German, Italian, Portuguese & Indonesian.

Y a-t-il une garantie ?

Absolument ! Tous nos abonnements bénéficient d'une garantie de satisfaction de 30 jours. Si vous n'êtes pas entièrement SATISFAIT et ENCHANTÉ, contactez-nous dans les 30 jours pour un remboursement complet, sans justification !
21 Draw tel que vu sur...

Qui est 21 Draw ?

Depuis 2013 en chiffres :
  • une forte communauté de 70 000 personnes
  • 40k de livres vendus
  • 10k backers sur Kickstarter
  • 632k$ financés sur KS

Nous avons lancé 21 Draw en Suède en 2013 dans le but d'aider tout le monde à devenir un meilleur artiste !

Nous nous appelons 21 Draw parce que lorsque nous avons commencé, nous avions seulement un budget pour engager 21 artistes. Cependant, un grand nombre d'artistes étaient tellement enthousiastes à l'idée de participer que nous n'avons pas pu résister à en ajouter davantage, et à créer encore plus de produits, allant des livres aux cours en ligne.

Notre objectif est de travailler aux côtés des meilleurs artistes du monde pour aider notre communauté et vous aider à atteindre vos objectifs artistiques. Nous voulons rendre l'enseignement artistique de qualité accessible à tous.

Fermer
Souscription à SEULEMENT USD $59/an ! Garantie 30 jours