Sale Ends Today! 75% off our annual membership. Get skills that fulfill.

 Bree Lee
If you’ve ever spent hours in the ideation phase of an illustration, take longer than desired on a single sketch, or end up with a piece that just doesn’t align with the message you were trying to tell, this read is for you!
Planning is a big part of the process. A solid plan that efficiently builds you up for success can save you loads of time. With Laia’s expert advice from her course, “Digital Illustration for Beginners”, let’s learn how to effectively start an illustration together!

Start with some doodles to help you conceptualize a handful of ideas. During this phase, don’t worry about drawing perfect lines and proportions. This is the time to explore different ways to tell the message you’re shooting for!
It’s a great way to flesh out a few ideas without the pressure of trying to create a perfect sketch. While you’re doodling, another thing you may want to consider is composition. We’ll talk about this in the next section!
Note: References are great for ideation and collecting inspiration. Make sure you’ve taken some time to collect some references before you begin sketching your thumbnails. Certainly one of the most underrated tools!

During the rough sketch phase, try out a few different compositions to see what best suits the message you’re trying to tell! Which characters do you want to highlight? Where do you want the eyes of your viewers to look at? How can you best capture the message of the story by placing the key elements in the right spots? These are the questions you want to think about as you create your compositions.
A great hack for designing a successful composition is the “Rule of Thirds.” The Rule of Thirds is made up of three horizontal and three vertical lines. Place the most important elements where these lines intersect!

Amongst your rough sketches, there might be a couple that stick out to you more than the others. Select the sketch that best encapsulates the story you’re trying to tell!
“This doesn’t mean the other two thumbnails are wrong; they would also make nice designs.” – @itslopez
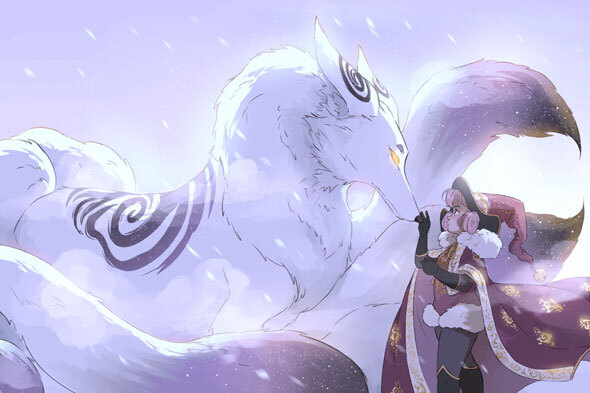
Each of Laia’s sketches contained the same subjects, but the focus of each image was slightly different. Since her goal was to highlight her two subjects, she chose the design that put the attention on them. The other thumbnails were just as beautiful and cohesive, but either the environment or the animal took precedence in these other versions.
Before making your clean line art, let’s draw one more sketch! In this sketch, don’t just focus on cleaning up the sketch you have. Take it a step further by adding facial expressions, details to the clothing, and refining the poses of your characters! Now you have a strong base to build your final line art on. Wonderful!
You’ve taken the time to explore your ideas, come up with a multitude of different compositions, and have clean line art to take into the next step. Now what? It’s time to start the coloring phase! If you’d like to learn about digital coloring next, let us know by responding to this email!
If you’d like more FREE tips on basic illustration concepts, you must check out the FREE lessons in Laia’s course, “Digital Illustration for Beginners”! Till next time, folks!
Bree Lee
Bree is a digital artist based in California. She enjoys helping new artists grow and loves to create artwork of her own.


 Gift Cards